Many beginners find themselves scratching their heads when their TIG welder torch acts up. It’s a common hurdle that can stop your project dead in its tracks. But don’t worry!
Sorting out a TIG Welder Torch Issue? Quick Fix is often simpler than you think. We’ll walk you through easy steps to get you welding again in no time.
Ready to troubleshoot like a pro?
Key Takeaways
- You will learn common reasons why a TIG welder torch might not be working right.
- We will show you simple checks you can do yourself to fix torch problems.
- You will find out how to keep your TIG torch in good shape to avoid issues.
- The post will help you identify when a problem needs professional help.
- You will gain confidence in fixing basic TIG torch issues quickly.
Troubleshooting Your TIG Welder Torch: Simple Steps
It’s frustrating when your TIG welder torch doesn’t cooperate. You might be trying to make a clean weld, and suddenly, nothing happens, or it sputters. This can feel like a big problem, especially when you’re just starting out.
Many new welders get confused by what seems like a complicated piece of equipment. The good news is that most TIG welder torch problems have straightforward solutions.
Why Do TIG Welder Torches Act Up?
Several things can cause your TIG torch to misbehave. Think of it like a car engine; if one part isn’t right, the whole thing might not run. For a TIG torch, common culprits include gas flow issues, electrical contact problems, or a worn-out part.
Sometimes, it’s just something simple, like a loose connection.
Gas Flow Problems
TIG welding needs a steady stream of shielding gas, usually Argon. If the gas isn’t flowing properly, your weld won’t be protected from the air. This can lead to weak or porous welds.
A gas flow issue might mean your regulator is set wrong, the gas cylinder is almost empty, or there’s a leak somewhere between the cylinder and the torch. You might hear a hiss or notice the arc looks unstable.
Another cause for poor gas flow could be a clogged gas nozzle. Over time, tiny bits of metal or dirt can build up inside the nozzle, blocking the gas. This is like trying to drink through a straw that has a hole in it – not much gets through!
Electrical Contact Issues
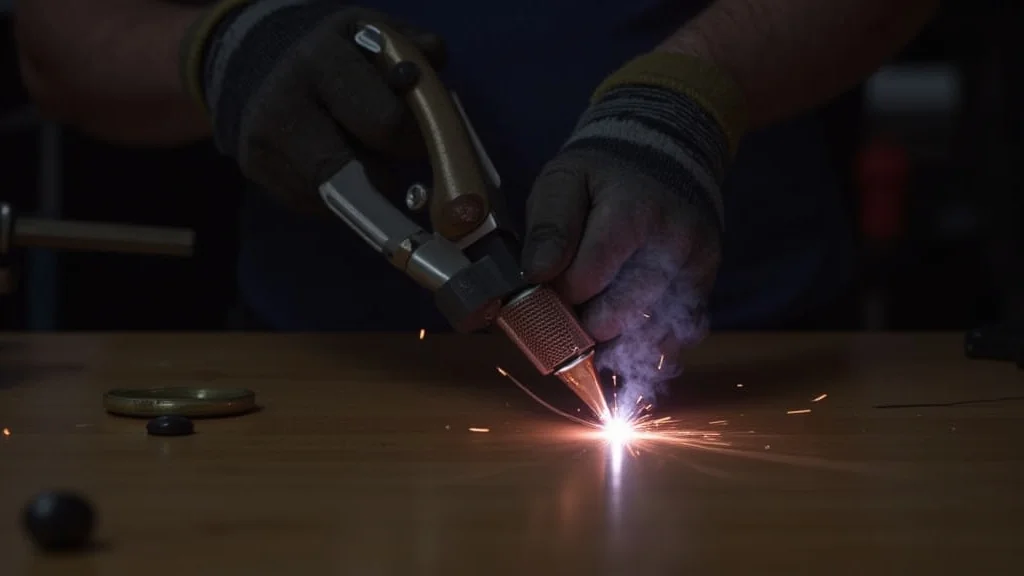
The arc starts when electricity jumps from the tungsten electrode to your workpiece. For this to happen smoothly, all the electrical connections need to be clean and tight. If the tungsten isn’t seated properly in the collet, or if the collet itself isn’t making good contact with the torch body, you might have trouble starting the arc.
You might see sparks jump erratically, or the arc might not start at all.
The power cable connection to the welder is also vital. If it’s loose or corroded, it can interrupt the electrical flow. This is a common reason for an inconsistent arc or no arc.
Worn or Damaged Parts
Like any tool, TIG torch parts can wear out or get damaged. The tungsten electrode, which is the pointy bit that creates the arc, can become blunt, chipped, or contaminated. A dull or dirty tungsten makes it much harder to start and maintain a stable arc.
The collet and collet body hold the tungsten in place and also carry the electrical current. If they are damaged or worn, they won’t make good contact.
The gas lens, which helps direct the shielding gas more effectively, can also get damaged. Small cracks or debris can affect how the gas flows around the arc, leading to weld defects. Even the torch consumables like the ceramic cup can chip or crack, affecting gas coverage.
Quick Fixes for Common TIG Torch Problems
Let’s look at how you can fix some of these issues yourself. Remember, always turn off and unplug your welder before you start working on the torch.
Checking Gas Flow
First, check your Argon gas cylinder. Is the valve open? Is there still gas left in the tank?
You can usually tell by the pressure gauge on the regulator. If the tank is full, check your regulator settings. For most TIG welding, a flow rate of 15-25 cubic feet per hour (CFH) is common, but it can vary based on what you’re welding.
Look up the recommended settings for your specific application.
Next, inspect the gas hose for any kinks or leaks. You can sometimes hear a faint hiss if there’s a leak. Also, make sure the connection between the hose and the regulator, and the hose and the welder, are tight.
If you suspect a clogged nozzle, you can try gently cleaning it with a soft brush or compressed air. If it’s really bad, you might need to replace the nozzle. It’s a cheap part and easy to swap out.
Ensuring Good Electrical Contact
When your tungsten electrode doesn’t seem to be making a good connection, the first thing to do is remove it. Check the collet and collet body. Are they clean?
Is there any damage? Often, simply cleaning them with a wire brush or a cloth can solve the problem. Make sure the tungsten is inserted straight and sits snugly in the collet.
Tighten the back cap of the torch. This presses the collet and tungsten into the collet body, ensuring a good electrical connection. Don’t overtighten it, but make sure it’s snug.
Check the power cable connection at the back of your welder. Ensure it’s clean and securely fastened. If you see any signs of corrosion or damage, clean the connection points or consider replacing the cable.
Replacing Worn or Damaged Parts
If your tungsten electrode is blunt or contaminated, it needs to be sharpened or replaced. For most steel and stainless steel welding, you’ll want a pointed tip. For aluminum, a slightly blunter, rounded tip is often better.
Always grind your tungsten in a dedicated grinder, not one you use for other metals, to prevent contamination.
If your ceramic cup is chipped or cracked, it’s time for a new one. A damaged cup can cause shielding gas to escape unevenly, leading to poor weld quality. Replacing a cup is usually as simple as unscrewing the old one and screwing on a new one.
Similarly, if your gas lens has any visible damage or seems to be affecting gas flow, replace it. The gas lens is a small but important part that helps create a stable, focused gas stream.
When to Seek Professional Help
While many TIG torch issues are easy to fix, some might require more attention. If you’ve tried all the simple fixes and your torch still isn’t working correctly, it might be time to consult your welder’s manual or contact the manufacturer. If you suspect a problem with the internal wiring of the torch or the welder itself, it’s best to let a qualified technician handle it.
Trying to repair complex internal components without the right knowledge could lead to further damage or safety hazards.
Frequently Asked Questions
Question: My TIG torch is not starting an arc. What should I check first?
Answer: Check if your tungsten electrode is properly seated and making good electrical contact. Also, ensure your shielding gas is turned on and flowing correctly. Make sure the power cable connection at the welder is secure.
Question: I’m getting a weak or sputtering arc. What could be wrong?
Answer: This could be due to insufficient shielding gas, a contaminated or blunt tungsten electrode, or a loose electrical connection. Try increasing the gas flow slightly, re-sharpening or replacing your tungsten, and checking all connections.
Question: My gas nozzle seems clogged. How can I clean it?
Answer: You can try using a soft brush or a can of compressed air to gently remove any debris from the inside of the gas nozzle. If it’s severely blocked, it’s often easier and more effective to replace the nozzle.
Question: How often should I replace TIG torch consumables?
Answer: Consumables like tungsten electrodes, collets, collet bodies, and ceramic cups should be replaced when they show signs of wear, damage, or contamination. Regular inspection will help you know when it’s time.
Question: Is it safe to try and fix a TIG torch myself?
Answer: Yes, for common issues like replacing consumables, cleaning parts, and checking connections, it is generally safe as long as you unplug the welder first. However, for internal torch or welder repairs, it’s best to seek professional help.
Final Thoughts
Tackling a TIG Welder Torch Issue? Quick Fix often involves simple checks. You learned how to look at gas flow, electrical contacts, and worn parts.
Simple steps like cleaning consumables, checking connections, and ensuring proper gas settings can solve many common problems. Don’t let a minor hiccup stop your welding. Most issues are easy to resolve, keeping you productive and improving your skills with every fix.