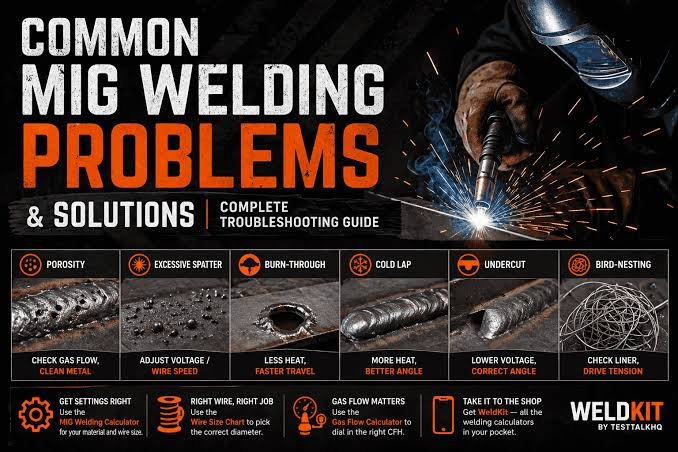
MIG welding is one of the most popular welding processes used by beginners, DAY enthusiasts, automotive repair shops, fabrication businesses, and professional welders. Its relatively simple setup, high welding speed, and ability to produce clean welds make it an excellent choice for many projects.
However, MIG welding is not always as easy as it looks.
Many welders experience problems such as excessive spatter, porosity, weak welds, burn-through, wire feeding issues, lack of penetration, and inconsistent weld beads. These problems can be frustrating, especially when you do not understand what is causing them.
The good news is that most MIG welding problems have identifiable causes and practical solutions.
This complete MIG welding troubleshooting guide explains the most common MIG welding problems, why they happen, and how to fix them. Whether you are learning how to MIG weld for the first time or trying to improve your welding quality, this guide will help you diagnose problems and create stronger, cleaner welds.
Table of Contents
- What Is MIG Welding?
- Why MIG Welding Problems Happen
- Excessive Spatter
- Porosity in MIG Welds
- Lack of Penetration
- Burn-Through
- Wire Feeding Problems
- Bird nesting
- Wire Stubbing
- Erratic Arc
- Uneven Weld Beads
- Undercut
- Overlap
- Cracking in MIG Welds
- Cold Welds
- Warping and Distortion
- Excessive Heat Input
- Poor Shielding Gas Coverage
- Contact Tip Problems
- MIG Wire Problems
- Welding Thin Metal Problems
- Welding Thick Metal Problems
- Common MIG Welding Troubleshooting Tips
- Frequently Asked Questions
- Final Thoughts
What Is MIG Welding?
MIG welding stands for Metal Inert Gas welding, although the process is technically known as Gas Metal Arc Welding (GNAW).
The process uses a continuously fed wire electrode that passes through a welding gun. When the wire contacts the work piece, an electric arc is created. The heat from the arc melts the wire and base metal, forming a weld.
A shielding gas protects the molten weld pool from oxygen, nitrogen, and other contaminants in the atmosphere.
The basic components of a MIG welding system include:
- MIG welding machine
- Welding gun
- Wire electrode
- Wire feeder
- Contact tip
- Nozzle
- Shielding gas
- Ground clamp
MIG welding is commonly used for:
- Automotive repairs
- Steel fabrication
- Home projects
- Manufacturing
- Construction
- Furniture fabrication
- Equipment repairs
Although MIG welding is relatively beginner-friendly, the quality of the weld depends heavily on proper machine settings, material preparation, wire feeding, and shielding gas coverage.
Why MIG Welding Problems Happen
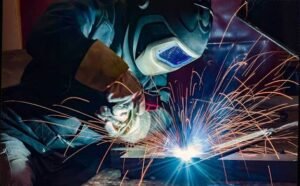
Most MIG welding problems are caused by a small number of factors.
These include:
- Incorrect voltage
- Incorrect wire feed speed
- Wrong travel speed
- Dirty metal
- Poor shielding gas coverage
- Incorrect gun angle
- Incorrect stick out
- Damaged consumables
- Wrong welding wire
- Improper grounding
Understanding these factors makes troubleshooting much easier.
Instead of randomly changing your welding machine settings, identify the symptoms first. Then examine the possible causes and make adjustments one step at a time.
1. Excessive Spatter
Excessive spatter is one of the most common MIG welding problems.
Spatter consists of small droplets of molten metal that fly away from the weld pool and stick to the surrounding surface.
A small amount of spatter is normal, but excessive spatter usually indicates a problem.
Possible Causes of Excessive Spatter
Common causes include:
- Incorrect voltage
- Incorrect wire feed speed
- Dirty base metal
- Excessive stick out
- Wrong shielding gas
- Poor gas flow
- Incorrect polarity
- Dirty contact tip
How to Fix Excessive Spatter
First, make sure your voltage and wire feed speed are properly balanced.
If the wire feed speed is too high for the selected voltage, the wire can enter the weld pool too quickly and create excessive spatter.
If the voltage is too high or too low, arc stability may also suffer.
Clean the metal before welding. Remove:
- Rust
- Paint
- Oil
- Grease
- Dirt
- Moisture
Also check your stick out.
For many MIG welding applications, keeping the contact tip approximately 3/8 to 1/2 inch from the work piece can help maintain a stable arc.
Check your shielding gas and make sure your gas flow is appropriate for your working conditions.
2. Porosity in MIG Welds
Porosity refers to small holes or gas pockets trapped inside the weld.
Porosity weakens the weld and can cause serious structural problems.
Causes of Porosity
The most common causes include:
- Dirty metal
- Moisture
- Oil or grease
- Poor shielding gas coverage
- Empty gas cylinder
- Gas leaks
- Wind blowing away shielding gas
- Contaminated welding wire
How to Fix Porosity
Clean the base metal thoroughly before welding.
Use a wire brush, grinder, or other appropriate cleaning method to remove contamination.
Inspect your shielding gas system.
Check:
- Gas cylinder level
- Gas regulator
- Hose connections
- Welding gun
- Nozzle
Listen and look for possible leaks.
If you are welding outdoors, wind can blow away the shielding gas. Use a windbreak or move the work into a protected area.
Also make sure the nozzle is clean. Spatter buildup inside the nozzle can interfere with proper gas coverage.
3. Lack of Penetration
Lack of penetration occurs when the weld does not properly fuse deep enough into the base metal.
The weld may look acceptable on the surface but be weak internally.
Causes of Lack of Penetration
Common causes include:
- Voltage too low
- Travel speed too fast
- Incorrect welding technique
- Improper joint preparation
- Thick material
- Dirty metal
- Incorrect wire size
How to Fix It
Increase voltage gradually if your welding machine settings are too low.
Slow down your travel speed slightly to allow more heat to enter the joint.
Make sure the joint is properly prepared.
For thicker metal, beveling the edges may help create better penetration.
You may also need multiple welding passes.
Do not assume that increasing wire feed speed alone will solve penetration problems. Voltage, travel speed, wire diameter, and joint design must work together.
4. Burn-Through
Burn-through occurs when excessive heat melts completely through the base metal.
This problem is especially common when welding thin sheet metal.
Causes of Burn-Through
- Voltage too high
- Wire feed speed too high
- Travel speed too slow
- Metal is extremely thin
- Large gap between materials
- Staying in one location too long
How to Fix Burn-Through
Reduce the welding heat.
You can do this by lowering voltage or adjusting wire feed speed according to your machine’s recommended settings.
Increase your travel speed slightly.
For very thin metal, use a series of short welds instead of one long continuous weld.
This technique allows the material to cool between welds.
Reducing the gap between pieces can also help prevent burn-through.
A backing material can sometimes help absorb heat and support the molten weld pool.
5. MIG Wire Feeding Problems
Wire feeding problems can cause inconsistent welds, poor arc performance, and frequent interruptions.
If the wire does not feed smoothly, the welding process becomes difficult.
Common Causes
- Wrong drive roll
- Incorrect drive roll tension
- Damaged liner
- Dirty liner
- Tangled wire spool
- Wrong wire size
- Worn contact tip
How to Fix Wire Feeding Problems
Check that the drive rolls match your wire diameter.
For example, using the wrong drive roll size can cause slipping or wire damage.
Adjust drive roll tension carefully.
Too little tension can cause slipping.
Too much tension can crush or deform the wire.
Inspect the gun liner. If it is dirty, worn, or damaged, replace it.
Also check the wire spool for tangles or crossed wire.
6. Bird nesting
Bird nesting occurs when the welding wire becomes tangled near the drive rolls.
The wire can form a tangled mass that resembles a bird’s nest.
This usually happens when the wire continues being pushed but cannot move through the welding gun properly.
Causes of Bird nesting
- Blocked contact tip
- Worn contact tip
- Dirty liner
- Damaged liner
- Excessive drive roll pressure
Solution
Stop welding immediately.
Remove the tangled wire carefully.
Check the contact tip and replace it if necessary.
Inspect the liner for damage or contamination.
Reduce excessive drive roll tension.
After correcting the problem, feed new wire through the system and test the machine before continuing.
7. Wire Stubbing
Wire stubbing happens when the wire repeatedly hits the work piece instead of smoothly melting into the weld pool.
This can create popping sounds and unstable welding.
Causes
- Wire feed speed too high
- Voltage too low
- Excessive stick out
- Incorrect welding settings
Solution
Reduce wire feed speed or increase voltage slightly.
The goal is to create a balanced arc.
Listen to the sound of the welding arc.
A properly adjusted MIG welder often produces a relatively consistent sound. Erratic popping and repeated wire stubbing usually indicate that the settings need adjustment.
8. Erratic MIG Welding Arc
An unstable or erratic arc can make it difficult to control the weld.
The arc may repeatedly start and stop or fluctuate unexpectedly.
Possible Causes
- Poor ground connection
- Dirty metal
- Damaged welding gun
- Loose electrical connections
- Worn contact tip
- Wire feeding problems
How to Fix It
Check your ground clamp first.
Make sure the clamp is securely attached to clean metal.
Rust, paint, and dirt can reduce electrical conductivity.
Inspect the welding gun and cables for damage.
Check the contact tip.
If the hole has become enlarged or irregular, replace the tip.
9. Uneven Weld Beads
An uneven weld bead may vary in width, height, or appearance.
This can happen when the welding technique is inconsistent.
Causes
- Uneven travel speed
- Inconsistent gun angle
- Incorrect stick out
- Unstable wire feeding
- Poor machine settings
Solution
Maintain a consistent travel speed.
Keep your gun angle steady.
For many MIG welding applications, a slight push angle is commonly used.
Avoid constantly changing your distance from the work piece.
Practice welding straight beads on scrap metal before working on important projects.
10. Undercut
Undercut is a groove that forms along the edge of the weld.
It reduces the thickness of the base metal and can weaken the joint.
Causes
- Excessive voltage
- Travel speed too fast
- Incorrect gun angle
- Excessive heat
How to Fix Undercut
Reduce voltage if necessary.
Slow your travel speed slightly.
Make sure the arc is properly directed toward the joint.
Avoid excessive weaving movements.
Proper machine settings and consistent technique are essential for preventing undercut.
11. Overlap
Overlap occurs when weld metal flows onto the base metal without properly fusing with it.
The weld may appear to sit on top of the material.
Causes
- Travel speed too slow
- Excessive wire feed
- Incorrect gun angle
- Low voltage
Solution
Increase travel speed slightly.
Check voltage and wire feed settings.
Maintain proper gun angle.
The weld pool should properly fuse with both pieces of metal.
12. Cracking in MIG Welds
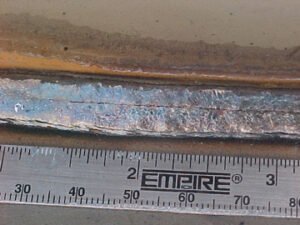
Weld cracking is one of the more serious welding problems.
Cracks can significantly reduce the strength and reliability of a welded structure.
Causes of Cracking
- Contaminated material
- Excessive stress
- Incorrect filler wire
- Rapid cooling
- High heat input
- Poor joint design
How to Prevent Weld Cracks
Clean the base metal.
Use the correct filler wire for the material.
Prepare the joint properly.
Avoid excessive heat input.
For thicker or specialized materials, preheating may sometimes be necessary.
If a weld is structurally important, follow the appropriate welding procedures and material specifications.
13. Cold Welds
A cold weld occurs when the weld metal does not properly fuse with the base material.
The bead may look acceptable but have poor penetration and weak fusion.
Causes
- Voltage too low
- Travel speed too fast
- Dirty metal
- Incorrect gun angle
Solution
Increase heat gradually.
Slow down slightly.
Clean the base metal.
Make sure the arc is directed properly toward the joint.
Testing your settings on scrap material before welding the final project is always a good practice.
14. Warping and Distortion
Heat from welding causes metal to expand and contract.
When this happens unevenly, the material can warp.
Causes
- Excessive heat
- Long continuous welds
- Poor welding sequence
- Thin metal
How to Prevent Warping
Use shorter welds when possible.
Allow the metal to cool between passes.
Use tack welds to hold components in position.
Plan your welding sequence carefully.
On large fabrication projects, alternating weld locations can help distribute heat more evenly.
15. Excessive Heat Input
Too much heat can create several problems at once.
These include:
- Burn-through
- Warping
- Excessive weld width
- Distortion
- Material damage
Solution
Adjust your voltage and travel speed.
Avoid staying in one location too long.
Use appropriate welding settings for the thickness of the material.
For thin metal, shorter welds are often safer than continuous welding.
16. Poor Shielding Gas Coverage
Shielding gas protects the molten weld pool.
Without proper gas coverage, contamination and porosity can occur.
Common Causes
- Empty gas cylinder
- Gas leak
- Dirty nozzle
- Excessive wind
- Incorrect gas flow
How to Fix It
Check your gas cylinder.
Inspect hoses and fittings.
Clean the nozzle regularly.
Avoid welding in strong wind unless the welding area is protected.
Do not automatically assume that increasing gas flow will solve every problem. Excessive gas flow can sometimes create turbulence that affects shielding coverage.
Use a stable, appropriate flow rate for your equipment and environment.
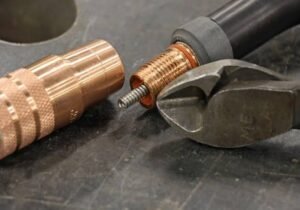
17. Contact Tip Problems
The contact tip transfers electrical current to the welding wire.
Because it experiences heat and friction, it eventually wears out.
Signs of a Worn Contact Tip
- Erratic arc
- Difficult wire feeding
- Excessive spatter
- Inconsistent welding
Solution
Inspect the contact tip regularly.
Replace it when the opening becomes worn or damaged.
Always use the correct contact tip size for your welding wire.
18. MIG Welding Wire Problems
Using poor-quality or contaminated wire can create welding problems.
Common Issues
- Rusty wire
- Dirty wire
- Wrong wire size
- Incorrect wire type
Solution
Store welding wire in a dry environment.
Avoid exposing wire to moisture.
Use the correct wire for the base material.
Common steel MIG welding wire types include wires designed for general-purpose carbon steel applications, but the correct choice depends on the material and welding requirements.
Always match wire diameter to your welding machine and project.
19. Welding Thin Metal With MIG
Thin metal is one of the most difficult materials for beginners.
The biggest challenge is preventing burn-through.
Tips for Thin Metal
- Use lower heat settings
- Increase travel speed
- Use tack welding
- Weld in short sections
- Avoid large gaps
- Practice on scrap material
Instead of running one continuous weld, use short welds and allow the metal to cool.
This reduces the amount of heat concentrated in one area.
20. Welding Thick Metal With MIG
Thick metal requires enough heat and proper joint preparation.
A weld that looks good on the surface may not penetrate deeply enough.
Tips
- Clean the metal
- Prepare the joint
- Consider beveling edges
- Use appropriate voltage
- Use multiple passes when necessary
For very thick material, professional welding procedures may be required.
21. Wrong MIG Welding Settings
Incorrect machine settings are responsible for many MIG welding problems.
The two primary settings are generally:
- Voltage
- Wire feed speed
These settings must work together.
If the voltage is too low, the wire may stub into the work piece.
If voltage is too high, the arc may become unstable and produce excessive spatter.
Best Approach
Start with the recommended settings provided by your welding machine manufacturer.
Then make small adjustments based on:
- Metal thickness
- Wire size
- Joint type
- Welding position
Test your settings on scrap material first.
22. Incorrect Welding Gun Angle
Gun angle affects penetration and weld bead shape.
Holding the gun incorrectly can contribute to:
- Poor penetration
- Excessive spatter
- Uneven beads
- Lack of fusion
Maintain a consistent angle.
For many standard MIG applications, welders use a slight push angle.
However, the best technique can depend on the welding position and application.
Practice maintaining a steady gun position.
23. Dirty Base Metal
One of the easiest ways to improve MIG welding quality is proper material preparation.
Contaminants can include:
- Rust
- Paint
- Oil
- Grease
- Moisture
These materials can cause porosity, poor fusion, and unstable welding.
Solution
Clean the welding area before starting.
Use an appropriate method for the material and coating.
The cleaner the welding surface, the easier it is to produce a consistent weld.
24. Poor Ground Connection
A poor ground connection can cause inconsistent arc performance.
Check Your Ground Clamp
Make sure:
- The clamp is secure
- The contact surface is clean
- The cable is not damaged
- The connection is close enough to the welding area
Do not attach the clamp to heavily painted, rusty, or dirty metal.
25. Incorrect Stick out
Stick out refers to the distance between the contact tip and the work piece.
Too much stick out can make the arc unstable.
Too little stick out can increase heat and make the welding gun difficult to control.
Maintain a consistent stick out throughout the weld.
Consistency is often more important than constantly changing your distance while welding.
MIG Welding Troubleshooting Chart
Problem: Excessive Spatter
Possible Cause: Incorrect voltage or wire speed.
Solution: Adjust settings gradually and clean the base metal.
Problem: Porosity
Possible Cause: Poor shielding gas or contamination.
Solution: Check gas flow, clean metal, and inspect for leaks.
Problem: Burn-Through
Possible Cause: Excessive heat.
Solution: Reduce heat and increase travel speed.
Problem: Lack of Penetration
Possible Cause: Insufficient heat or fast travel speed.
Solution: Increase voltage and improve joint preparation.
Problem: Wire Stubbing
Possible Cause: Wire feed speed too high or voltage too low.
Solution: Balance voltage and wire speed.
Problem: Bird nesting
Possible Cause: Blocked wire path.
Solution: Inspect the liner, contact tip, and drive rolls.
Problem: Uneven Weld
Possible Cause: Inconsistent technique.
Solution: Maintain steady travel speed and gun angle.
How to Diagnose MIG Welding Problems
The best troubleshooting method is systematic.
Follow these steps:
Step 1: Look at the Weld
Examine:
- Weld shape
- Spatter
- Holes
- Cracks
- Penetration
The appearance of the weld provides important clues.
Step 2: Check Machine Settings
Review:
- Voltage
- Wire feed speed
- Polarity
Compare your settings with the recommendations for your material.
Step 3: Check the Wire
Make sure:
- The wire is clean
- The wire size is correct
- The spool feeds smoothly
Step 4: Check Shielding Gas
Inspect:
- Cylinder
- Regulator
- Hose
- Nozzle
Step 5: Check Consumables
Inspect:
- Contact tip
- Nozzle
- Liner
- Drive rolls
Replacing worn consumables can solve many problems quickly.
How to Improve Your MIG Welding Skills
Good MIG welding requires practice.
Here are several ways to improve.
Practice on Scrap Metal
Before welding an important project, practice on material with the same thickness.
Experiment with settings and observe the results.
Maintain a Consistent Travel Speed
Moving too quickly can cause poor penetration.
Moving too slowly can create excessive heat.
Try to maintain a smooth, controlled motion.
Watch the Weld Pool
Instead of focusing only on the arc, watch how the molten weld pool behaves.
The weld pool provides information about heat and fusion.
Keep Your Equipment Maintained
Regular maintenance improves welding consistency.
Clean your:
- Nozzle
- Contact tip
- Drive rolls
Inspect your liner regularly.
MIG Welding Safety Tips
MIG welding involves serious hazards.
Always use appropriate protective equipment.
Important safety equipment includes:
- Welding helmet
- Welding gloves
- Flame-resistant clothing
- Safety boots
- Eye protection
- Respiratory protection when appropriate
Make sure your workspace has adequate ventilation.
Welding fumes can be hazardous, particularly in enclosed spaces.
Keep flammable materials away from the welding area.
Inspect cables and equipment before use.
Never weld near flammable liquids or gases.
Frequently Asked Questions About MIG Welding Problems
Why is my MIG welder popping?
Popping can be caused by incorrect voltage and wire feed speed, poor gas coverage, contamination, or unstable wire feeding.
Start by checking your machine settings and cleaning the metal.
Why is my MIG weld full of holes?
Small holes are usually a sign of porosity.
Check your shielding gas system and make sure the metal is clean and dry.
Why does my MIG wire keep sticking?
Wire sticking can happen when wire feed speed is too high for the voltage setting.
Adjust the settings until the arc becomes more stable.
Why is my MIG weld weak?
Weak welds may result from poor penetration, cold welds, contamination, or lack of fusion.
Check your heat settings and joint preparation.
Why does my MIG wire keep tangling?
Wire tangling can be caused by bird nesting, excessive drive roll tension, damaged liners, or blocked contact tips.
Inspect the complete wire feeding system.
Why am I getting too much spatter?
Excessive spatter is often caused by poor machine settings, dirty material, incorrect stick out, or shielding gas problems.
Adjust one variable at a time.
Final Thoughts
MIG welding problems can be frustrating, but most of them are relatively easy to diagnose once you understand the relationship between machine settings, welding technique, material preparation, wire feeding, and shielding gas.
The most important thing is to avoid changing everything at once.
If your weld is producing excessive spatter, porosity, poor penetration, or an unstable arc, inspect the problem systematically.
Start with the basics:
- Check your welding machine settings.
- Clean the base metal.
- Inspect your shielding gas.
- Check the ground connection.
- Inspect the wire feeding system.
- Replace worn consumables.
- Practice your welding technique.
With proper preparation and regular practice, you can solve most common MIG welding problems and significantly improve the quality of your welds.
Remember that a good-looking weld is not always a strong weld. Proper penetration, fusion, and joint preparation are just as important as appearance.
Whether you are welding automotive sheet metal, building equipment, repairing machinery, or working on a home project, understanding MIG welding troubleshooting will help you work more efficiently and produce safer, stronger results.
For More Information about this a rtical Click Here
For More Information about this Click Here