Choosing between a 240V and 110V MIG welder is one of the most important decisions you’ll make before buying. Get it wrong, and you’ll either burn through thin metal or struggle to weld anything thicker than sheet metal.
Picking the wrong voltage is one of the most common — and most expensive — mistakes beginner welders make. You either end up with a 110V machine that can’t handle the steel you need, or you buy a 240V welder and realize you don’t have the outlet for it in your garage.
This guide breaks down the real differences between 240V and 110V MIG welders: power, material thickness, cost, portability, and which one is actually right for your situation.
The Core Difference: What Voltage Actually Means
Voltage is not just a number on a spec sheet — it directly controls how much amperage your welder can produce. And amperage is what actually matters when you’re welding.
Here’s the simple rule: higher amperage = thicker metal you can weld.
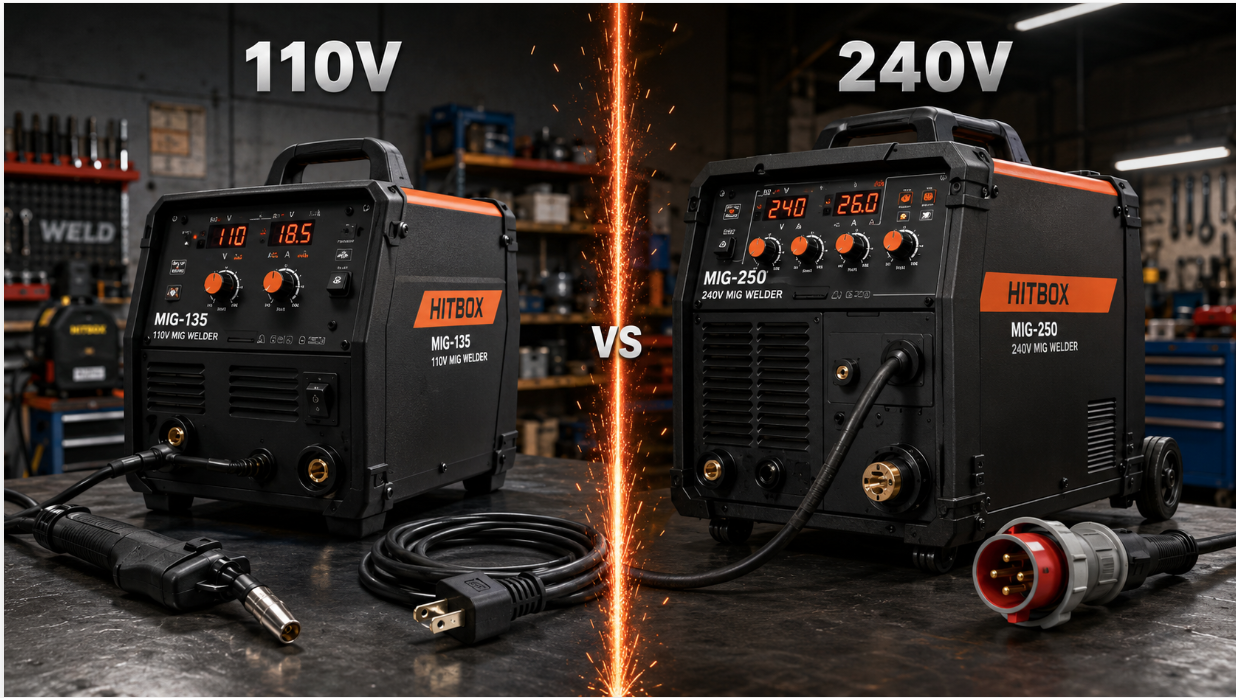
A 110V MIG welder typically tops out around 90–140 amps. A 240V MIG welder can deliver 140–300+ amps. That gap is massive in real-world welding.
Think of it like a garden hose. A 110V welder is a standard hose — fine for watering a lawn. A 240V welder is a fire hose. If you’re fighting a fire (welding ¼-inch steel plate), the garden hose isn’t going to cut it.
The bottom line: Voltage determines how much power your machine can draw from the wall, which determines the maximum amperage output, which determines how thick a piece of metal you can weld cleanly and consistently.
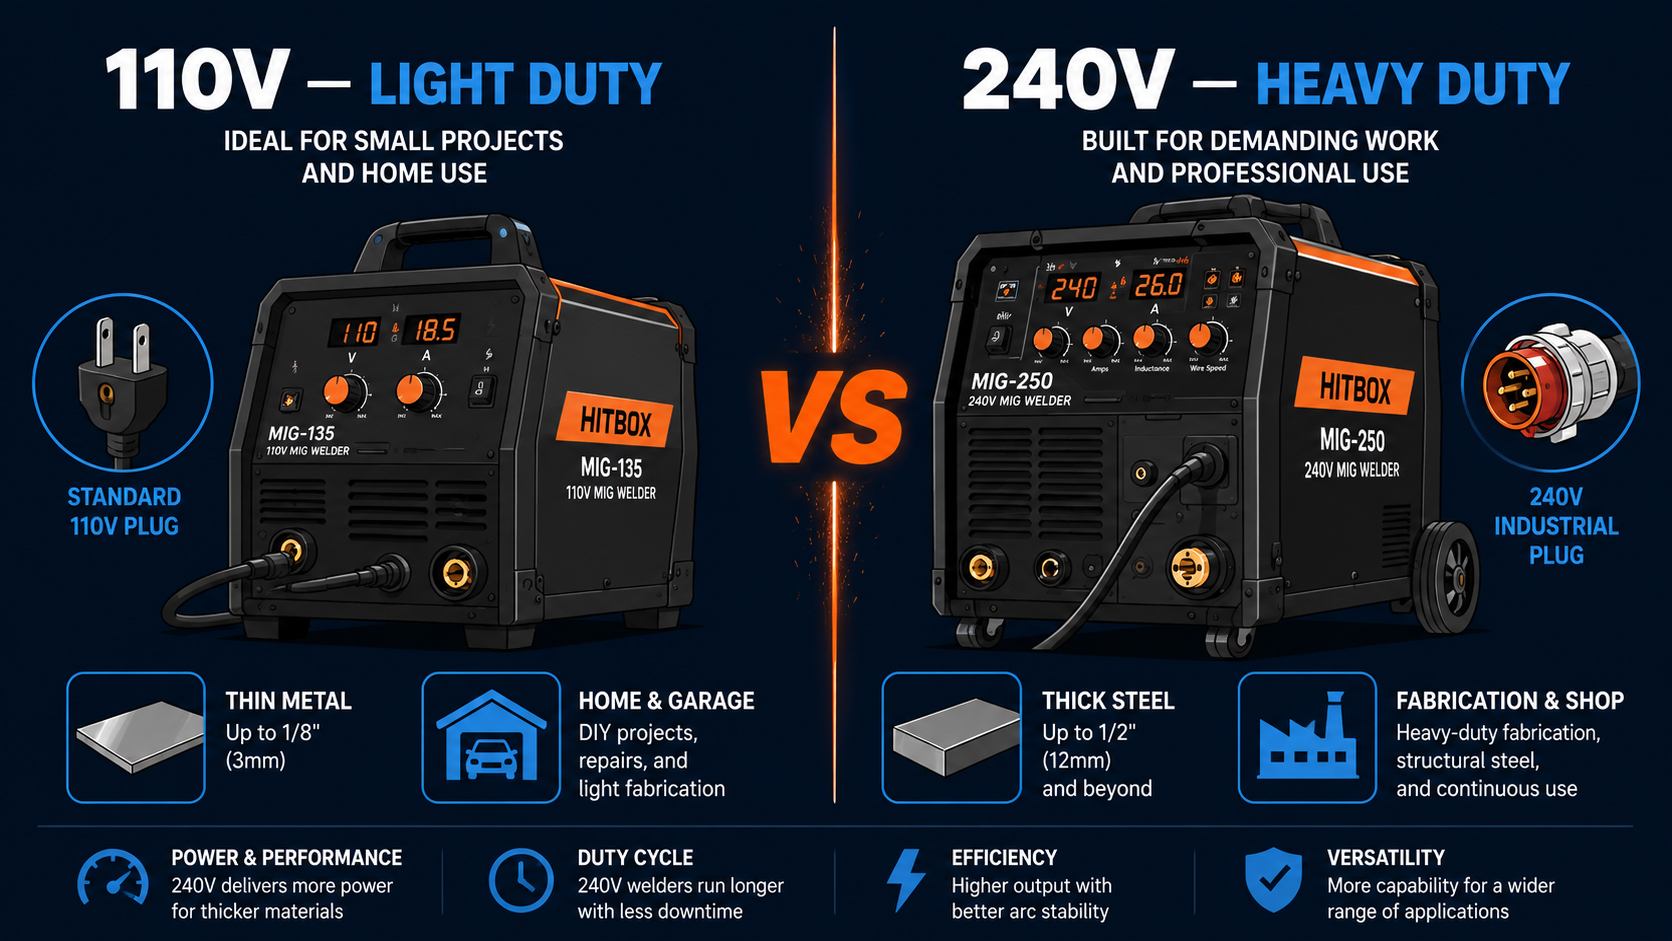
110V MIG Welder: Pros, Cons, and Best Uses
What Is a 110V MIG Welder?
A 110V MIG welder (also called 120V) runs on a standard US household outlet — the same outlet you plug your TV or microwave into. No special wiring needed.
Advantages of 110V MIG Welders
Plug and play convenience. You can set it up anywhere in your home, garage, or on a job site without needing an electrician. This is a huge advantage for beginners and hobbyists.
Lower upfront cost. 110V machines are generally cheaper — you can find solid entry-level options for $200–$500. You also save on electrical installation costs.
Portability. These machines are typically lighter and more compact. If you need to weld at a friend’s house, on a farm, or on a job site, 110V machines are far easier to transport and use.
Great for thin metal. On 16–18 gauge sheet metal (auto body panels, thin tubing, decorative metalwork), a 110V MIG welder can produce clean, precise welds. Trying to use a 240V machine on very thin metal can cause burn-through if settings aren’t dialed in perfectly.
Disadvantages of 110V MIG Welders
Limited material thickness. Most 110V MIG welders max out at around 3/16″ (about 4.8mm) steel — and even that is pushing it. Anything thicker will result in poor penetration, cold welds, and weak joints.
Lower duty cycle. Duty cycle is the percentage of time in a 10-minute period that a welder can run continuously. 110V machines often have duty cycles of 20–30% at maximum amperage. That means you’re stopping to let the machine cool down more often.
No room to grow. If your projects get bigger or thicker, you’ll outgrow a 110V machine quickly.
Best Uses for 110V MIG Welders
- Auto body repair and patch panels
- Thin sheet metal fabrication (up to 3/16″)
- Light furniture and decorative metalwork
- Home repair projects (gates, railings, brackets)
- Hobby projects where portability matters
240V MIG Welder: Pros, Cons, and Best Uses
What Is a 240V MIG Welder?
A 240V MIG welder requires a dedicated 240V outlet — the same type used by your electric dryer, oven, or air conditioner. It draws significantly more power from the wall, which translates directly into more welding capability.
Advantages of 240V MIG Welders
Weld thicker metal. This is the primary reason most serious welders choose 240V. You can comfortably weld ¼” steel plate, ½” structural steel, and heavy-duty tubing. With a 110V machine, these tasks are impossible.
Higher amperage output. More amps means better arc stability, deeper penetration, and cleaner welds. You’ll notice far less porosity and cold lap (when the weld bead doesn’t fuse properly with the base metal).
Better duty cycle. 240V machines are built for sustained use. A quality 240V welder might run at 60% duty cycle at 200 amps — meaning you can weld for 6 minutes out of every 10 without stopping. That matters on longer fabrication projects.
More professional results. The arc is more stable, spatter is reduced, and weld puddle control is significantly improved. Even beginners report better-looking welds on their first try with a 240V machine.
Long-term value. A good 240V MIG welder can last 20+ years with proper care. It grows with your skills and handles virtually any project you’ll take on.
Disadvantages of 240V MIG Welders
Requires dedicated wiring. If your garage doesn’t already have a 240V outlet, you’ll need an electrician to install one. This typically costs $200–$800 depending on your home’s panel and the distance to your garage.
Higher upfront cost. Quality 240V MIG welders start around $400–$600 for budget options and go up to $2,000+ for professional-grade machines.
Less portable. You’re limited to locations with 240V outlets. Taking a 240V machine to a job site or a friend’s house requires planning.
Best Uses for 240V MIG Welders
- Structural steel fabrication (frames, trailers, supports)
- Automotive frame and chassis repair
- Farm equipment and heavy machinery maintenance
- Metal art and large sculpture projects
- Anything involving steel ¼” or thicker
- Professional or semi-professional welding work
240V vs 110V: Head-to-Head Comparison
| Feature | 110V MIG Welder | 240V MIG Welder |
|---|---|---|
| Max Amperage | 90–140A | 140–300A+ |
| Max Steel Thickness | Up to 3/16″ | Up to ½”+ |
| Outlet Required | Standard household | Dedicated 240V circuit |
| Typical Price Range | $150–$500 | $400–$2,000+ |
| Duty Cycle | 20–30% at max amps | 40–60% at max amps |
| Portability | High | Moderate |
| Arc Stability | Good (thin metal) | Excellent (all thicknesses) |
| Setup Difficulty | Plug and play | May need electrician |
| Best For | Beginners, thin metal, home use | Serious hobbyists, pros, thick metal |
| Long-Term Value | Limited | High |
Metal Thickness Guide: Which Voltage Do You Need?
This is the most practical question. Here’s a real-world guide based on what you’re actually welding:
| Material / Project | Thickness | Recommended Voltage |
|---|---|---|
| Auto body panels | 18–22 gauge | 110V is fine |
| Thin tubing (furniture, art) | 16–18 gauge | 110V is fine |
| Exhaust pipes | 14–16 gauge | 110V works |
| Light brackets, hinges | 1/8″ (11 gauge) | 110V works (barely) |
| Gate frames, light fab | 3/16″ | 110V at its limit — 240V preferred |
| Structural tubing | ¼” | 240V required |
| Trailer frames | 3/8″ | 240V required |
| Heavy plate, equipment | ½”+ | 240V required |
Quick rule of thumb: If you’re welding anything ¼” or thicker on a regular basis, a 110V machine will leave you frustrated. Get the 240V.
What About Dual Voltage MIG Welders?
Dual voltage MIG welders are a growing category — machines like the YESWELDER 205A or Miller Multimatic 215 that run on both 110V and 240V.
These are an excellent option if you want flexibility. Here’s when dual voltage makes sense:
- You have 240V at home but occasionally need to weld on job sites with only 110V available.
- You’re not sure what projects you’ll tackle — the dual voltage covers both light and heavy work.
- You want one machine that grows with you without needing to buy a second welder.
The tradeoff: on 110V mode, a dual voltage machine has the same limitations as any 110V welder. You get the best performance by running it on 240V.
Bottom line on dual voltage: If you can afford it, a dual voltage machine is the most versatile option for most home welders. Buy it, wire your garage for 240V, and enjoy the full capability — knowing you can also use it on 110V when needed.
Power Outlet: Do You Have 240V in Your Garage?
Before you buy a 240V welder, check your garage. Here’s what to look for:
You already have 240V if your garage has:
- A 240V outlet (large, 3- or 4-prong, like an electric dryer outlet)
- An electric vehicle charger installed
- A large air compressor or table saw plugged into a larger outlet
You need an electrician if:
- Your garage only has standard 110V outlets
- Your home’s electrical panel is near or at capacity
Cost to install a 240V outlet: Typically $200–$800 in the US, depending on panel distance and complexity. This is a one-time cost that pays off immediately — and it adds value to your home.
Pro tip: Check your home’s main electrical panel first. If you have a 200-amp service (common in homes built after 1990), adding a 240V circuit for a welder is usually straightforward for any licensed electrician.
Which One Should You Buy?
Let’s make this simple. Answer these two questions:
1. What’s the thickest metal you’ll regularly weld?
- Mostly thin sheet metal (under 3/16″) → 110V will work
- Regularly welding 3/16″ or thicker → Go with 240V
2. Do you have (or can you install) a 240V outlet?
- Yes → Get the 240V machine
- No, and you can’t install one → 110V or dual voltage
Our Recommendation by User Type
Weekend hobbyist, light repairs, auto body work → A quality 110V machine like the Lincoln Electric Easy MIG 140 or Hobart Handler 140 will serve you well.
Serious home shop welder, farm/ranch work, trailer builds → Go straight to 240V. A machine like the YESWELDER 205A or Hobart Handler 210MVP (dual voltage) gives you the power to tackle real projects.
Professional or semi-professional work → 240V is non-negotiable. Look at the Hobart IronMan 240 or Miller Millermatic 252 for machines built to run all day.
Frequently Asked Questions
Can I convert a 110V MIG welder to run on 240V?
No. These machines have different internal components — transformers, capacitors, and circuitry designed for a specific voltage. You cannot convert a 110V welder to run on 240V. If you need 240V capability, buy a 240V or dual-voltage machine.
Is 240V really that much better than 110V?
For welding metal under 3/16″, the difference is less dramatic. But for anything thicker, the difference is night and day. Better penetration, more stable arc, cleaner welds, and a higher duty cycle all combine to make 240V machines significantly more capable.
What size breaker do I need for a 240V MIG welder?
Most 240V MIG welders require a dedicated 30–50 amp, 240V circuit. Check your specific welder’s manual — running a machine on an undersized breaker will cause frequent tripping and can damage the welder over time.
Can I run a 240V welder on a generator?
Yes, but the generator must produce at least 240V and have enough wattage to handle the welder’s draw. A 240V MIG welder typically needs a 5,000–8,000 watt generator at minimum. Always check the welder’s input power requirements before pairing with a generator.
Is a dual voltage MIG welder worth the extra money?
For most home welders, yes. The price difference between a single-voltage and dual-voltage machine is usually $50–$150, and the flexibility it offers is well worth it — especially if you ever need to weld away from your 240V shop setup.
What’s the best 110V MIG welder for beginners?
The Lincoln Electric Easy MIG 140 and Hobart Handler 140 are consistently rated as the top beginner-friendly 110V machines. Both are reliable, have good arc characteristics, and are backed by excellent customer support.
What’s the best 240V MIG welder for a home shop?
The YESWELDER 205A offers excellent value at its price point. For a step up, the Hobart Handler 210MVP (dual voltage) or Miller Multimatic 215 are hard to beat for quality and longevity.
Final Verdict
The 240V vs 110V debate comes down to one thing: what you’re actually going to weld.
For light work — auto body panels, thin tubing, decorative projects — a 110V MIG welder is perfectly adequate and far more convenient. You don’t need to run new wiring, and you’ll spend less upfront.
But if you’re doing any serious fabrication, building trailers, repairing farm equipment, or working with structural steel, a 240V MIG welder is not a luxury — it’s a requirement. No 110V machine will give you the penetration and arc stability needed for thick material, no matter how much you fine-tune the settings.
If you’re on the fence, our advice is simple: get the 240V machine and wire your garage properly. The one-time electrical cost is far cheaper than buying two welders over the years as you outgrow the 110V. And once you weld with a proper 240V machine, you’ll never want to go back.
Looking for specific 240V MIG welder recommendations? Check out our roundup of the Best 240V MIG Welders for top-rated picks at every budget.