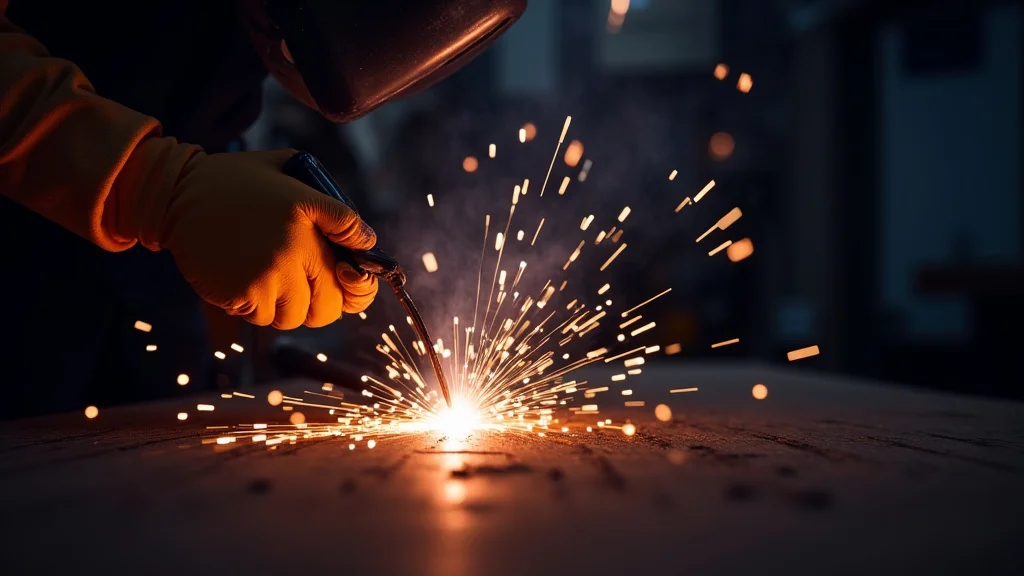
MIG welding is a great way to join metal, but sometimes you see a little metal stuck to the end of your wire. This is called burnback, and it can be confusing when you’re just starting out. Don’t worry, it’s a common issue that most beginner welders face.
This guide will show you exactly what causes it and how to fix it step-by-step. We’ll cover the simple adjustments you can make to get your welds looking smooth and clean again.
Key Takeaways
- Burnback happens when the welding wire melts too far back, sticking to the contact tip.
- Common causes include incorrect voltage, wire speed, or gun angle.
- You can fix burnback by adjusting these settings and ensuring proper equipment maintenance.
- Checking your consumables like the contact tip and nozzle is important.
- Understanding burnback helps you achieve cleaner, stronger welds.
What is Burnback in MIG Welding?
Burnback in MIG welding is when the welding wire melts too close to or even inside the contact tip. This causes a glob of metal to stick to the tip. It can look like a small ball of wire or a melted mess.
This isn’t good because it can mess up your weld. It can lead to poor weld quality, inconsistent arcs, and even damage your equipment if left unchecked. It’s a sign that something isn’t quite right with your welding setup.
Why Does Burnback Happen?
Several things can cause burnback. Think of it like a campfire; if the fuel (wire) is too close to the heat source (arc), it melts too fast. The main reasons are usually related to your welding machine’s settings or how you’re holding the gun.
Incorrect Voltage and Wire Speed
Your MIG welder has two main controls: voltage and wire speed. These two work together like a team. If you have your wire speed too low for the voltage you’re using, the wire doesn’t feed fast enough.
This means the arc stays on the wire too long, letting it melt back too far. On the other hand, if your voltage is too high, it creates a lot of heat. This extra heat can also cause the wire to melt back into the tip, especially if the wire speed isn’t keeping up.
The goal is to have a balance. The wire speed needs to be just right to feed the metal into the arc at a rate that creates a stable weld. When this balance is off, burnback is likely to happen.
It’s about finding that sweet spot where the wire melts cleanly as it’s being used.
Wire Feed Speed Too Low
This is a very common culprit. If you set the wire feed speed too low, the wire comes out of the gun slowly. The welding arc is hot, and if the wire isn’t being fed into that heat fast enough, it will start to melt back towards the nozzle.
Imagine trying to eat soup with a very slow-moving spoon; you’d get a big blob at the end of the spoon, right? It’s similar with welding wire.
A low wire feed speed means less metal is being supplied to the weld pool. This excess energy from the arc is then directed back onto the wire itself, causing it to melt prematurely and stick to the contact tip. This can happen even if your voltage is set correctly, but it’s especially problematic when voltage is also on the higher side.
Voltage Too High
Voltage controls the arc length and how much heat is going into your weld. If your voltage is set too high, the arc becomes very long and hot. This excess heat can cause the wire to melt too quickly.
When the wire melts too quickly, it can melt back to the contact tip before it can properly form a weld bead. This is like having a stove burner turned up too high for a thin piece of butter; it melts away before you can even use it.
A high voltage setting can also lead to a more “spattery” weld. The excessive heat can cause the molten metal to break apart into small droplets, which fly off in different directions. This spatter can stick to your workpiece and your welding gun, making a mess and indicating that your heat input is too high, contributing to burnback.
Improper Gun Angle
The way you hold your MIG gun also matters. If you push your gun too far into the weld puddle or hold it at a very steep angle, you’re directing a lot of heat back towards the contact tip. This can cause the wire to melt back.
You want to maintain a consistent gun angle, usually a slight push or pull depending on the material and situation. A steep angle can trap heat near the tip.
Think about it like this: if you aim a flashlight directly at a wall from very close, the light is intense and concentrated. If you move it further away or angle it, the intensity changes. In welding, a bad gun angle can concentrate the arc’s heat on the tip itself.
This is especially true if you’re getting too close to the workpiece. Maintaining a consistent distance and angle helps manage heat and prevent burnback.
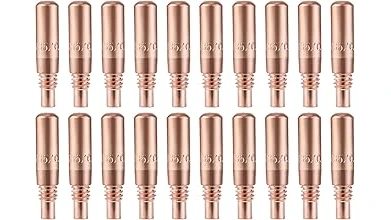
Worn-Out Contact Tip
The contact tip is the small copper piece at the end of your welding gun. Its job is to carry the electrical current to the wire and guide it out. If the hole in the tip gets larger or misshapen from use, it can allow the wire to melt back more easily.
A worn tip can also lead to inconsistent wire feeding and poor electrical contact.
Over time, the heat of the welding arc can erode the inside of the contact tip. This makes the opening larger. A larger opening gives the molten wire more space to travel backward and stick to the tip.
It’s like a worn-out faucet that drips because the seal isn’t tight; a worn tip doesn’t guide the wire precisely.
Dirty or Damaged Nozzle
The nozzle is the outer shield around the contact tip. It directs the shielding gas to the weld puddle. If it’s dirty with spatter or damaged, it can affect the gas flow.
Poor gas flow can lead to an unstable arc and more heat directed back towards the tip, causing burnback. Spatter buildup inside the nozzle can obstruct the gas and create hot spots.
Think of the nozzle as a funnel for your shielding gas. If that funnel is clogged with metal bits, the gas doesn’t flow smoothly. This can cause the arc to become unstable and hotter than it should be.
A stable, consistent gas flow is key to a good weld and preventing unwanted heat issues like burnback.
Ground Clamp Issues
A good electrical connection is vital for MIG welding. If your ground clamp isn’t making a solid connection to the workpiece or the machine, it can cause issues. A poor ground can lead to a weaker or inconsistent arc.
This inconsistency can sometimes manifest as burnback because the electrical circuit isn’t working as it should.
The ground clamp completes the electrical circuit. If it’s loose, dirty, or on painted metal, the electricity can’t flow smoothly. This makes the arc unstable and can lead to problems.
It’s like trying to run a car with a weak battery connection; it just won’t perform right. Ensure your ground clamp is clean, tight, and on bare metal.
How to Troubleshoot Burnback in MIG Welders
Fixing burnback is usually straightforward once you know what to look for. It often comes down to making small adjustments to your settings or performing a bit of maintenance. Here’s a simple way to tackle it.
1. Check and Adjust Wire Feed Speed
This is your first stop. If you suspect burnback, try increasing the wire feed speed slightly. You want to find the speed that feeds the wire smoothly into the arc.
If the wire feed is too slow, it will melt back. Gradually increase it until the arc sounds smooth and stable, and the burnback stops. Listen to the sound of the arc; it should be a consistent sizzle, not a harsh crackle or pop.
2. Adjust Voltage Settings
If increasing wire speed doesn’t help, or if you also have a lot of spatter, try lowering the voltage a bit. A lower voltage will reduce the heat of the arc. You might need to adjust the wire speed again after changing the voltage to get the best balance.
The goal is a nice, smooth arc with minimal spatter and no burnback.
Remember that voltage and wire speed work together. If you lower the voltage, you might need to slightly lower the wire speed too, and vice-versa. Experiment with small increments until you find the right combination for your specific material thickness and type.
3. Correct Your Gun Angle and Distance
Make sure you’re holding the gun correctly. Aim for a consistent angle, usually a slight push or pull depending on the situation. Don’t get too close to the workpiece.
Maintaining a consistent distance of about 1/2 to 3/4 inch from the tip to the workpiece is a good starting point. This distance helps protect the wire and the arc.
Practice moving the gun smoothly. A consistent angle and distance prevent excessive heat buildup at the tip. Try to keep the gun perpendicular to the weld seam as much as possible, or use the recommended push or pull angle for the specific welding task.
4. Inspect and Replace the Contact Tip
This is a quick and easy fix. If your contact tip looks worn, discolored, or enlarged, replace it. New contact tips are inexpensive.
Make sure you get the correct size for your welding wire. A worn tip is a common cause of persistent burnback issues. You might even want to keep a few spare tips handy.
To replace it, simply unscrew the old tip from the welding gun and screw in a new one. Be sure it’s snug but don’t overtighten it. This simple step can solve a lot of problems.
5. Clean or Replace the Nozzle
If you see spatter building up inside the nozzle, clean it out with a chipping hammer or a wire brush. If the nozzle is significantly damaged, it’s best to replace it. Ensure good gas flow by keeping the nozzle clean and clear of obstructions.
A clean nozzle ensures that the shielding gas flows properly to protect your weld. This stable gas flow helps maintain a consistent arc and reduces the chances of burnback.
6. Verify Your Ground Connection
Make sure your ground clamp is clean and making solid contact with the metal you’re welding. Remove any paint, rust, or debris from the surface where the clamp will attach. A tight, clean connection is essential for a good weld.
A poor ground can cause erratic arc behavior and affect the overall weld quality. Always check this connection first if you’re experiencing unusual welding issues.
7. Check Wire Tension and Drive Rollers
Sometimes, the tension on the wire feed rollers might be too loose or too tight. If it’s too loose, the wire might slip, causing inconsistent feeding and potential burnback. If it’s too tight, it can deform the wire or cause excessive wear on the rollers and the liner.
Also, make sure the drive rollers are clean and the groove matches your wire diameter.
The drive rollers push the wire through the gun. If they aren’t gripping the wire properly, the wire won’t feed smoothly. This can lead to the arc eating the wire faster than it’s being fed, resulting in burnback.
8. Consider Shielding Gas Flow Rate
An incorrect shielding gas flow rate can also contribute to burnback. If the flow rate is too low, the arc isn’t properly protected, leading to instability and excess heat. If it’s too high, it can cause turbulence and disrupt the arc.
A flow rate of around 15-20 cubic feet per hour (CFH) is typical for many MIG welding applications, but it can vary.
Check your flow meter or regulator to ensure it’s set to the recommended level for your gas type and welding situation. A steady, consistent gas flow is crucial for a stable arc and preventing burnback.
What if Burnback Still Happens?
If you’ve tried all these steps and are still experiencing burnback, there might be an issue with the liner inside your welding gun. The liner is a plastic or metal tube that guides the wire from the machine to the contact tip. If the liner is damaged, kinked, or worn out, it can create friction and cause the wire to feed erratically, leading to burnback.
Replacing the liner can often solve persistent feeding problems.
Frequently Asked Questions
Question: What is the most common cause of burnback in MIG welding?
Answer: The most common cause is a wire feed speed that is too low for the set voltage, causing the wire to melt back too far.
Question: Can I fix burnback by just changing one setting?
Answer: Often, yes. Adjusting the wire feed speed or voltage is usually the first and most effective step.
Question: How often should I replace my contact tip?
Answer: You should replace your contact tip when it shows signs of wear, such as an enlarged hole or discoloration, or if you experience persistent burnback.
Question: Does the type of wire affect burnback?
Answer: Yes, different wire types and diameters can behave differently. Always use the correct settings recommended for your specific wire.
Question: Is burnback dangerous?
Answer: While burnback itself isn’t usually dangerous, it indicates a problem that can lead to poor weld quality and potentially damage your equipment if not addressed.
Final Thoughts
Dealing with burnback in MIG welding is a common hurdle for new welders. By understanding that it’s usually caused by a simple imbalance in your settings or a worn part, you can fix it. Adjusting wire speed and voltage are your main tools.
Don’t forget to check your contact tip and nozzle for wear or spatter. With a few adjustments and a little maintenance, you’ll be welding smoothly with clean, strong joints in no time.