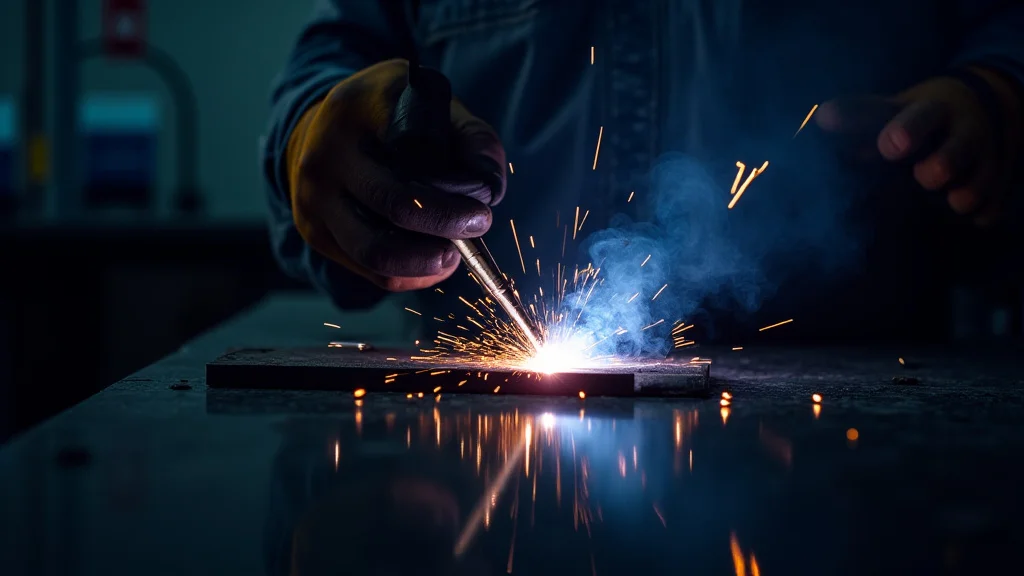
Getting TIG welding just right can feel tricky at first, especially when you’re trying to keep the arc steady. It’s like balancing a pen while drawing a perfectly straight line. This is where How to Maintain Consistent Arc in TIG Welding becomes a big deal for many new welders.
Don’t worry, though! We’re going to break it down with simple steps that make sense. Stick around, and we’ll show you how to get that smooth, consistent arc you’re aiming for.
Key Takeaways
- You will learn the importance of a steady arc for good TIG welds.
- Discover how arc length affects your weld puddle and bead.
- Understand the role of amperage and how it relates to arc stability.
- Learn techniques for controlling your tungsten and filler rod for a consistent arc.
- See how travel speed impacts arc control and weld appearance.
- Get tips for practicing and building confidence in maintaining a stable TIG arc.
Why a Consistent Arc Matters
A steady arc is the heart of good TIG welding. When your arc is stable, it melts the metal just right and lets you control the puddle easily. This means your welds look clean and strong, without lots of problems like pockmarks or uneven beads.
It’s what separates a beginner’s weld from a pro’s work.
If your arc jumps around or is too long, it can lead to a weak weld. You might get what’s called “porosity,” which are tiny holes in the metal. Or, the weld might not stick together as well as it should.
For beginners, it’s often hard to keep everything moving at the same pace: the torch, the filler rod, and your eyes on the puddle. This is why learning How to Maintain Consistent Arc in TIG Welding is so important from the start.
Understanding Arc Length
Arc length is simply the distance between the tip of your tungsten electrode and the piece of metal you’re welding. Think of it like the gap between a pencil tip and paper. For TIG welding, this distance is usually very small.
A short arc, meaning the tungsten is very close to the metal, produces a more concentrated heat. This gives you good control over a small puddle. It’s great for fine details and precise work.
However, if the tungsten touches the metal, it can contaminate the electrode and cause all sorts of problems.
A long arc, where the tungsten is further away, spreads the heat out more. This can make the puddle wider, but it also makes the arc less stable. It might sputter more, and the heat isn’t as focused.
This can lead to a weaker weld and makes it harder to control the metal melting. For most TIG welding, you want an arc length that’s about the same as the diameter of your tungsten electrode.
Why Arc Length is Tricky for Beginners
When you’re starting out, it’s hard to judge that tiny distance. Your hand might shake a little, or you might get excited and move the torch too far away. It takes practice to get a feel for the right spacing and to keep it consistent as you move along your weld line.
The Role of Amperage
Amperage is the amount of electrical current flowing through your TIG welder. It’s like the “heat setting” for your weld. The amperage you choose has a big impact on how your arc behaves.
Higher amperage means more heat. This allows for faster welding speeds and can help you melt thicker metals. However, too much amperage can make your arc hard to control.
It might be too “hot” and spread out, making the puddle difficult to manage. It can also burn through thin materials quickly.
Lower amperage means less heat. This is good for delicate work and thin metals. A lower amperage can sometimes lead to a more stable, controlled arc.
But if the amperage is too low, your arc might be weak, and you might not get enough penetration into the metal. The weld might not be strong enough.
Matching Amperage to Your Material
The best amperage depends on the type of metal you’re welding and how thick it is. For example, welding thin aluminum requires a different amperage than welding thick steel. You’ll often need to adjust your amperage based on these factors to get the best arc and a good weld.
Many TIG welders have a dial or buttons to set the amperage. Some advanced machines even let you control the amperage with a foot pedal, which is very helpful for fine-tuning your heat as you go.
Controlling Your Tungsten and Filler Rod
Your tungsten electrode and filler rod are your main tools for building the weld. Keeping them in the right position relative to the arc and the puddle is key to maintaining a consistent arc.
Tungsten Electrode
The tungsten electrode is what creates the arc. It’s important that it’s properly sharpened to a fine point. A sharp point helps create a focused and stable arc.
If the tungsten becomes balled up or contaminated, the arc will spread out and become unstable.
The distance you hold the tungsten from the metal, as we discussed with arc length, is crucial. Keep that gap consistent. As you weld, the tungsten can get shorter due to heat, so you might need to feed it out a little further from the torch body to maintain your desired arc length.
However, avoid feeding it out too much, as this can lead to a longer, less stable arc.
Filler Rod
The filler rod adds metal to your weld puddle. You’ll usually feed this rod into the puddle from the side, not directly into the arc itself. The trick is to dip the filler rod into the leading edge of the molten puddle.
When you’re feeding the filler rod, try to keep the tip of the rod just above the puddle. If the tip of the filler rod gets too close to the arc, it can melt too quickly and drip into the puddle, creating inconsistencies. It can also contaminate your tungsten if it touches it.
The rhythm of dipping the filler rod into the puddle and pulling it back slightly is something you develop with practice. This dipping action, timed with your torch movement, helps add metal smoothly and build a consistent bead without disrupting the arc.
Travel Speed: The Unsung Hero
Travel speed is how fast you move your TIG torch along the joint you’re welding. This is just as important as arc length and amperage for maintaining a consistent arc and a good-looking weld.
What Happens with Different Travel Speeds
If you move too fast, your arc might not have enough time to melt the metal properly. You’ll get a narrow, “dry-looking” bead that doesn’t penetrate well. This can make your weld weak.
The arc might also seem to “chase” the puddle, making it harder to control.
If you move too slowly, you’ll put too much heat into one spot. This can cause the metal to sag or even burn through. The puddle can become too large and difficult to manage, and the arc might become unstable due to excessive heat.
Finding the Right Speed
The right travel speed is usually one that allows the arc to melt the edges of the metal and form a consistent, medium-sized puddle. You want the puddle to move along smoothly with the torch, leaving a nice, even bead behind it. It often feels like a steady, controlled pace.
Observing the puddle is your best guide. As you move the torch, watch how the puddle forms, solidifies, and how much heat it’s taking. Adjust your speed so the puddle looks consistent and the bead forms neatly.
Putting It All Together: Practice and Technique
Learning How to Maintain Consistent Arc in TIG Welding isn’t just about knowing the rules; it’s about putting them into practice. Your hands and eyes need to work together, and that takes time and repetition.
Practice Tips for Beginners
- Start with scrap metal: Use pieces of metal you don’t need for anything important. This lets you experiment without worry.
- Focus on one thing at a time: Try to get your arc length just right first. Then, work on your travel speed. You can combine them as you get more comfortable.
- Watch the puddle, not the arc: While the arc is important, the molten puddle tells you what’s happening. Learn to read it.
- Use your foot pedal (if you have one): A foot pedal gives you great control over amperage, allowing you to make small adjustments on the fly, which helps keep the arc steady.
- Listen to your welder: The sound of the arc can tell you a lot. A steady, humming sound usually means a good, stable arc. Sputtering or popping might mean something is off.
- Review your work: Look at the welds you make. Are they smooth? Even? Strong? This feedback helps you learn.
Don’t get discouraged if your first welds aren’t perfect. Every welder started out learning. The key is to keep practicing and to be patient with yourself.
As you get more experience, you’ll develop an instinct for what feels right.
Frequently Asked Questions
Question: What is the most common mistake beginners make when trying to maintain a consistent TIG arc?
Answer: The most common mistake is having an inconsistent arc length. Beginners often hold the tungsten too far from the metal, or their distance changes too much as they move, leading to an unstable arc.
Question: How does the type of tungsten electrode affect the arc?
Answer: The type of tungsten electrode (like pure, thoriated, ceriated, or lanthanated) and how it’s sharpened affect arc stability and the type of current you can use. Sharpened electrodes generally provide a more focused and stable arc.
Question: Can I use a gas lens on my TIG torch to help with arc stability?
Answer: Yes, a gas lens helps provide a wider coverage of shielding gas around the arc. This protection can lead to a more stable arc and fewer weld defects, especially when welding out of position or in windy conditions.
Question: What should I do if my TIG arc is sputtering?
Answer: Sputtering can be caused by several things: a contaminated tungsten electrode, too long of an arc length, incorrect amperage for the material, or poor shielding gas flow. Check these factors and adjust accordingly.
Question: Is it possible to have too steady an arc?
Answer: Not really. The goal is a stable, consistent arc. However, if you’re focusing only on keeping the arc length perfect and neglecting other factors like travel speed or filler metal control, the overall weld quality might still suffer.
Final Thoughts
Keeping that TIG arc steady is all about balance. You need the right distance between your tungsten and the metal, a good amount of heat from the amperage, and a smooth way of adding filler. Your speed of movement along the weld joint matters a lot too.
By practicing these things, you’ll see your welds get better. Focus on watching the puddle and letting your hands learn the rhythm. You’ve got this!