It’s frustrating when you’re ready to weld and your TIG welder just won’t start an arc. This is a super common problem, especially when you’re new to TIG welding. It can feel like a big mystery, but usually, the fix is pretty simple.
We’ll walk through the most likely reasons why Why Is My TIG Welder Not Producing Arc? and give you easy steps to get back to welding. Let’s figure out what’s going on.
Key Takeaways
- You will learn the most common reasons a TIG welder won’t start an arc.
- We will explain how to check your power settings and connections.
- You will discover how gas flow affects arc initiation.
- We will cover the importance of a clean tungsten electrode.
- You’ll find out how to troubleshoot common torch and ground clamp issues.
- Simple, step-by-step solutions will be provided to get your welder working again.
Why Is My TIG Welder Not Producing Arc?
When your TIG welder refuses to create that magical arc, it’s easy to feel stuck. This is a challenge many beginners face. The good news is that most of the time, the issue isn’t with the welder itself, but with a simple setting or connection that’s out of place.
Let’s explore the common culprits and how to fix them so you can get back to creating great welds.
Power and Settings: The First Place to Look
The most basic reason your TIG welder isn’t making an arc is that it’s not getting the power it needs, or the settings aren’t quite right. Think of it like trying to turn on a light switch without electricity. Everything needs to be connected and set up correctly for it to work.
Is It Plugged In?
This might sound obvious, but double-check that your welder is plugged into a working outlet. Ensure the power cord is securely connected to both the machine and the wall socket. If you’re using an extension cord, make sure it’s heavy-duty enough for your welder’s power needs.
Circuit Breaker Tripped?
Your welder draws a lot of power. If the circuit breaker for the outlet has tripped, the welder won’t get any power. Go to your electrical panel and see if any breakers are in the middle position or flipped off.
Reset any tripped breakers.
Voltage Selector Switch
Some welders have a voltage selector switch. Make sure this switch is set to the correct voltage for your power source. If it’s set incorrectly, the machine might not turn on or function properly.
Amperage and Polarity Settings
For DC TIG welding (which is common for steel and stainless steel), you’ll typically use DC Electrode Negative (DCEN). If your welder is set to DC Electrode Positive (DCEP) or AC, it won’t initiate an arc correctly for most materials. Check your machine’s manual to see where these settings are.
AC is used for aluminum and magnesium.
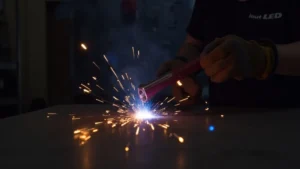
Gas Flow: The Unsung Hero of TIG
TIG welding requires a shielding gas, usually Argon, to protect the weld pool from contamination in the air. If you don’t have gas flowing, or if it’s not flowing correctly, you won’t get a stable arc. The gas also plays a role in arc initiation.
Is the Gas Cylinder Open?
It’s easy to forget to open the valve on your Argon tank. Make sure the main valve on top of the cylinder is fully open. You should hear the gas flowing when you press the torch button (if your machine has a gas solenoid).
You might also need to open the regulator valve slightly.
Regulator and Flowmeter
Your gas regulator controls the pressure from the tank, and the flowmeter shows you how much gas is actually flowing to the torch. Check that the regulator is set to the correct pressure, usually between 15-25 cubic feet per hour (CFH) for most TIG applications. If the flowmeter is showing zero, there might be a blockage or the tank is empty.
Gas Lens or Standard Collet Body
The gas lens helps direct the shielding gas more smoothly and broadly over the weld. If you’re using a standard collet body without a gas lens, the gas flow might not be distributed effectively, especially at lower amperages, making it harder to start the arc.
Leaky Connections
Check all the connections in your gas system. This includes the connection from the regulator to the tank, the hose to the regulator, and the hose to the welder. Even a small leak can let enough air in to prevent a good gas shield and hinder arc start.
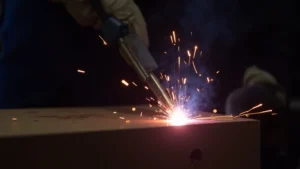
The Torch and Consumables: Your Direct Link to the Arc
Your TIG torch is where the magic happens. If the components inside the torch aren’t set up right, or if they’re worn out, you’ll have trouble creating an arc.
Tungsten Electrode Issues
The tungsten electrode is what actually initiates the arc. It needs to be properly prepared and clean.
- Grind the Tungsten: Tungsten electrodes for DC welding should be ground to a sharp point. This helps focus the arc. For AC welding (aluminum), you typically leave a slightly rounded or balled tip.
- Contamination: If the tungsten tip touches the weld puddle or filler metal, it can get contaminated. A contaminated tip won’t start an arc reliably. If this happens, snip off the contaminated tip and re-grind it.
- Correct Tungsten Type: Different tungsten types are used for different materials and currents. Pure tungsten (green band) is generally not recommended for most TIG. Thoriated (red band) or Ceriated (grey band) are common for DC. Lanthanated (blue or gold band) is versatile for both AC and DC. Using the wrong type can affect arc stability.
- Tungsten Stickout: The amount of tungsten sticking out of the torch cup matters. Too much stickout can make it hard to start the arc and can lead to contamination. Aim for about 1/4 to 1/2 inch (6-12mm).
Collet and Collet Body
The collet holds the tungsten electrode in place. Make sure the collet is the correct size for your tungsten. If it’s too loose, the tungsten will wobble.
The collet body houses the collet and attaches to the torch handle.
Torch Gas Nozzle (Cup)
The ceramic cup directs the shielding gas. If it’s cracked, chipped, or clogged, it can disrupt gas flow. Ensure it’s clean and the correct size for your application.
Larger cups generally provide better gas coverage.
Torch Cable and Connections
Check the torch cable for any damage, such as cuts or kinks. Also, make sure the torch is securely connected to the welder. A loose connection can prevent the arc from forming.
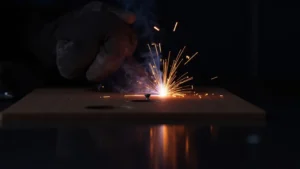
Ground Clamp: Completing the Circuit
For any electrical circuit to work, it needs a complete path. In welding, the ground clamp provides one side of that path. If the ground clamp isn’t making good contact, the circuit is broken, and you won’t get an arc.
Secure Connection to the Workpiece
Ensure the ground clamp is attached firmly to the piece you are welding. It needs to be on clean, bare metal. Paint, rust, or grease will prevent a good electrical connection.
Secure Connection to the Welder
The ground clamp cable must also be securely attached to the ground terminal on your TIG welder. Check for any corrosion or damage at this connection point. A loose or corroded ground connection is a common cause of arc starting problems.
Properly Sized Ground Clamp
Make sure your ground clamp is heavy enough for the amperage you are using. A small clamp might overheat or not make sufficient contact on larger projects.
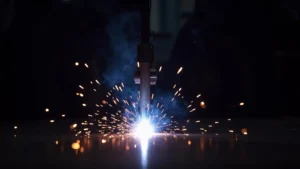
High-Frequency (HF) Start Issues
Most modern TIG welders use high-frequency (HF) start to help initiate the arc without touching the tungsten to the workpiece. If your HF start isn’t working, you might struggle to start an arc, especially if you don’t have a lift-arc or scratch-start option.
HF Start Setting
Check your welder’s settings to ensure HF start is turned on. There might be different modes: high, low, or off. Make sure it’s set to high or low for arc starting.
Electrode Gap
There’s a small gap between the tungsten electrode and the HF points inside the torch. If this gap is too large or too small, the HF arc might not jump effectively. Consult your welder’s manual for the correct gap setting, and how to adjust it if necessary.
HF Starting Intensity
Some machines allow you to adjust the intensity of the HF start. If it’s set too low, it might not be powerful enough to jump the gap to start the arc. Try increasing the intensity.
Damage to HF Components
The HF start system involves components within the torch and the welder. If these are damaged, they can fail to produce the necessary spark. This is less common for beginners but can happen.
Lift Arc vs. Scratch Start
Some TIG welders offer a “lift arc” feature. This allows you to touch the tungsten to the workpiece gently, and then lift it slightly to initiate the arc. It’s a gentler alternative to scratch starting (where you drag the tungsten like a match).
Lift Arc Functionality
If you’re trying to use lift arc and it’s not working, ensure the feature is enabled in your welder settings. The sensitivity of the lift-arc can sometimes be adjusted.
Scratch Start Technique
If your welder doesn’t have HF or lift-arc, you’ll need to use scratch start. This involves quickly dragging the tungsten across the workpiece like striking a match and then lifting it to establish the arc. It requires a bit of practice.
Troubleshooting Steps: A Practical Approach
When you encounter the problem, follow these steps systematically:
- Check Power: Is the welder plugged in? Is the breaker on?
- Verify Settings: Is the polarity correct (DCEN for steel)? Is the amperage set reasonably high to start?
- Inspect Gas: Is the tank open? Is the regulator set? Is gas flowing from the torch when you press the button?
- Examine Torch: Is the tungsten properly seated and sharp/balled? Is the cup clean and secure? Is the electrode sticking out the right amount?
- Test Ground: Is the ground clamp making solid contact with clean metal on the workpiece and on the welder?
- Review HF Start: If applicable, is HF start enabled?
If you’ve gone through these steps and still have no arc, it might be time to consult your welder’s manual for specific troubleshooting or contact the manufacturer.
Frequently Asked Questions
Question: Why won’t my TIG welder strike an arc when I press the torch button?
Answer: This can be due to several reasons, including power supply issues, incorrect settings (like polarity), no gas flow, a contaminated or improperly prepared tungsten electrode, a poor ground connection, or a problem with the high-frequency start system.
Question: My TIG welder has power, but I can’t get an arc. What’s the first thing I should check?
Answer: Start with the simplest things: ensure your ground clamp is making good, clean contact with the workpiece and the welder. Then, check your polarity setting and gas flow.
Question: I have Argon gas, but I still can’t start an arc. What else could it be?
Answer: Make sure the gas cylinder valve is fully open and that the regulator is set correctly to provide gas flow. Also, check for any leaks in the gas line or connections.
Question: My tungsten electrode is clean and sharp, but I still can’t get an arc. What’s next?
Answer: Inspect the tungsten stickout. If it’s too long, it can make arc starting difficult. Also, ensure the collet and collet body are correctly sized and seated, and check the ceramic cup for damage or obstructions.
Question: I’m trying to weld aluminum and can’t get an arc. What’s different?
Answer: For aluminum, you need to use AC (Alternating Current) mode. Ensure your welder is set to AC, and your tungsten is prepared for AC welding (usually a slightly balled tip). Proper gas flow and a clean ground are also critical.
Final Thoughts
Getting your TIG welder to produce an arc is about checking the basics. When Why Is My TIG Welder Not Producing Arc?, remember it’s usually not a major defect. Power, settings, gas, the torch consumables, and a solid ground connection are your main checks.
Most of the time, a simple adjustment or fix in one of these areas will solve the problem. Don’t get discouraged; with a little patience and systematic troubleshooting, you’ll be welding again in no time.