It’s common for new welders to wonder, “Why Is My TIG Weld Bead Uneven?” TIG welding looks simple, but getting smooth, consistent beads takes practice. Lots of people find it tricky at first. Don’t worry, though!
This guide will show you the easy steps to fix it. We’ll go over what makes your bead wonky and how to make it nice and even. Let’s start fixing those wavy lines!
Key Takeaways
- You’ll learn the main reasons TIG weld beads become uneven.
- Discover how to control your heat for a smoother bead.
- Understand the impact of filler metal and how to use it right.
- Find out how travel speed affects your weld bead appearance.
- Learn the importance of torch angle and consistency.
- Gain confidence in creating even TIG weld beads.
Understanding Uneven TIG Weld Beads
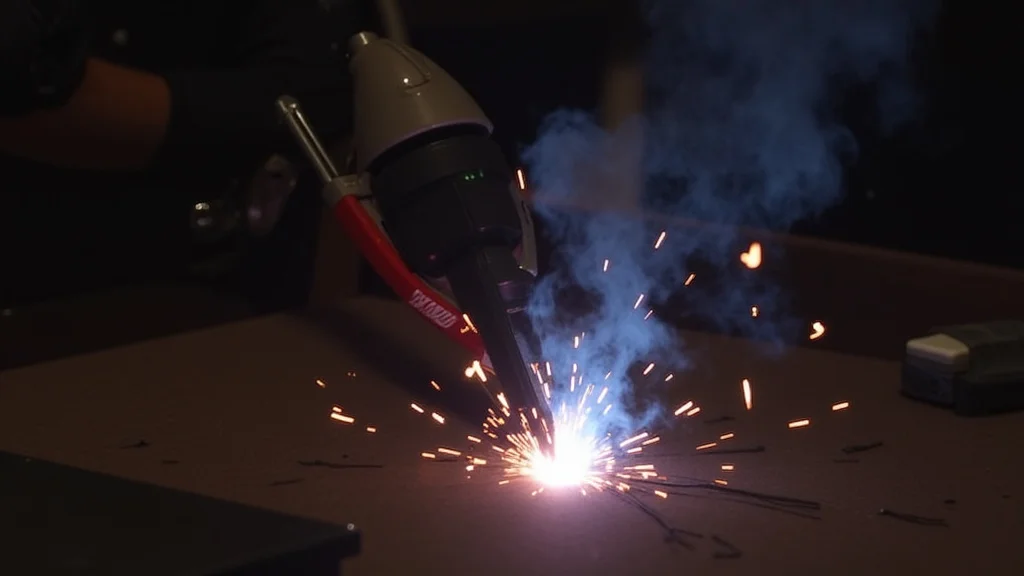
Seeing a wobbly TIG weld bead can be frustrating. It often happens because TIG welding requires you to manage three things at once: the welding torch, the filler rod, and the foot pedal (or gas pedal) that controls your power. When these aren’t in sync, the heat and metal flow get out of balance.
This is why beginners often struggle with getting a nice, flat, consistent bead.
Heat Control is Key
The biggest reason for an uneven TIG weld bead is often heat. Too much heat, and the metal melts too fast, spreading out unevenly. Too little heat, and the metal doesn’t flow properly, creating lumps or gaps.
Too Much Heat
When you apply too much heat, the base metal melts too quickly. This causes the weld puddle to become very large. If you don’t add filler metal at the right rate, or if your travel speed is too fast, the puddle can spread out thinly in some areas and bulge in others.
This results in a bead that is wider than it is tall, often with thin edges that can look wavy or irregular. You might also see excessive melting of the base metal, which is called ‘washout’.
Too Little Heat
Conversely, not enough heat creates a different set of problems. The weld puddle will be small and may not fully fuse with the base metal. This leads to a bead that looks like it’s sitting on top of the metal rather than being integrated into it.
It can appear lumpy, unevenly spaced, or have noticeable gaps. Sometimes, it looks like a series of small bumps rather than a smooth, flowing bead. This is often called ‘cold lap’ or ‘lack of fusion’.
The Role of Filler Metal
The filler rod is what you add to the molten puddle to build up your weld. How you add it makes a big difference to the bead’s appearance.
Adding Filler Rod Too Fast
If you dunk the filler rod into the puddle too quickly or too often, you can overwhelm the molten pool. This dumps extra metal in one spot, causing a bulge or lump in your bead. It can also cool down the puddle, leading to inconsistent fusion.
The bead will look uneven because you’re adding metal in bursts rather than a steady stream.
Adding Filler Rod Too Slow or Not Enough
If you don’t add enough filler metal, or if you add it too slowly, you won’t have enough material to fill the puddle properly. This will result in a narrow, often concave bead, or even gaps where metal should be. The bead might appear to have dips and peaks because the filler metal isn’t keeping up with the melting of the base metal.
It’s like trying to build a wall with too few bricks; it just won’t be smooth or uniform.
Incorrect Filler Rod Diameter
Using a filler rod that is too thick for the job can also cause problems. You might end up adding too much metal too quickly, leading to large, uneven beads. If the rod is too thin, you might not be able to build up the bead sufficiently, resulting in a shallow, uneven bead.
The size of the filler rod should match the thickness of the material you’re welding and the size of the weld you’re trying to achieve.
Travel Speed and Consistency
How fast you move your TIG torch along the joint is critical. It directly impacts how long the metal stays molten and how the filler metal flows into the puddle.
Moving Too Fast
If you move the torch too quickly, you don’t give the weld puddle enough time to form properly or for the filler metal to integrate. This results in a narrow, often “stringy” bead that can have gaps and cold laps. The bead will look uneven because there isn’t enough deposited metal to create a smooth, consistent surface.
It’s like trying to draw a line too quickly; it comes out shaky and thin.
Moving Too Slow
When you move too slowly, you’re essentially applying heat to the same spot for too long. This can cause excessive melting, leading to a very wide, flat, and sometimes wavy bead. The edges can get thin and might even sag or droop.
You might also burn through the material if you’re not careful. The puddle becomes too large to control, and the bead will look spread out and irregular.
Inconsistent Travel Speed
The worst offender is often inconsistent travel speed. If you speed up and slow down randomly, your heat input will vary. This causes the weld puddle to swell and shrink, leading to an uneven bead with varying widths and heights.
The appearance will be a series of bulges and narrow sections, looking very unprofessional. The key is to maintain a steady, even pace.
Torch Angle and Position
The angle at which you hold your TIG torch affects how the arc melts the metal and how the filler rod enters the puddle. A consistent angle is vital for a uniform bead.
Incorrect Torch Angle
Holding the torch at too steep an angle, or consistently changing the angle, can direct the heat unevenly. This can cause one side of the bead to melt more than the other, resulting in an asymmetrical and uneven bead. For example, if you’re always pushing the torch forward at a sharp angle, you might be melting more of the leading edge than the trailing edge.
Torch Angle Variations
Even slight, random changes in your torch angle during the weld can cause the bead to widen or narrow inconsistently. The arc might hit the base metal at different points, altering the shape and size of the molten puddle. This leads to a bead that looks like it’s ‘wobbling’ its way along the joint.
Off-Center Arc
If the arc isn’t centered on the joint or the filler rod, you’ll get uneven heating and deposition of metal. For instance, if the arc is always closer to one edge of the joint, that edge will melt more, and the bead will be thicker on that side.
Arc Length Matters
The distance between the tip of your tungsten electrode and the workpiece (the arc length) is another factor that influences bead appearance.
Arc Length Too Long
A long arc length spreads the heat out more. This can lead to a wider, flatter bead that lacks penetration. It also makes the arc less stable, causing it to ‘wander’ slightly.
This instability can result in an uneven bead that looks somewhat fuzzy or irregular along its edges. It’s harder to control the molten puddle when the arc is too far away.
Arc Length Too Short
A very short arc length can cause tungsten contamination. This happens when small bits of tungsten break off and get into the weld puddle. Tungsten inclusions are a defect that weakens the weld.
A short arc can also make it difficult to see the puddle clearly and can lead to ‘sugaring’ or oxidation on the weld if you’re not using good shielding gas.
Inconsistent Arc Length
Like inconsistent travel speed, an inconsistent arc length means the heat input is constantly changing. This causes the weld puddle to grow and shrink unpredictably, leading to an uneven bead profile. The arc length should be consistent, typically about the diameter of your tungsten electrode.
Shielding Gas Issues
Your shielding gas protects the molten weld puddle from oxygen and other contaminants in the air. If it’s not flowing correctly, it can seriously affect your weld bead.
Insufficient Gas Flow
If your shielding gas flow rate is too low, or if there’s a breeze disrupting the gas shield, the weld puddle will be exposed to the air. This causes oxidation, which can make the weld bead look rough, discolored, and uneven. You might see a powdery residue on the weld surface called ‘sugaring’.
This poor protection means the metal doesn’t flow smoothly.
Gas Flow Too High
While less common for causing uneven beads, excessively high gas flow can cause turbulence. This turbulence can actually pull in air and contaminate the weld. It can also blow away the molten puddle, making it difficult to control and leading to inconsistent deposition of filler metal and an uneven bead.
Wrong Type of Gas
While pure Argon is standard for TIG welding most metals, using the wrong gas for a specific application (like aluminum) can also affect bead appearance. For instance, if you use straight Argon on thicker steel where a mix might be better, you might get less desirable bead characteristics.
Troubleshooting Common Issues
Let’s look at how to fix some specific problems you might see.
The “Chicken Track” Bead
This is a bead that looks like a series of overlapping semicircles, often called a “stack of dimes” look. While sometimes desired, if it’s uneven, it’s not what you want.
- Cause: Usually from inconsistent filler rod dips and travel speed. You’re essentially creating small, individual puddles and joining them.
- Fix: Aim for a smooth, sweeping motion. Instead of dipping the rod, try to feed it into the puddle continuously. Focus on maintaining a steady travel speed and consistent torch movement. Think of it as flowing metal, not stacking dimes.
The “Washout” Bead
This is when the edges of your weld bead are very thin and almost disappear into the base metal, or you’ve melted away too much of the base metal.
- Cause: Too much heat, moving too fast, or holding the arc too close to the edge of the joint.
- Fix: Reduce your amperage slightly. Increase your travel speed a little, but not too much. Ensure your torch angle is perpendicular to the joint and that the arc is centered. Try to add filler metal slightly ahead of the puddle’s furthest melting point.
The “Lumpy” Bead
This bead has distinct humps or high spots along its length.
- Cause: Adding filler rod too quickly or too frequently, or inconsistent travel speed where you pause too long.
- Fix: Slow down your filler rod addition. Try to feed the rod into the leading edge of the puddle smoothly. Maintain a consistent, slightly faster travel speed. Ensure you’re not stopping and starting the torch motion.
The “Pinched” or Narrow Bead
This bead is much narrower than desired and may have little penetration.
- Cause: Not enough heat, moving too fast, or not enough filler metal.
- Fix: Increase your amperage slightly. Slow down your travel speed. Ensure you are adding enough filler metal to properly fill the puddle.
Practicing for Perfection
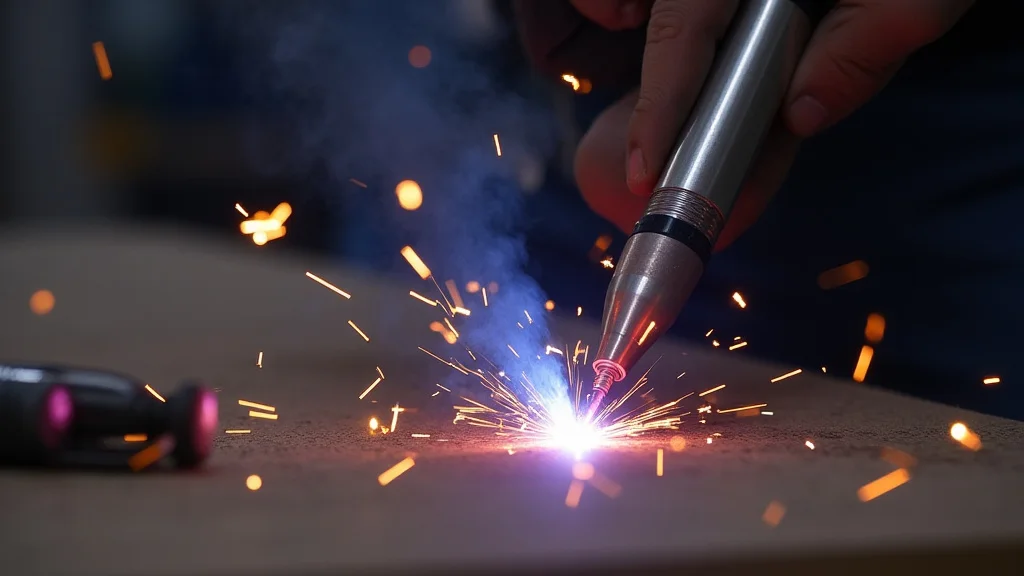
The best way to overcome an uneven TIG weld bead is practice. Here’s how to make your practice time more effective:
- Start with the basics: Practice establishing your arc and maintaining a consistent arc length.
- Focus on one thing at a time: On scrap pieces, try to focus only on your travel speed for a whole bead. Then, work on your filler rod technique.
- Use a steady hand: Rest your arm or wrist on a stable surface if possible. This helps reduce hand tremors and makes your movements smoother.
- Observe the puddle: Watch how the molten puddle behaves. Learn to anticipate its size and shape changes based on your heat and speed.
- Listen to your torch: The sound of the arc can sometimes tell you if you’re too close or too far away.
- Different materials: Practice on different metal thicknesses and types (like mild steel and then aluminum) to feel the differences in heat requirements.
Frequently Asked Questions
Question: What is the most common mistake beginners make with TIG welding?
Answer: The most common mistake is not managing the three key elements – torch, filler rod, and foot pedal – smoothly and at the same time. This leads to inconsistent heat and metal deposition, making the bead uneven.
Question: Should I move the filler rod in a circular motion?
Answer: No, a circular motion for the filler rod is usually not recommended for smooth beads. It’s better to gently feed the rod into the leading edge of the puddle with a steady, forward motion. Some slight side-to-side movement might be used on wider beads, but continuous circles will create lumps.
Question: How do I know if I have enough shielding gas?
Answer: You should see a light, consistent “veil” of gas around the molten puddle. The weld shouldn’t look discolored or have a powdery residue (sugaring) after welding. A simple flow meter on your gas bottle will help you set the correct flow rate, usually around 15-25 CFH (cubic feet per hour) depending on the application.
Question: What’s the best way to start a TIG weld bead?
Answer: The best way to start is to scratch the tungsten on the workpiece to initiate the arc (scratch start) or use a high-frequency start if your machine has it. Once the arc is established and you have a small puddle, begin feeding the filler rod into the leading edge of the puddle while moving your torch forward at a steady speed.
Question: How can I make my TIG welds look like a professional did them?
Answer: Achieving professional-looking welds comes from consistent practice. Focus on smooth travel speed, steady filler rod feeding, consistent arc length, and proper torch angle. Observing experienced welders and getting feedback on your work will also help you improve.
Final Thoughts
Fixing an uneven TIG weld bead is all about control. You’ve learned that heat, filler rod speed, and how fast you move are the main players. By paying attention to your torch angle and arc length, you can make big improvements.
Consistent practice will help you feel these elements naturally. Focus on smooth movements and watching that puddle. Soon, your beads will look smooth and even.