It’s a common question for anyone learning to MIG weld: Why Is My MIG Weld Not Penetrating Properly?. You want your welds to be strong, and that means they need to go deep enough into the metal. Sometimes, it feels tricky to get that right when you’re starting out.
Don’t worry, it’s a puzzle many new welders face. We’ll break down the common reasons and give you simple steps to fix it. Get ready to make better, deeper welds with ease.
Key Takeaways
- You will learn the main reasons why MIG welds lack penetration.
- You will discover how wire speed and voltage affect weld depth.
- You will understand the role of travel speed and angle.
- You will find out how to choose the right welding gas.
- You will learn about the importance of clean metal for good penetration.
- You will get practical tips to improve your MIG weld penetration.
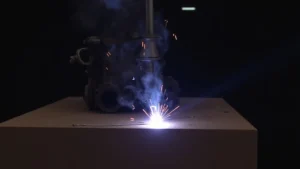
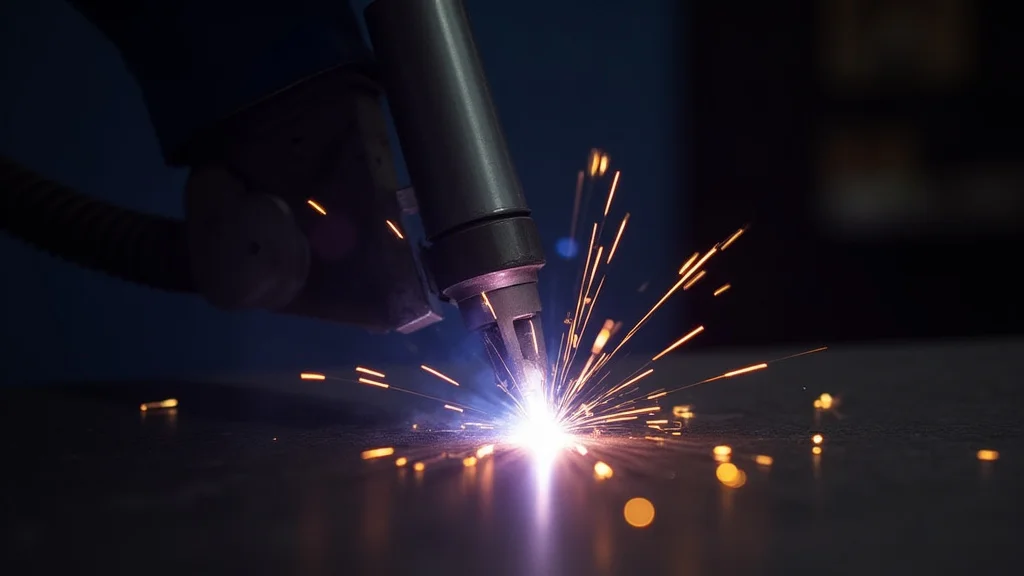
Understanding MIG Weld Penetration
What is Weld Penetration?
Weld penetration is how deep your weld metal goes into the base metal. Think of it like how deep a nail goes into wood. For MIG welding, good penetration is key.
It means your weld is strong. It fuses the pieces together well. A weld that doesn’t go deep enough is weak.
It can break easily. This is especially true for jobs that need to hold a lot of weight or stress.
Why is Good Penetration Important?
Good penetration makes your weld strong. It creates a solid bond. This is vital for safety and durability.
Imagine a bridge or a car part. If the welds aren’t deep, they could fail. This can cause serious accidents.
For many projects, especially structural ones, deep penetration is not just good; it’s required.
Common Reasons for Poor Penetration
Incorrect Amperage and Voltage Settings
Your MIG welder has settings for voltage and wire speed. These work together to control the heat and current. If your settings are too low, you won’t have enough heat.
The metal won’t melt enough to allow the weld to go deep. It’s like trying to melt butter with a small candle. It just won’t get hot enough.
Voltage
Voltage affects the arc length. A higher voltage usually means a longer arc. This gives you more heat.
It helps the weld pool spread out and melt deeper. Too low a voltage makes a short, choppy arc. This doesn’t put enough heat into the metal.
Wire Speed
Wire speed controls how fast the welding wire feeds into the weld. It’s directly related to amperage. Faster wire speed means more amperage.
More amperage means more heat. If the wire speed is too slow, the amperage will be low. This means not enough heat to get good penetration.
Wrong Travel Speed
How fast you move your welding gun along the seam matters a lot. If you move too quickly, you don’t give the weld pool enough time to melt into the metal. The metal behind the gun cools too fast.
It’s like trying to draw a deep line by dragging your finger very fast. You won’t make a deep mark.
Moving Too Fast
When you move too fast, you’re essentially just laying down hot metal on the surface. It doesn’t get a chance to mix and fuse with the base material below. The weld might look okay on top, but it’s weak underneath.
Moving Too Slow
Moving too slowly can also be a problem. It can lead to too much heat building up. This can burn through thin metal.
It can also create a large, floppy weld puddle. This makes it hard to control and can still lead to poor fusion if the puddle is too big to manage correctly.
Incorrect Gun Angle
The angle of your welding gun relative to the metal affects how the molten metal flows. For MIG welding, a slight push or pull can make a difference. The angle also helps direct the heat where you want it.
Push vs. Pull
In MIG welding, you generally “push” the weld. This means the gun is angled slightly forward in the direction you are welding. Pushing the weld can help the weld puddle stay flatter.
It also allows for better visibility. A slight pull angle can sometimes be used for specific situations, but for general deep penetration, pushing is often preferred.
Off-Angle Travel
If you’re not holding the gun straight, the heat and metal won’t be applied evenly. This can create a lopsided weld bead. The deepest part of the weld might not be where you need it to be.
Keep the gun perpendicular to the joint for consistent results.
Contaminated Base Metal
The metal you are welding must be clean. Dirt, oil, rust, paint, or even a thin layer of mill scale can get in the way. These contaminants prevent the molten metal from properly fusing with the base material.
It’s like trying to glue two pieces of wood that have dirt on them. The glue won’t stick well.
Types of Contamination
Common contaminants include grease, oil, paint, rust, and dirt. Even a thin film of this stuff can stop your weld from penetrating deeply. It can also cause defects like porosity (little holes) in your weld.
Cleaning the Metal
Always clean the metal before you weld. Use a wire brush, grinder, or a degreaser. Make sure the area where you’re welding is free of any gunk.
Wrong Welding Gas
The gas you use in MIG welding is important. It shields the weld pool from the air. It also affects how the arc behaves and how much heat is generated.
Different gases and gas mixes are better for different metals and applications.
Types of Gases
For steel, 100% CO2 or a mix of Argon and CO2 are common. Argon is a noble gas that helps create a hotter, more fluid weld puddle. CO2 adds more heat and helps with penetration, but it can cause more spatter (little drops of molten metal flying out).
Pure Argon is usually used for aluminum.
Gas Flow Rate
If your gas flow rate is too low, you won’t get enough shielding. This can lead to a weak, porous weld. If it’s too high, the gas can create turbulence.
This can pull air into the weld. It can also blow the shielding gas away from the weld pool.
Incorrect Wire Type or Diameter
The welding wire you use needs to match the metal you are welding. Using the wrong type of wire means you won’t get a strong bond. The diameter of the wire also matters.
Wire Diameter
Thicker wire needs more amperage to melt. If you use thick wire on thin metal, you’ll likely burn through. If you use thin wire on thick metal, you might not get enough heat and filler material for deep penetration.
Common sizes for general steel work are 0.023″, 0.030″, and 0.035″.
Wire Type
There are solid wires and flux-cored wires. Solid wires are typically used with a shielding gas. Flux-cored wires have a flux inside them that creates its own shielding gas.
Some flux-cored wires are designed for deep penetration and can be very effective on thicker materials.
Wrong Machine Settings for Material Thickness
Every welding machine has a recommended setting chart. This chart tells you what to set your voltage and wire speed to for different material thicknesses. Ignoring this chart is a common mistake.
Using the Chart
Find the chart on your welder, in the manual, or online for your specific machine and wire. It’s a great starting point. You can then adjust slightly based on your observations.
Adjusting Based on Observation
The chart is a guide. You’ll learn to make small adjustments. If the weld looks like it’s not penetrating, you might need to increase the heat (higher voltage and/or wire speed).
If you’re burning through, you need to decrease it.
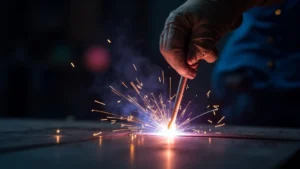
Fixing Poor Penetration: A Step-by-Step Guide
Step 1: Clean Your Metal Thoroughly
Before you even turn on your welder, grab a wire brush or a grinder. Scrub the metal where you plan to weld. Make sure it’s shiny and free of any rust, paint, oil, or dirt.
This is the first and one of the most important steps. Clean metal is essential for a good weld.
Step 2: Check Your Wire Speed and Voltage
Consult your welder’s chart for the thickness of metal you’re working with. Set your wire speed and voltage according to the chart. If you’re still not getting enough penetration, try increasing the voltage slightly.
Then, adjust the wire speed to keep the arc sound. Often, you’ll need a slightly hotter setting than the chart suggests for maximum penetration.
| Material Thickness (Gauge) | Wire Speed (IPM) | Voltage |
|---|---|---|
| 24-20 (Thin) | 100-200 | 15-17 |
| 18-16 (Medium) | 200-350 | 17-19 |
| 14-10 (Thick) | 350-500+ | 19-22+ |
Note: These are general estimates. Always refer to your welder’s manual for specific recommendations. IPM stands for Inches Per Minute.
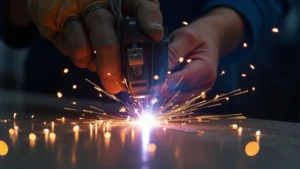
Step 3: Adjust Your Travel Speed
Move your welding gun at a steady pace. You want the weld puddle to be about as wide as your wire diameter. If the puddle is too small, you’re likely moving too fast.
If it’s getting too large and floppy, you might be moving too slow, or your heat is too high.
Step 4: Maintain the Correct Gun Angle
Hold the welding gun so it’s pointing slightly forward in the direction you’re welding (a push angle). Keep the gun as straight as possible, perpendicular to the joint. Avoid jerky movements.
Step 5: Verify Your Shielding Gas
Make sure your gas cylinder valve is open and the regulator is set correctly. You should have a steady flow of gas coming from the nozzle when you pull the trigger (with the tip away from the metal). Check the flow rate – usually around 20-25 cubic feet per hour (CFH) is good for most applications.
Listen for a gentle hiss, not a roar.
Step 6: Use the Right Wire and Nozzle
Ensure you’re using the correct diameter wire for your drive rolls and the metal thickness. If you’re welding thicker steel and want better penetration, consider using a slightly larger diameter wire (e.g., 0.035″ instead of 0.023″) if your machine can handle it. Make sure your nozzle is clean; spatter buildup can disrupt gas flow.
Step 7: Practice on Scrap Metal
The best way to improve is to practice. Get some scrap pieces of the same metal you’ll be welding. Try different settings and techniques.
Look at the back of your weld (if possible) to see how deep it went. This feedback is invaluable.
Advanced Tips for Deeper Welds
Using a Longer Stick-Out
The “stick-out” is the length of welding wire that extends from the contact tip to the end of the weld pool. A slightly longer stick-out (e.g., 1/2 inch to 3/4 inch) can increase amperage. This is because the wire has more electrical resistance as it travels further through the contact tip.
More amperage generally means more heat and better penetration.
Preheating Thicker Materials
For very thick metals (like 1/4 inch or thicker), preheating the metal can significantly improve penetration. Heating the metal before welding reduces the temperature difference the arc has to overcome. This allows the weld pool to melt deeper into the base material.
Use a propane torch or oxy-acetylene torch for preheating.
Beveling Edges
When welding thick materials, you often need to create a “joint.” This means grinding away one or both edges of the metal to create a V-shape or U-shape. This bevel allows the weld metal to reach all the way down to the root of the joint, ensuring full penetration. Always ensure you have a small land (the flat edge left after beveling) to prevent burn-through.
Consider Flux-Cored Wire
For applications where deep penetration is critical, especially on thicker metals or in windy conditions, flux-cored wire can be a great option. Many flux-cored wires are designed to produce a more forceful spray arc that drives molten metal deeper into the joint.
Troubleshooting Common Issues
Spatter Everywhere!
Excessive spatter often means your settings are off, your gas flow is incorrect, or you have a dirty contact tip. Check your voltage and wire speed. Ensure your shielding gas is flowing steadily.
Clean the contact tip regularly.
Weld Looks Like a Sausage on Top
This is a classic sign of poor penetration. The weld metal is just sitting on the surface. It likely means your heat input is too low (voltage and wire speed) or you’re moving too fast.
Increase your heat and slow down your travel speed.
Burn-Through
This happens when you melt all the way through the base metal. It usually means your heat input is too high for the material thickness, or you’re moving too slowly. For thin materials, you might need to reduce voltage and wire speed or use a faster travel speed.
Frequently Asked Questions
Question: What is the most common mistake beginners make with MIG penetration?
Answer: The most common mistake is not cleaning the metal properly. Rust, paint, and oil prevent the weld from fusing correctly. Also, beginners often set their machine too low for the material thickness.
Question: How can I tell if my MIG weld has good penetration?
Answer: For flat welds, you can often see a slight “fishtail” or ripple on the back side of the weld. On thicker materials, you might need to cut a sample weld and check the cross-section. A good weld will show fusion all the way down into the joint.
Question: Can I use CO2 gas for better penetration on steel?
Answer: Yes, CO2 gas can provide deeper penetration than pure Argon because it creates a hotter, more forceful arc. However, it also tends to produce more spatter. A common mix is 75% Argon and 25% CO2, which balances penetration with reduced spatter.
Question: My MIG welder manual suggests a setting, but it still doesn’t penetrate. What should I do?
Answer: The manual settings are a starting point. You might need to slightly increase the voltage and wire speed to get deeper penetration, especially if your metal is slightly dirty or you’re dealing with slightly thicker material than recommended. Always ensure your metal is clean first.
Question: Is travel speed more important than heat settings for penetration?
Answer: Both are very important and work together. You need enough heat (from voltage and wire speed) to melt the metal. But if you move too fast, that heat won’t have time to go deep.
So, you need the right balance of both heat and travel speed.
Final Thoughts
Getting good MIG weld penetration is all about making sure you have enough heat and time for the metal to fuse properly. Start with clean metal. Use the right settings from your welder’s chart, but don’t be afraid to make small adjustments.
Slow down your travel speed and keep your gun angle steady. Practice makes perfect. By paying attention to these simple steps, you’ll see a big difference in your welds.