Learning to MIG weld can seem a bit tricky at first. Many beginners wonder, What Are the Most Important MIG Welding Techniques? It’s a common question because getting these right makes a big difference in your welding. Don’t worry, we’ll break it down simply.
We’ll go step-by-step to help you build strong, clean welds. Next, we’ll look at the basic steps to get you welding like a pro.
Key Takeaways
- Proper wire speed and voltage settings are key for good welds.
- Gun angle affects weld penetration and bead appearance.
- Travel speed controls the width and height of your weld bead.
- Maintaining a consistent arc length is vital for a stable weld.
- Understanding different welding positions helps achieve stronger joints.
- Clean metal is essential for a clean and strong weld.
What Are the Most Important MIG Welding Techniques?
MIG welding, also known as Gas Metal Arc Welding (GMAW), is popular because it’s relatively easy to learn. But to get good results, you need to know the right ways to do things. These aren’t super complicated, and with practice, they become second nature.
We’ll explore the techniques that make the biggest difference in your welds.
Setting Your Welder Up Right
Before you even strike an arc, setting your welder correctly is a big deal. This means getting the wire speed and voltage just right for the metal you’re welding. It’s like setting the temperature on your oven before you bake.
Too hot, and you burn through; too cold, and the weld won’t stick well.
Wire Speed
The wire speed controls how fast the welding wire feeds out of the gun. Think of it as controlling the fuel for your fire. If it’s too slow, you get a lumpy, inconsistent weld.
If it’s too fast, the wire sputters and doesn’t melt properly into the metal. You want a smooth, steady feed.
Voltage
Voltage affects the arc’s heat. It’s like the intensity of your flame. Too low a voltage and the weld won’t penetrate the metal enough, leading to a weak joint.
Too high a voltage can cause the arc to be unstable, leading to a wide, flat bead and potential spatter. Finding the sweet spot makes the arc smooth and the weld melt deep enough.
Most welding machines have suggested settings for different metal thicknesses. These are good starting points. You’ll often need to fine-tune them based on your specific setup and how the weld looks as you practice.
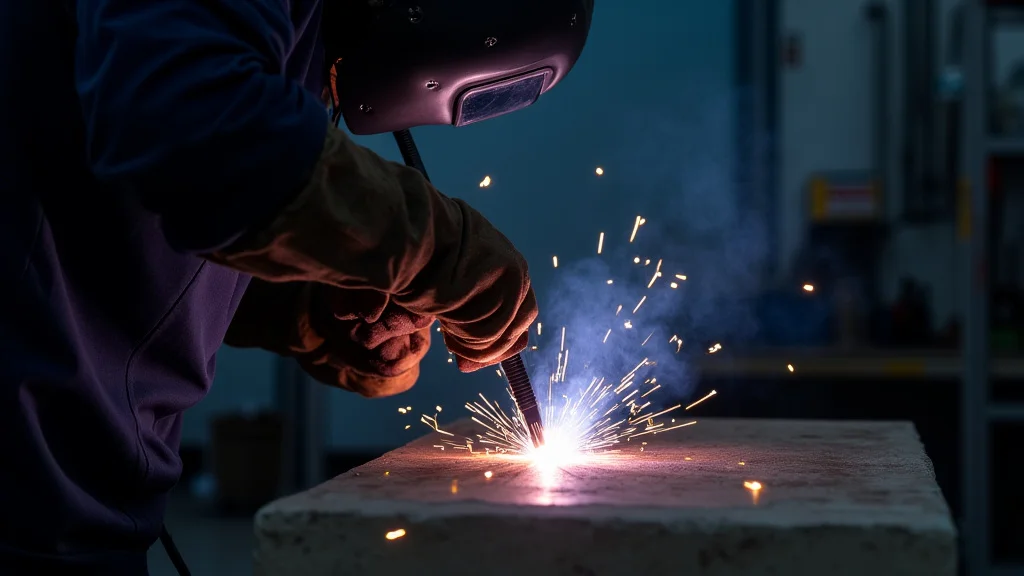
Gun Angle Matters
How you hold and move the welding gun is super important. The angle you hold it at can really change how your weld turns out.
Pushing vs. Pulling (Work Angle)
In MIG welding, you generally ‘push’ the weld. This means moving the gun forward in the direction you’re welding. This technique helps push the shielding gas ahead of the puddle, protecting it from the air.
Pushing also tends to create a flatter, wider bead with good penetration.
Pulling the gun (moving it backward) is less common with solid wire and spray transfer modes. It can create a taller, narrower bead but might not offer the same gas protection. For most beginner MIG welding, stick to pushing.
Gun Tilt (Travel Angle)
The angle you tilt the gun up or down is also key. You usually want the gun tilted slightly forward, maybe 10-15 degrees, in the direction of your travel. This helps the molten metal flow correctly and works with the shielding gas.
Holding the gun straight up and down isn’t usually the best. A slight forward tilt helps steer the puddle and get the right amount of heat where you need it. It’s a small adjustment that makes a big difference.
Travel Speed
This is simply how fast you move the welding gun along the joint. It controls the shape and size of your weld bead. It’s like painting – too fast and you miss spots, too slow and you glob it on.
If you move too fast, your weld bead will be narrow and might not penetrate the metal enough. It might look like a thin line sitting on top of the metal. If you move too slow, the molten metal builds up too much, creating a wide, possibly ropey bead that might have undercut (a groove at the edge of the weld).
You’re aiming for a consistent speed that lets the metal melt and fuse together properly, creating a smooth, even bead. The speed will change based on the metal thickness and the settings you’re using.
Maintaining a Consistent Arc Length
The arc is the spark that melts the metal. Keeping the distance between the tip of the welding gun and the metal consistent is vital. This distance is called the arc length.
A short arc length means the tip is very close to the metal. This can lead to a loud, crackling sound and a narrow bead. A long arc length means the tip is further away.
This can cause the arc to be unstable, spatter a lot, and produce a wider, flatter bead that might not penetrate well.
You want a nice, steady hum from your welder. A consistent arc length helps create that smooth, stable weld that fuses the metals together strongly.
Understanding Welding Positions
Welding isn’t always done on a flat surface. You’ll encounter different positions, and each requires a slight adjustment to your technique.
Flat Position (1G/1F)
This is the easiest position, where you’re welding on a horizontal surface. Gravity is your friend here. Your main focus is on gun angle, travel speed, and arc length.
Horizontal Position (2G/2F)
Here, you’re welding on a vertical surface, with the joint running horizontally. Gravity will try to pull the molten metal down. You’ll need to adjust your travel speed and potentially your gun angle to counteract this.
Often, a slightly faster travel speed and a small weave can help.
Vertical Position (3G/3F)
Welding up or down a vertical joint is more challenging. Welding ‘uphill’ is generally preferred for MIG. This involves moving the gun upwards with a slight pause at the top of each pass.
This allows the molten metal to build up and solidify before more metal is added. Welding ‘downhill’ is faster but can lead to less penetration and a weaker weld. Careful control of heat and travel speed is crucial.
Overhead Position (4G/4F)
This is the most difficult position. You’re welding from underneath a joint. Gravity is definitely not your friend here, as the molten metal wants to drip.
You need to use a faster travel speed and a shorter arc length to minimize the puddle size and prevent it from sagging or dripping.
Metal Preparation
This is often overlooked but is one of the most important techniques for a strong weld. You can have the best technique in the world, but if your metal is dirty, your weld will suffer.
Cleaning the Metal
Always start with clean metal. This means removing any rust, paint, oil, grease, or mill scale. A wire brush or a grinder works well for this.
If you’re welding on painted or coated metal, you’ll need to clean the area thoroughly around the weld joint.
Contaminants on the metal can cause porosity (little holes) in your weld, reduce the strength of the joint, and make it harder to get a good arc. Clean metal is the foundation of a good weld.
Shielding Gas
MIG welding uses a shielding gas to protect the molten weld puddle from the air. The air contains oxygen and nitrogen, which can weaken the weld and cause defects. The gas flows from the welding gun along with the wire.
Common shielding gases include pure argon, a mix of argon and CO2, or pure CO2. The type of gas used depends on the type of metal you’re welding and the welding process (e.g., spray transfer vs. short circuit).
For mild steel, a mix of 75% argon and 25% CO2 is very common. It provides a good balance of penetration and arc stability.
Make sure your gas flow rate is set correctly. Too little gas won’t provide enough protection, and too much can cause turbulence and actually draw in air. A flow rate of 15-25 cubic feet per hour (CFH) is typical.
Stickout and Nozzle Angle
Stickout is the length of the welding wire that extends beyond the contact tip. A general rule of thumb is to maintain a stickout of about 1/4 to 1/2 inch. Too long a stickout can lead to poor shielding and a less stable arc.
Too short a stickout can cause you to accidentally touch the contact tip to the workpiece, which can damage the tip and interrupt the weld.
The nozzle angle refers to the angle of the welding gun’s nozzle relative to the workpiece. While the work angle (pushing/pulling) and travel angle are about the overall gun direction, the nozzle angle is more about how the nozzle itself is oriented. You want the nozzle to be pointed at the weld joint so that the shielding gas flows evenly around the arc and the molten puddle.
Practice and Consistency
The most important technique of all is practice. No amount of reading will replace actually doing it. The more you weld, the better you’ll become at recognizing what a good weld sounds, looks, and feels like.
Consistency is key. Try to hold your gun at the same angle, move at the same speed, and maintain the same arc length throughout your weld. This consistency will lead to uniform, strong welds.
Frequently Asked Questions
Question: What is the most common mistake beginners make with MIG welding?
Answer: A very common mistake is not cleaning the metal properly before welding. Dirt, rust, or paint can cause weak welds and introduce defects like porosity.
Question: How do I know if my MIG welder settings (wire speed and voltage) are correct?
Answer: Good settings produce a smooth, steady arc with minimal spatter and a weld bead that has good penetration and a consistent width. If the arc is too crackly or spattery, or the bead is too wide and flat or too narrow and tall, your settings likely need adjusting.
Question: Should I push or pull the MIG gun?
Answer: For most MIG welding applications with solid wire, you should ‘push’ the gun. This means moving it forward in the direction of the weld. Pushing helps with gas coverage and typically creates a flatter, wider weld bead.
Question: What is ‘stickout’ in MIG welding?
Answer: Stickout is the length of the welding wire that extends from the end of the contact tip. Maintaining a consistent stickout, usually between 1/4 and 1/2 inch, is important for proper arc stability and shielding gas coverage.
Question: How important is the welding position when MIG welding?
Answer: The welding position is very important. Flat welds are easiest, but horizontal, vertical, and overhead positions all require adjustments to your travel speed, gun angle, and technique to counteract gravity and ensure a strong weld.
Final Thoughts
Mastering MIG welding comes down to a few key techniques. Getting your settings right, controlling your gun angle, maintaining a steady travel speed, and keeping a consistent arc length are vital. Don’t forget to start with clean metal for the best results.
Practice these techniques regularly. You’ll build confidence and create strong, clean welds. Keep welding; you’ll get better with every bead.