Learning to weld can feel a little confusing at first. You might wonder, What Are the Best Welding Practices for Beginners? It’s okay to feel that way! There are many things to learn, but we’ll make it simple.
This guide will show you the easy steps to get started. We’ll cover the most important tips to help you weld safely and well. Get ready to learn how to make strong, good-looking welds.
Key Takeaways
- You will learn about the basic types of welding and which might be best for starting.
- We will explain the importance of safety gear and how to use it properly.
- You will discover how to set up your welding machine for different jobs.
- Simple tips for making clean and strong welds will be shared.
- How to practice and improve your welding skills will be covered.
Getting Started with Welding: What You Need to Know
Choosing Your First Welder
When you’re new to welding, picking the right machine is a big step. There are a few types, but for beginners, MIG welding is often the easiest. MIG stands for Metal Inert Gas.
It’s called that because it uses a gas to protect the weld from air. A MIG welder feeds wire through a gun. This wire melts and joins the metal.
It feels a bit like using a hot glue gun, but it makes very strong connections.
Another common type is Stick welding, also called Shielded Metal Arc Welding (SMAW). This uses a metal rod coated in flux. The flux melts and creates a gas to protect the weld.
Stick welding can be good for thicker metals and outdoor jobs where wind might blow away the gas shield from MIG welding. However, it can create more sparks and smoke, and the slag (a burnt coating) needs to be cleaned off.
TIG welding, or Tungsten Inert Gas, is known for making very clean and precise welds. It uses a non-consumable tungsten electrode and a separate filler rod. TIG welding is great for thin metals and when you need perfect-looking welds.
But it has a steeper learning curve and requires more control. For most beginners, starting with a MIG welder is a good way to build confidence.
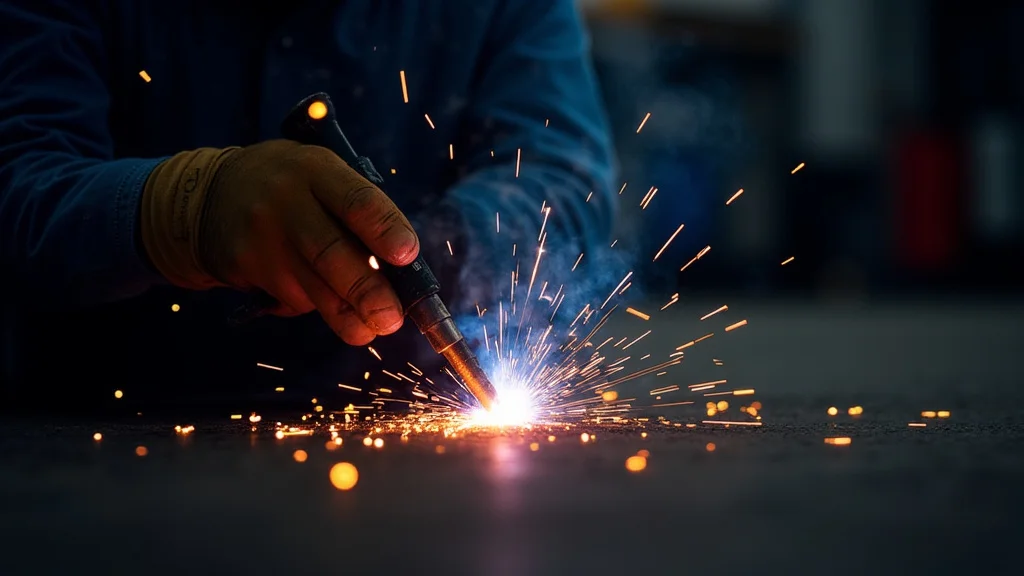
Safety First: Your Shield Against Danger
Welding is amazing, but it’s also serious work. Safety is the most important thing to think about. You need to protect yourself from heat, sparks, UV light, and fumes.
Never weld without the right gear. It’s not optional; it’s essential for your health.
Your welding helmet is your eyes’ best friend. It has a special lens that darkens when you strike an arc. This stops the bright light and UV rays from hurting your eyes.
Get an auto-darkening helmet if you can. It makes starting and stopping welds much easier. Always make sure the shade is right for the type of welding you’re doing.
You also need protective clothing. Wear a flame-resistant jacket and pants. Leather is a good choice because it doesn’t burn easily.
Make sure there are no holes or frayed edges. Wear sturdy leather gloves to protect your hands from heat and sparks. Also, wear closed-toe leather boots, not sneakers.
Anything that could catch fire or let sparks in should be avoided.
Ventilation is another key safety point. Welding produces fumes that can be harmful if you breathe them in for too long. Always weld in a well-ventilated area.
If you can’t get good airflow, use a fume extractor or wear a respirator mask designed for welding fumes. Your health today and in the future depends on this.
Setting Up Your Welder: Finding the Sweet Spot
Getting your welder set up correctly is like tuning a guitar before playing a song. It helps you make good sounds, or in this case, good welds. For MIG welding, you’ll adjust the voltage and wire speed.
Think of voltage as the heat and wire speed as how fast the metal comes out.
Too little heat or wire speed, and your weld won’t melt into the metal properly. This is called a lack of fusion. Too much heat or wire speed, and you might burn holes through your metal or create a messy weld.
The perfect setting depends on the type and thickness of the metal you are welding.
A good starting point for thin steel (around 1/8 inch thick) with a MIG welder might be around 16-18 volts and a wire speed of 150-200 inches per minute. For thicker steel, you’ll need more heat and faster wire speed. Your welder’s manual will have charts to help you find good starting points.
Don’t be afraid to experiment a little to find what works best for your specific project.
The Welding Gun: Your Tool for Connection
The welding gun is what you hold and aim at the metal. It’s where the wire comes out and the welding spark begins. Keeping your gun and its parts clean and in good shape is important for smooth welds.
The tip at the end of the gun is where the wire exits. It can wear out over time and should be replaced.
The nozzle, which surrounds the tip, helps direct the gas shield. If it gets clogged with spatter (little blobs of melted metal), the gas won’t protect the weld properly. Clean it regularly.
Also, make sure the liner inside the gun is free of kinks. A kinked liner can stop the wire from feeding smoothly.
When you weld, you’ll hold the gun at a certain angle. For MIG welding, it’s usually best to push the gun, not pull it. Pushing helps the gas shield cover the weld better.
Keep the gun at a consistent angle, usually about 10-15 degrees from straight up and down. This helps create a good bead shape.
Getting the Metal Ready: A Clean Start
You can’t weld dirt and expect good results. The metal you are joining needs to be clean. This means removing any rust, paint, oil, or grease.
These things can cause problems in your weld. Rust can make your weld weak. Paint and oil can create fumes and cause splatters.
Grease can create porosity (little holes) in your weld.
You can clean metal using a wire brush, sandpaper, or a grinder. A wire wheel on a grinder is very effective for removing rust and scale. For lighter cleaning, sandpaper or a Scotch-Brite pad works well.
If the metal has paint or oil, you might need a degreaser or solvent.
Beyond just cleaning, you might need to prepare the edges of the metal. If you’re joining two thick pieces of metal together, you might want to bevel the edges. This means grinding a V-shape along the edges.
This allows the weld metal to get deep into the joint and create a strong bond.
Making Your First Welds: Practice Makes Progress
Now for the exciting part: making a weld! For beginners, practicing on scrap pieces of metal is the best way to learn. Get some flat pieces of steel and practice making straight lines and then circles.
Hold the welding gun at a consistent distance from the metal. This is called your stick-out. For MIG welding, a stick-out of about 1/2 inch is often a good place to start.
Keep your hand steady. Try to move at a smooth, constant speed. You’re looking for a consistent bead of metal that looks like a neat row of ripples.
When you start, you might notice a few things. If your weld looks like it’s piling up too high and is very rough, you might be moving too slow or have too much heat. If you’re burning through the metal or the weld looks thin and weak, you might be moving too fast or not have enough heat.
It takes practice to get the feel for the right speed and heat.
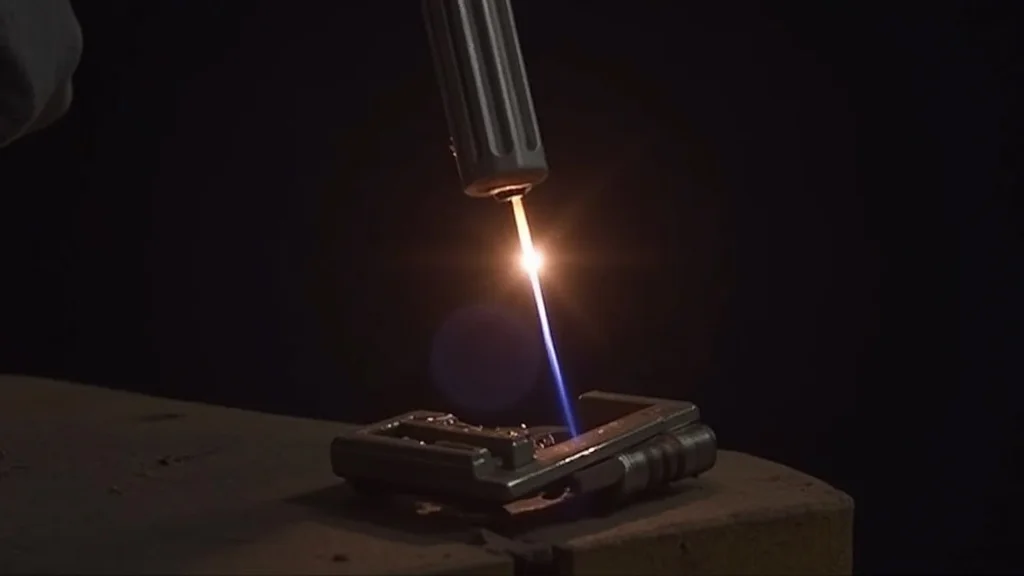
Controlling the Arc: The Heart of the Weld
The arc is the bright, hot light you see when you weld. It’s what melts the metal. Controlling the arc means keeping it steady and in the right place.
For MIG welding, try to keep the arc length consistent. This is the distance between the tip of the welding wire and the metal surface. If the arc is too long, it can cause spatter and a weaker weld.
Imagine you’re trying to draw a line with a crayon. You want to keep the crayon at the same angle and pressure. Welding is similar.
Try to maintain a consistent angle with your welding gun and a steady pace. Your goal is to create a puddle of molten metal that you can control.
As you move the gun, the molten puddle will follow. You want to keep the puddle at a size that you can manage. If the puddle gets too big, it can sag or even fall through on thin metal.
On thicker metal, a larger puddle can help you join pieces faster. It’s all about finding that balance.
Common Mistakes and How to Fix Them
Everyone makes mistakes when learning to weld. It’s part of the process! One common mistake is not cleaning the metal properly.
As we discussed, this leads to weak welds. Always start with clean metal.
Another mistake is inconsistent travel speed. If you move too fast, the weld won’t have enough penetration. If you move too slow, you can overheat the metal or create a big, messy bead.
Try to practice moving at a steady pace. You can even use a piece of chalk to draw a line on your scrap metal to follow.
Spatter is also a common issue. This is when small drops of molten metal fly off the weld. It can happen for many reasons, including incorrect voltage, dirty metal, or a long arc length.
Keeping your welding gun tip clean and using the right settings will help reduce spatter.
Burn-through is when you melt a hole in your metal. This usually happens on thinner materials or when the heat setting is too high. If you do burn through, you might be able to fix it by moving the arc quickly across the hole to bridge it, but it’s best to avoid it by adjusting your settings.
Practicing Different Positions
Most beginners start by welding on a flat surface. This is called flat position welding. It’s the easiest because gravity helps you control the molten puddle.
But in real-world projects, you’ll often need to weld in other positions.
Welding in the horizontal position means welding across a flat plate. The puddle can sag a bit. You’ll need to use a slightly faster travel speed and maybe a little less heat to prevent this.
Welding in the vertical position means welding up or down. Welding upwards is generally easier. You’ll use a tighter arc and a faster speed to push the puddle against the metal.
Overhead welding is the most challenging. You’re welding while lying on your back, with sparks and molten metal falling down. It requires a lot of control, a tight arc, and a very fast travel speed to keep the puddle from falling.
Start with flat, then move to horizontal, then vertical, and finally overhead as you get more comfortable.
Your Welding Toolkit: Beyond the Machine
Besides your welder and safety gear, there are a few other tools that are very handy. A wire brush is essential for cleaning metal. A chipping hammer is used to remove slag from stick welds, but it can also be useful for knocking off spatter from MIG welds.
Pliers are great for holding metal, adjusting wire speed on some welders, and pulling off hot pieces. You’ll also want a grinder with a wire wheel and a grinding disc. This is incredibly useful for cleaning metal, shaping edges, and smoothing welds.
Just remember to wear your safety glasses even when using a grinder.
Clamps are very important for holding your metal pieces together while you weld. Good quality C-clamps or welding clamps can make a big difference in how stable your work is. Finally, a good tape measure and a marker will help you lay out your projects accurately.
Frequently Asked Questions
Question: What is the easiest type of welding for a complete beginner?
Answer: MIG welding is generally considered the easiest for beginners. It’s more forgiving and has a learning curve that feels more accessible than Stick or TIG welding.
Question: How thick of metal can I weld with a basic beginner welder?
Answer: Most entry-level MIG welders can handle metal from about 18-gauge (very thin) up to around 1/4 inch thick. Thicker materials might require multiple passes or a more powerful machine.
Question: Do I need to wear a mask when welding indoors?
Answer: Yes, absolutely. Welding produces harmful fumes and UV light regardless of whether you are indoors or outdoors. Proper ventilation and a welding helmet are always necessary.
Question: How close should the welding gun be to the metal?
Answer: For MIG welding, a common starting point is to have about a 1/2 inch distance between the tip of the welding gun and the metal. This is called the stick-out.
Question: How can I get my welds to look smooth like a professional?
Answer: Smooth welds come from consistent speed, steady hand movements, and proper heat settings. Practice is key, and focusing on creating an even bead with controlled ripples will help you achieve a smoother look.
Final Thoughts
Learning What Are the Best Welding Practices for Beginners? is all about starting with the right safety, choosing an easy machine, and practicing consistently. You’ve learned about picking a welder, gearing up safely, setting up your machine, and preparing your metal. Practicing on scrap pieces, controlling your arc, and fixing common mistakes are all part of growing your skills.
Keep practicing, stay safe, and enjoy creating strong, useful things with your welding.
Leave a Reply