Working with thin sheet metal can feel tricky at first. You might wonder How to Set Up TIG Welder for Thin Sheet Metal so you don’t burn holes right through it. It’s a common worry for folks just starting out with TIG welding.
But don’t worry, it’s easier than you think! We’ll walk through it step-by-step, keeping things simple and clear. Get ready to learn what settings work best and how to get great results without frustration.
Key Takeaways
- You’ll learn the right amperage settings for thin metals.
- Discover the best tungsten and gas combinations for delicate work.
- Understand how to adjust your arc length and travel speed effectively.
- Get tips on preparing your thin sheet metal for welding.
- Learn how to practice and build confidence with thin materials.
Understanding Thin Sheet Metal TIG Welding
Why Thin Metal is Different
TIG welding thin sheet metal presents unique challenges. Unlike thicker materials that can absorb more heat, thin metal can quickly overheat. This can lead to burn-through, warping, and a weakened weld.
The goal is to apply just enough heat to fuse the metal without melting through it. This requires a finer touch and more precise control over your welding machine settings.
The Importance of Machine Settings
Your TIG welder has several settings that greatly affect how it performs on thin sheet metal. Getting these dialed in correctly is the first big step. The main settings you’ll focus on are amperage, gas flow rate, and sometimes pulse settings.
Each plays a crucial role in managing heat and achieving a clean, strong weld.
Essential TIG Welder Settings for Thin Metal
Amperage: The Heat Control Knob
Amperage is the amount of electrical current your welder sends out. For thin sheet metal, you need a low amperage. Too high, and you’ll burn a hole.
Too low, and the metal won’t fuse. The exact setting depends on the thickness of the metal and the type of metal you’re welding.
General guidelines for amperage:
- 24-gauge steel (approx. 0.024 inches): 30-60 amps
- 22-gauge steel (approx. 0.030 inches): 50-75 amps
- 20-gauge steel (approx. 0.036 inches): 60-90 amps
- Aluminum (thin): Often requires slightly higher amperage than steel, but still needs careful control. Start around 60-80 amps for very thin aluminum and adjust.
Always start at the lower end of the range and make small adjustments up as needed. It’s easier to add a little more heat than to fix a burn-through.
Gas Flow Rate: Shielding Your Weld
TIG welding uses a shielding gas, usually Argon, to protect the molten weld pool from air. This prevents contamination and ensures a strong weld. For thin sheet metal, you still need good shielding, but you don’t need excessive gas flow.
Too much gas can cause turbulence, which can also pull in air.
A good starting point for Argon flow is 10-15 cubic feet per hour (CFH). You can adjust this based on how the gas seems to be flowing. You should see a steady stream of gas, but not a wild rush.
Pulse TIG Welding: A Game Changer
Pulse TIG welding is incredibly useful for thin metals. It works by rapidly switching the amperage between a high peak current and a lower background current. This allows the weld puddle to cool slightly during the background phase, reducing overall heat input.
Here’s how pulse settings help:
- Peak Amperage: The high setting, responsible for melting the metal.
- Background Amperage: The low setting, where the weld puddle cools and solidifies. A good starting point is 30-50% of your peak amperage.
- Pulse Frequency (PPS): How often the welder switches between peak and background. For thin metals, a slower frequency (1-5 Hz) can give you more control and a wider bead. Faster frequencies (50-200 Hz) create a more concentrated, narrower bead, which can be good for high-speed welding but is less forgiving on thin materials.
- Pulse Width (Duty Cycle): The percentage of time spent at peak amperage. A common setting is 50%, meaning it spends half the time at peak and half at background.
Experiment with these settings. For instance, on 24-gauge steel, you might set peak amperage at 60 amps, background amperage at 30 amps, frequency at 2 Hz, and pulse width at 50%.
Choosing the Right Consumables
Tungsten Electrodes
The tungsten electrode is what creates the arc. For thin metals, you want a smaller diameter tungsten. This helps to focus the arc and provides more precise control.
- Common Sizes: 0.040 inches (1.0mm) or 1/16 inch (1.6mm) are excellent choices for thin sheet metal.
- Type: Pure tungsten is generally not recommended. Ceriated (grey band) or Lanthanated (blue band) tungsten are good all-around choices. Lanthanated is often preferred for AC welding of aluminum and DC welding of steel.
- Grind: A finely ground, pointed tip on your tungsten is crucial for a stable, focused arc.
Filler Metal
If you need to add filler material, choose a thin rod that matches your base metal. The diameter of the filler rod should be appropriate for the thickness of the sheet metal.
- Steel: ER70S-2 or ER70S-6 in very thin diameters (e.g., 0.030″ or 0.035″).
- Aluminum: 4043 or 5356 in thin diameters.
For some very light gauge work, you might even be able to “flame cut” or fuse the edges together without filler metal, but this requires excellent control.
Preparing Your Thin Sheet Metal
Cleaning is Key
Just like with any welding, cleanliness is paramount. Thin sheet metal can be easily compromised by rust, paint, oil, or dirt. These contaminants can cause porosity (tiny holes) and weak welds.
- Steel: Use a stainless steel wire brush or a flap disc to remove any rust, mill scale, or coatings. Then, wipe down the area with acetone or a specialized metal cleaner.
- Aluminum: Aluminum oxide forms a tough layer on the surface. Use a dedicated stainless steel brush (never use a brush on steel for aluminum) or a chemical cleaner to remove this layer. Acetone is also a good solvent for removing oils.
Clean both sides of the metal if possible, especially near the weld joint.
Fit-Up and Fixturing
Proper fit-up is critical. Gaps are harder to bridge on thin materials. Ideally, the edges should meet squarely.
For thin metals, fixturing is highly recommended to prevent warping and movement. This can include:
- Clamps: Use C-clamps or specialized welding clamps to hold the metal securely.
- Copper or Aluminum Backing Bars: These conduct heat away from the weld area, helping to prevent burn-through and distortion. They also provide a nice, flat surface for the weld puddle to form against.
- Copper or Aluminum Tacks: For tack welding, you can use small pieces of copper or aluminum as temporary fixtures to hold parts in place.
Technique for Thin Metal Welding
Arc Length and Travel Speed
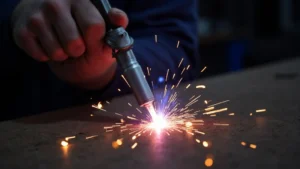
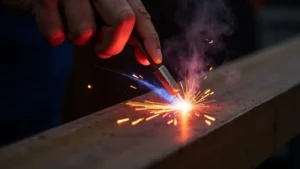
Your arc length is the distance between the tungsten and the work piece. For thin metals, a short arc length is best. This concentrates the heat and arc force.
Travel speed is how fast you move the torch along the weld joint. You need to move quickly enough to keep the puddle from getting too large, but slowly enough to ensure good fusion.
Practice finding that sweet spot where the puddle is just the right size and you’re moving at a consistent pace. It’s a feel you develop over time.
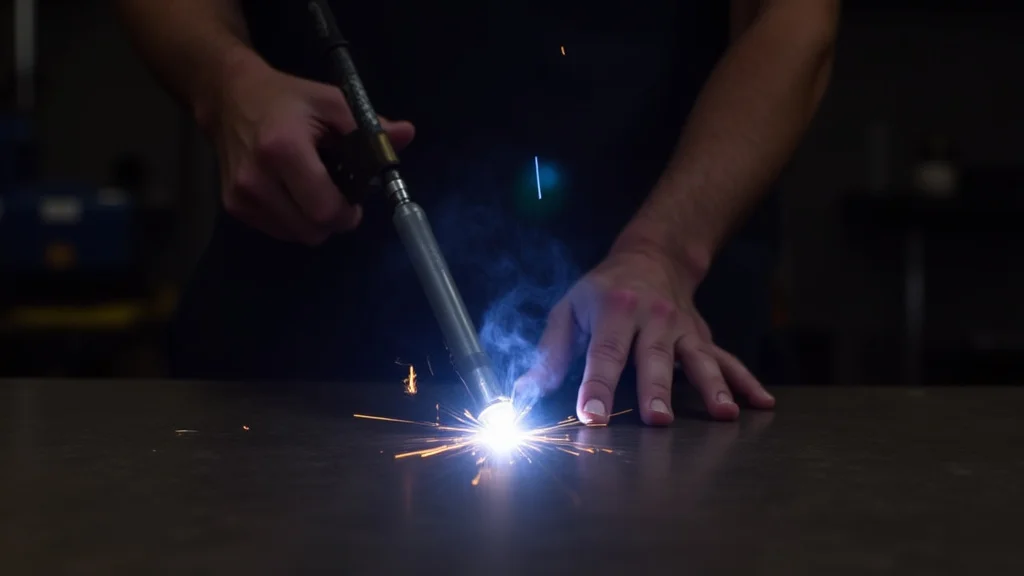
Starting Your Weld
Starting a weld on thin metal can be tricky. Avoid using a scratch start if possible, as this can contaminate your tungsten. Using a lift arc or high-frequency start is preferred.
If using lift arc, gently touch the tungsten to the metal and then lift it slightly (about the diameter of your tungsten) to establish the arc. If using high-frequency start, simply bring the torch close to the metal and press the button.
Adding Filler Metal
When adding filler, do so rhythmically. Dip the filler rod into the leading edge of the molten puddle. Don’t hold the filler rod in the puddle for too long, as this adds excessive heat.
Think of it as a dance between your torch and the filler rod, pushing the puddle forward and adding just enough filler to keep it controlled.
Practicing Your Skills
Scrap Metal is Your Friend
Before you weld your actual project, grab some scrap pieces of the same thin metal you plan to use. This is the best way to get a feel for your settings and technique.
Try welding different joints: butt joints, lap joints, and corner joints. Pay attention to:
- How quickly the metal heats up.
- If you’re getting good penetration without burning through.
- The consistency of your bead.
Don’t be afraid to make mistakes. Every mistake is a learning opportunity. Adjust your settings and try again.
You’ll quickly learn what works and what doesn’t.
Troubleshooting Common Issues
Burn-Through
This is the most common problem. If you’re burning through:
- Reduce your amperage.
- Use a faster travel speed.
- Consider using pulse welding with a lower background amperage.
- Use a backing bar.
Warping
Thin metal can warp easily from heat. To minimize warping:
- Use tack welds to hold parts together before making the final weld.
- Weld in short segments, moving around the piece to distribute heat evenly.
- Use copper or aluminum backing bars to pull heat away.
- Consider clamping the piece to a heavy metal surface or workbench.
Poor Fusion
If your weld looks like it’s just sitting on top of the metal, you might not have enough heat or you’re moving too fast.
- Slightly increase amperage.
- Slow down your travel speed.
- Ensure your tungsten is clean and you have a proper arc.
Frequently Asked Questions
Question: What is the most important setting for welding thin sheet metal with a TIG welder?
Answer: The most important setting is amperage. You need to keep it low enough to avoid burning through the thin metal, but high enough to create a fusion weld.
Question: Can I TIG weld thin sheet metal without filler metal?
Answer: Yes, for some applications, especially very thin metals or certain joint types, you can fuse the edges together without adding filler metal. This requires excellent heat control.
Question: What kind of tungsten should I use for thin metals?
Answer: A smaller diameter tungsten, like 0.040-inch or 1/16-inch, is best. Lanthanated or Ceriated tungsten are good choices for general use.
Question: How do I prevent thin metal from warping when TIG welding?
Answer: Prevent warping by using tack welds, welding in short segments, using backing bars, and clamping the metal securely. Distributing heat evenly is key.
Question: Is pulse TIG welding necessary for thin sheet metal?
Answer: While not strictly necessary, pulse TIG welding is highly beneficial for thin metals. It helps control heat input, reduces the risk of burn-through, and can make achieving a good weld easier.
Final Thoughts
Mastering How to Set Up TIG Welder for Thin Sheet Metal comes down to controlling heat. Focus on low amperage, precise arc length, and steady travel speed. Pulse welding offers an extra layer of control that’s very helpful.
Always clean your metal well and practice on scrap before tackling your project. Small, consistent movements and careful observation of your weld puddle will lead to clean, strong welds. You’ve got this!