MIG welding can be tricky, especially when your welds aren’t heating up evenly. This is a common problem beginners run into, making it hard to get clean, strong joints. But don’t worry!
We’ll show you simple ways to fix this. You’ll learn what causes it and how to stop it. Get ready to improve your welding with easy steps.
Key Takeaways
- You will learn why MIG welds get too hot in some spots and not others.
- Discover how to adjust your MIG welder settings for better heat.
- Understand the role of your welding wire and gas in heat control.
- Find out how your welding technique affects heat distribution.
- Learn simple fixes to get consistent heat for great welds.
Why MIG Welds Get Too Hot in Spots
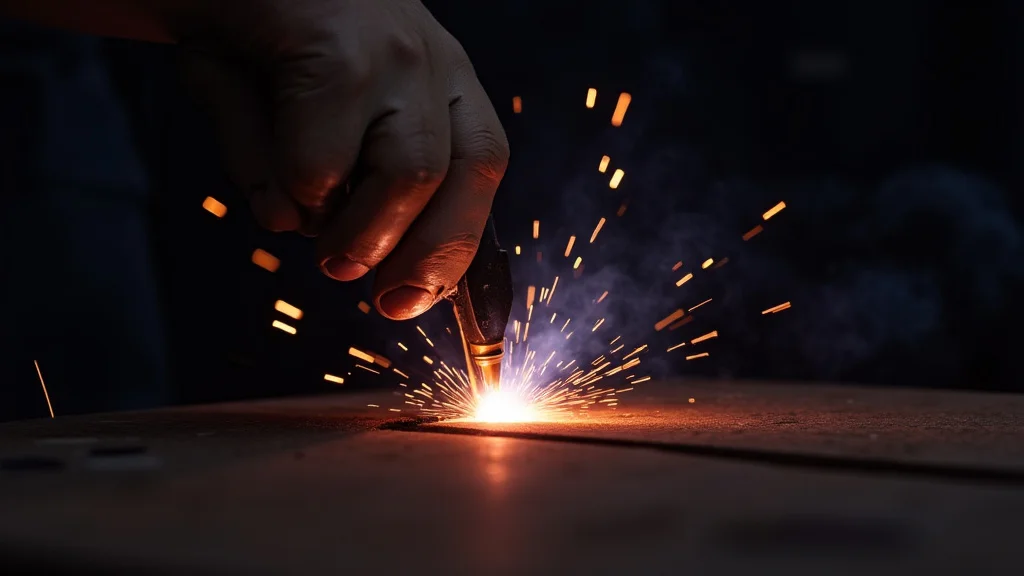
Sometimes, when you MIG weld, one part of your metal gets super hot, while another part stays too cool. This makes your weld look bad and can make it weak. We call this uneven heat distribution.
It’s like trying to toast bread and only getting one side browned.
For folks just starting out with MIG welding, this is a super common puzzle. It can be frustrating because you want your welds to look smooth and hold together really well. When the heat isn’t right, the metal can melt too much in one area, creating a hole, or not melt enough in another, leaving a weak spot.
This is exactly why knowing How to Fix Uneven Heat Distribution in MIG Welding is so important for building your skills.
Common Causes of Uneven Heat
Several things can make your MIG welds heat up unevenly. Let’s look at the main culprits.
Incorrect Machine Settings
Your MIG welder has knobs and buttons to control how it works. These settings tell the machine how much power to send to the welding wire and how fast the wire feeds out. If these aren’t set just right, the heat won’t be even.
Voltage and Amperage (Wire Speed)
Voltage and amperage are like the gas pedal and the engine power of your welder. Voltage controls the arc’s length and heat. Too high, and it’s too hot.
Too low, and it’s not hot enough. Amperage, which is closely tied to your wire feed speed, determines the amount of power. If your wire speed is too fast for the voltage, you’re sending too much metal into the weld pool too quickly, which can cool it down unevenly or blow through.
If it’s too slow, the arc might be too long and spattery.
Getting the balance between voltage and wire speed right is key. For thicker metals, you need more heat (higher amperage/wire speed and often higher voltage). For thinner metals, you need less heat.
When this balance is off, you get hot spots and cold spots.
Polarity Settings
Polarity tells the electricity which way to flow. For most MIG welding with solid wire and shielding gas, you want direct current electrode positive (DCEP). This means the electrode (your welding wire) is positive.
This pushes most of the heat into your workpiece, which is usually what you want for good penetration. If you accidentally set it to direct current electrode negative (DCEN), more heat stays in the wire, leading to a weak, spattery arc and poor fusion.
Welding Wire Issues
The wire you use is more than just metal. It affects how your weld heats and melts.
Wire Diameter
The thickness of your welding wire matters a lot. Thicker wires (like .035″ or .045″) carry more current and deliver more heat than thinner wires (like .023″ or .030″). If you’re using a wire that’s too thick for the metal you’re welding, you’ll likely overheat one area.
For thin sheet metal, you want a thinner wire. For thicker steel, a thicker wire is better.
Wire Type and Quality
Different types of welding wire are made for different jobs and metals. Using the wrong type of wire can cause issues. Also, low-quality wire might not feed smoothly, or it might have coatings that affect the weld.
A wire that doesn’t feed consistently can cause the arc to fluctuate, leading to uneven heat. Kinks or rust on the wire can also be problems.
Shielding Gas Problems
Shielding gas is like a protective blanket for your weld. It keeps air and other bad stuff out, which helps create a clean, strong weld. It also plays a role in how the arc behaves and where the heat goes.
Wrong Gas Mixture
For steel, common shielding gases are pure argon, or a mix of argon and carbon dioxide (CO2). A common mix is 75% argon and 25% CO2. This mix gives you a good balance of penetration and puddle control.
If you use too much CO2, the arc can become hotter and more forceful, potentially leading to more heat in one area. If you use pure argon on steel, you might get less penetration and a softer arc, which could also lead to uneven heating if not managed properly.
Low Gas Flow Rate
If your gas flow is too low, the shielding gas won’t fully cover your weld. This can cause porosity (little holes) and a weak weld. It can also make the arc unstable, causing it to wander and heat unevenly.
You want a steady, consistent flow that pushes away the air.
Leaky Connections or Gas Cylinder Issues
Even small leaks in your gas hose, regulator, or connections can reduce the amount of gas reaching your weld. A weak gas flow means poor shielding and an unstable arc, which directly impacts heat distribution.
Technique and Travel Speed
How you move your welding gun also has a big impact on heat. This is something beginners often struggle with.
Travel Speed
This is how fast you move the welding gun along the joint. If you move too slowly, you’re putting too much heat into one spot for too long, causing it to overheat and potentially burn through. If you move too fast, you won’t melt enough of the base metal, resulting in a weak weld with poor penetration.
Finding the “sweet spot” for your travel speed is vital for even heat.
Torch Angle
The angle of your welding gun matters. Pointing the gun too far in one direction can push the heat and molten metal that way. Generally, for MIG welding, you want to hold the gun at a slight push angle (about 10-15 degrees) and keep it straight across the joint as much as possible.
Pushing helps control the puddle and gives a smoother bead.
Stinger Angle (Electrode Stick-out)
This refers to how far the welding wire sticks out from the end of your welding gun’s contact tip. If the stick-out is too long, the wire heats up more before it reaches the workpiece, leading to a hotter, less controlled arc. Too little stick-out can cause the wire to get stuck or create a very concentrated, intense arc that might not spread heat evenly.
Material Issues
The metal you’re welding itself can play a role.
Material Thickness
This is a big one. Welding thin metal requires less heat than welding thick metal. If you try to use the same settings on both, you’ll overheat the thin metal and underheat the thick metal.
You need to adjust your voltage and wire speed (amperage) based on the thickness of the material.
Contamination
Rust, paint, oil, or dirt on the metal surface can cause problems. These contaminants can burn, spatter, and affect how the weld melts and fuses. It can lead to inconsistent heating and weak spots.
Material Type
Different metals conduct heat differently. For example, aluminum conducts heat much faster than steel. This means you need to adjust your settings and technique significantly when welding aluminum compared to steel.
If you use steel settings on aluminum, you’ll likely have major problems with heat control.
How to Fix Uneven Heat Distribution
Now that we know what causes the problem, let’s look at how to fix it and get those nice, even welds.
Adjusting Machine Settings
This is your first and most powerful tool for controlling heat.
Calibrate Your Voltage and Wire Speed
Most MIG welders have a chart on the machine or in the manual that gives you suggested settings for different material thicknesses and wire types. Start with these recommendations. Then, make small adjustments.
If the weld is too hot in one spot, you might need to slightly lower the voltage or the wire speed. If it’s not hot enough, you might need to increase them.
Think of it this way: For thin metals, you want a shorter arc (lower voltage) and a slower wire feed. For thicker metals, you want a longer arc (higher voltage) and a faster wire feed. Experimentation on scrap pieces is the best way to find the sweet spot.
Check Your Polarity
Always double-check that your welder is set to DCEP (DC Electrode Positive) for MIG welding with solid wire and shielding gas. This is usually a simple switch on the machine or a connection change.
Optimizing Your Welding Wire
The wire you use matters for consistent heat.
Choose the Right Wire Diameter
Use the appropriate wire diameter for your material thickness. For thin metals (18-22 gauge), a .023″ or .025″ wire is usually best. For medium thickness (1/8″ to 1/4″), .030″ or .035″ works well.
For thicker materials, .045″ or larger might be needed.
Use Quality Wire and Ensure Smooth Feeding
Buy your welding wire from a reputable supplier. Make sure the wire is clean and free of rust or kinks. Check your drive rolls in your feeder to ensure they are clean and the correct size for your wire.
Ensure the tension on the drive rolls is set properly – not too tight that it deforms the wire, and not too loose that it slips.
Proper Shielding Gas Setup
Your gas should be protecting your weld perfectly.
Select the Correct Gas Mixture
For general steel MIG welding, a 75% Argon / 25% CO2 mix is a good starting point. If you’re welding very thin steel and want a softer arc, you might try a mix with a bit less CO2. For stainless steel or aluminum, you’ll need different gas mixtures.
Set the Right Gas Flow Rate
The recommended gas flow rate is typically between 15-25 cubic feet per hour (CFH), depending on your nozzle size and welding conditions. You can often find recommendations in your welder’s manual. A good test is to turn on the gas flow and listen for a steady, quiet hiss.
Too much gas can cause turbulence, and too little won’t shield properly. A simple way to check is to move your welding gun away from the joint and briefly pull the trigger. You should hear the gas flowing smoothly for a second or two before the arc starts.
Inspect for Leaks
Check all your gas connections from the cylinder to the welding gun for leaks. You can use soapy water; if you see bubbles, you have a leak.
Refining Your Welding Technique
How you hold and move the gun is just as important.
Master Your Travel Speed
Practice moving at a consistent speed. When you’re welding, watch the puddle. If it’s getting too wide and flat, you’re likely moving too slowly.
If it’s too narrow and not spreading out, you’re moving too fast. You want a bead that is nicely rounded and fuses well into the base metal.
Maintain a Consistent Torch Angle
Hold the gun at a consistent slight push angle (around 10-15 degrees). Avoid whipping or moving the gun in erratic patterns. Keep it moving in a straight line along the joint.
Control Electrode Stick-out
Aim for about 3/8″ to 1/2″ (around 10-13 mm) of wire sticking out from the contact tip. This distance provides a good balance of heat and arc stability. If you have too much stick-out, reduce it.
If you have too little, extend it slightly.
Preparing Your Material
A clean workpiece leads to a better weld.
Clean the Metal Thoroughly
Always clean the metal before welding. Use a wire brush or grinder to remove rust, paint, oil, or any other contaminants. For aluminum, special cleaning brushes and solvents are needed.
Consider Material Thickness and Type
Always adjust your settings for the material thickness. If you’re welding different thicknesses, you might need to use a technique like stitch welding or vary your travel speed to manage heat.
FAQ Section
Question: What is the most common mistake beginners make with MIG heat?
Answer: The most common mistake is not adjusting their settings (voltage and wire speed) for the specific thickness of the metal they are welding. They often use the same settings for thin and thick materials, leading to overheating or underheating.
Question: How can I tell if my MIG weld has uneven heat distribution?
Answer: You can usually tell by looking at the weld bead. If it’s very wide and flat in some areas and narrow and raised in others, or if you see signs of burn-through in certain spots while other areas look like they didn’t melt enough, that’s uneven heat.
Question: Can a dirty nozzle cause uneven heat?
Answer: Yes, a dirty or spattered nozzle can disrupt the gas flow and affect the arc. This can lead to inconsistent shielding, which in turn can cause the arc to behave erratically and heat unevenly.
Question: Should I always use the same gas for MIG welding steel?
Answer: While a 75% Argon / 25% CO2 mix is very common and effective for most steel, different applications might benefit from slight variations. However, for beginners, sticking with this standard mix is generally the best approach.
Question: How does my welding angle affect heat distribution?
Answer: Your welding angle, especially the torch angle, directs the heat. If you angle the torch too much in one direction, you’ll push more heat into the metal on that side. A slight push angle (10-15 degrees) generally provides the most consistent heat distribution.
Final Thoughts
Getting your MIG welds to heat evenly is something you’ll get better at with practice. It’s all about paying attention to your machine’s settings, using the right materials, and moving your torch smoothly. Don’t get discouraged if your first few tries aren’t perfect.
Keep adjusting your voltage and wire speed based on the metal thickness. Watch your weld puddle, and adjust your travel speed as needed. With a little patience and by following these simple steps, you’ll be making strong, clean welds in no time.
Leave a Reply