Learning TIG welding can be tricky at first. Many beginners struggle with How to Fix Poor Arc Control in TIG Welding. This is because controlling the arc needs practice and a good feel for the machine and materials.
It’s like learning to ride a bike; you might wobble a bit before finding your balance. But don’t worry! We’ll show you simple ways to get better.
Stick around, and we’ll walk through easy steps to help you master your TIG arc.
Key Takeaways
- Understand how arc length affects weld quality.
- Learn the proper hand and body positioning for arc control.
- Discover how to adjust amperage for better arc stability.
- Recognize the role of filler metal in arc management.
- Practice specific techniques to improve arc control consistency.
Understanding Arc Control in TIG Welding
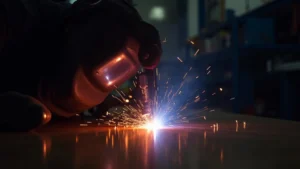
Arc control is all about keeping a steady, consistent arc length. This is key to making clean, strong welds. When the arc is too long, it sputters and can cause porosity.
It also makes the weld pool harder to manage. Too short, and you risk arc-off and contamination. The heat spreads wider than you want, and you might even get tungsten dipped into the weld.
A good arc looks smooth and makes a nice hissing sound, not a loud crackling.
Why Beginners Struggle with Arc Control
It’s common for new welders to have trouble with arc control. It takes practice to get the feel for it. Your hands might shake a little, or it’s hard to keep the torch at the exact same distance.
You’re also juggling the torch, the filler rod, and watching the puddle. This all happens at the same time! It’s a lot to take in when you’re just starting out.
Plus, different metals and thicknesses need slightly different approaches, adding another layer of challenge.
The arc is like a tiny lightning bolt between your tungsten and the metal. You need to keep this bolt the right size and distance away. Imagine holding a spray can; you don’t want to hold it too close or too far from the wall.
The TIG arc is similar. You want just the right distance to deposit material cleanly and melt the base metal evenly.
The Elements of Good Arc Control
Several things work together to create good arc control. Think of them as building blocks. You need the right settings on your machine, the correct way to hold your torch, and how you move your body.
Each part plays a vital role in making those perfect welds.
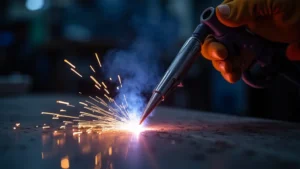
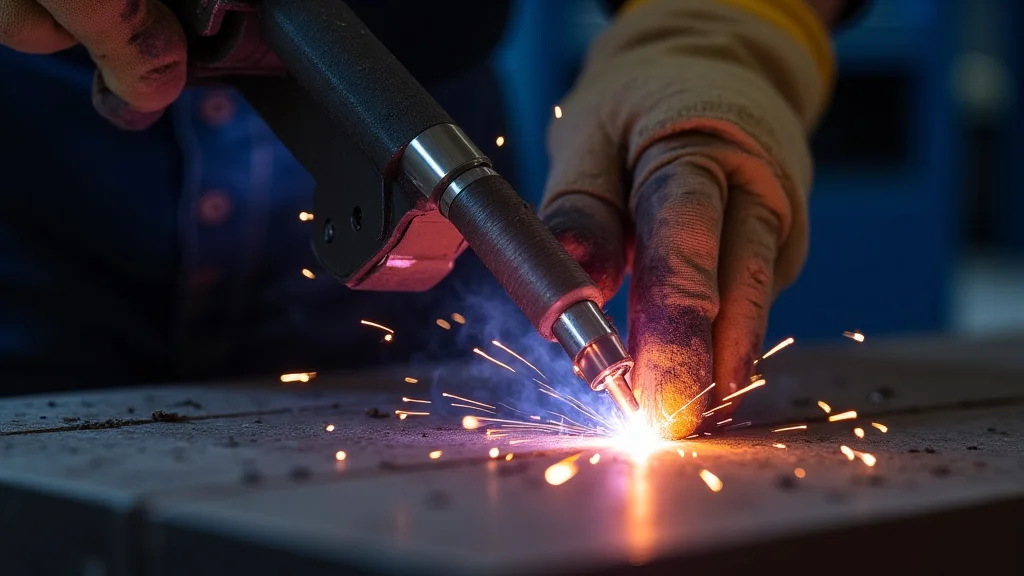
Torch Angle and Distance
Holding the torch at the right angle is super important. For most TIG welding, you want to hold the torch almost straight up and down. A slight angle, maybe 5 to 10 degrees, might be helpful depending on the situation.
The main thing is consistency. If the torch angle changes a lot, the arc becomes uneven. This leads to a wider, flatter bead than you intended.
The distance between the tungsten and the metal is your arc length. This is the most direct factor in arc control. A good rule of thumb is to keep the arc length about the same as the diameter of your tungsten.
So, if you’re using a 1/16-inch tungsten, aim for a 1/16-inch arc length. This keeps the heat focused and the weld pool manageable.
Practice holding your hand steady. You can rest your wrist or elbow on the welding table to help. Sometimes, using a welding glove that lets you feel the heat can also give you feedback on your distance.
If it feels too hot, you might be too close.
Amperage Settings
The amperage setting on your TIG welder is your main heat control. It directly affects how strong the arc is and how much the metal melts. If your amperage is too low, you’ll have a weak arc.
It will be hard to melt the base metal, and your welds will look like they’re just sitting on top. You’ll also have trouble feeding filler metal.
If the amperage is too high, the arc will be very hot and wide. You’ll melt too much metal, creating a big, uncontrolled weld pool. This can lead to burn-through, especially on thinner materials.
It also makes it hard to see what you’re doing because the arc is so bright and the puddle is so large.
Finding the right amperage is often a process of trial and error. A good starting point is to look up charts for TIG welding settings. These charts suggest amperage ranges for different metal types and thicknesses.
For example, welding 1/8-inch mild steel might require around 100-120 amps. Always start in the recommended range and adjust as needed.
If you notice your arc wandering or being unstable, your amperage might be too low. If the puddle is boiling over and hard to control, your amperage might be too high.
Foot Pedal or Hand Control
Most modern TIG welders come with a foot pedal or a hand control. This is your variable amperage control. It allows you to change the heat while you’re welding.
This is incredibly useful for arc control.
When you start welding, you’ll begin with a lower amperage to get the puddle going. Then, you can gradually increase it using the pedal. As you move along the joint, you might need to adjust the amperage slightly.
For instance, if you’re welding a corner where more heat is needed, you’ll press the pedal down a bit more. When you reach a thin spot or the end of a pass, you might ease up on the pedal.
Practicing with the pedal is essential. Try to make smooth, gradual changes. Avoid jerky movements.
Imagine you’re gently squeezing a gas pedal in a car. You want smooth acceleration and deceleration, not sudden stops and starts.
If your machine has a hand control, the principle is the same. You’ll be adjusting a dial or slider on the torch handle. The goal is to make small, controlled changes to the amperage as you weld.
Filler Metal Usage
How you use your filler metal also affects arc control. The filler rod is used to add material to the joint, build up the bead, and help bridge gaps. It also plays a role in keeping the arc stable.
When you add filler metal, you’re dipping the rod into the leading edge of the weld pool. You want to do this consistently. Avoid touching the tungsten with the filler rod, as this can contaminate the tungsten and cause it to break or create a poor arc.
Adding filler metal too quickly can cool down the weld pool and make it harder to control. Adding it too slowly might mean you’re not feeding enough material, and the arc is too dominant. The rhythm of adding filler metal should match the pace of your welding.
Try to keep the filler rod tip close to the weld pool, but not touching. This way, it heats up slightly before entering the puddle, which helps it melt smoothly. A consistent dip and withdrawal motion is ideal.
Techniques to Improve Your Arc Control
Improving arc control comes down to practice and trying different methods. It’s not just about settings; it’s about how you move and feel the weld.
Steady Hand and Body Positioning
This is probably the most important physical aspect. A shaky hand will cause a wobbly arc. To combat this, use your body to support your welding arm.
Rest your elbow on the welding table, or even your forearm. If you’re welding in a position where you can’t rest your arm, try bracing your shoulder or your side against something stable.
Your stance matters too. Stand with your feet shoulder-width apart, balanced. If you’re welding a long seam, you might want to move along the seam in a controlled manner, perhaps by sliding your body.
This helps maintain a consistent distance and angle.
Breathing can even affect your steadiness. Try to time your torch movements with your exhale. Many experienced welders find that holding their breath for too long makes them shaky.
A controlled, steady exhale can help steady your hand.
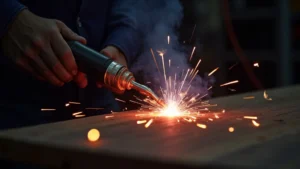
Practicing the Arc Strike
How you start the arc is critical. There are two main ways to start a TIG arc: touch start and high-frequency start. High-frequency is common on most TIG machines and is like a spark plug that ignites the arc without touching.
Touch start involves briefly touching the tungsten to the metal and then lifting it away to establish the arc.
With touch start, the key is to lift away smoothly and quickly. Don’t drag the tungsten across the metal. Just a light tap and lift.
For high-frequency start, ensure your initial torch distance is correct. The arc should jump to the metal cleanly.
Practice just striking the arc over and over. Do this on a scrap piece of metal. Try to make the arc length consistent each time.
Focus on that smooth lift away or the clean jump from the high-frequency start.
Controlled Puddle Manipulation
Once you have a good arc, you need to manage the weld pool. The puddle is molten metal. You want it to be the right size and shape for the joint.
Your torch angle and movement help direct the heat and shape the puddle.
If you’re welding a butt joint (two pieces of metal end-to-end), you want a relatively narrow puddle. If you’re welding a fillet weld (where two pieces meet at an angle), you might want a slightly wider puddle to ensure good fusion on both pieces.
Move the torch along the joint at a steady pace. Too fast, and you won’t melt enough. Too slow, and you’ll get too much melt, and possibly burn-through.
This speed is often called travel speed.
The sound of the arc is a good indicator. A steady, hissing sound is usually good. A loud crackling sound often means your arc is too long or you have contaminants.
A quiet, sputtering sound might mean your amperage is too low or your arc is too short.
Material Thickness and Type
Remember that arc control needs to adapt to different materials and thicknesses. Thicker metals need more heat and often a longer arc to get full penetration. Thinner metals need less heat and a shorter, more focused arc to avoid burning through.
Different metals also behave differently. Aluminum, for example, oxidizes quickly and requires a different technique than steel. It often needs a wider arc and AC current.
Stainless steel can be prone to warping, so controlled heat input is key.
Always start with the recommended settings for the material and thickness you’re working with. Then, make small adjustments based on how the arc and puddle are behaving. It’s about learning to read the metal.
Common Problems and Solutions
Even with practice, you might run into issues. Here are some common problems with arc control and how to fix them.
Problem: Porosity
Porosity is small holes in your weld. It often happens when contaminants get into the weld pool, or shielding gas is lost. Poor arc length can contribute.
If your arc is too long, it can be harder for the shielding gas to protect the weld pool from the air.
Solution: Ensure your torch is at the correct distance. Check your gas flow rate. Make sure you have good ventilation but avoid drafts that can blow away the shielding gas.
Clean your base metal thoroughly before welding.
Problem: Undercut
Undercut is a groove melted into the base metal next to the weld. It weakens the joint. This often happens when the amperage is too high or the travel speed is too slow.
The arc is too wide, melting away the edges of the base metal.
Solution: Reduce amperage or increase travel speed slightly. Try to keep the arc focused on the weld pool, not the base metal edge. Make sure you are adding filler metal at the correct rate to fill the undercut area.
Problem: Burn-Through
Burn-through is when you melt a hole completely through the base metal. This is a direct result of too much heat or a travel speed that is too slow. The arc is too strong for the thickness of the material.
Solution: Lower your amperage significantly. Increase your travel speed. If welding thin material, consider using a backing bar to help dissipate heat.
Practice on scrap pieces of the same thickness to get the feel.
Problem: Arc Wander
Arc wander means the arc is not staying in a straight line or at a consistent distance. This is usually due to an unstable hand or body position, or sometimes magnetic arc blow (a more advanced issue on DC welding). It can also happen if your torch angle is inconsistent.
Solution: Focus on improving your hand and body stability. Brace yourself. Ensure a consistent torch angle.
If you suspect magnetic arc blow, try changing your ground clamp location or welding direction.
Frequently Asked Questions
Question: What is the ideal arc length for TIG welding?
Answer: A good starting point is to keep the arc length about the same as the diameter of your tungsten electrode. For example, if you use a 1/16-inch tungsten, aim for a 1/16-inch arc length. This helps keep the arc focused and the weld pool manageable.
Question: How does amperage affect arc control?
Answer: Amperage is the heat. Too low amperage makes a weak, unstable arc that’s hard to melt with. Too high amperage makes a hot, wide arc that can be hard to control and leads to burn-through.
Finding the right amperage is key to a smooth, controllable arc.
Question: Can I improve arc control without a foot pedal?
Answer: Yes. While a foot pedal offers the best control, you can still achieve good arc control with a fixed amperage. This requires excellent technique in maintaining a consistent torch distance and travel speed.
Practicing striking and holding a steady arc is even more important.
Question: What is the best way to practice arc control?
Answer: Practice striking the arc repeatedly on scrap metal without filler rod. Focus on keeping the distance and arc sound consistent. Then, practice moving along a joint, maintaining that steady arc and travel speed.
Using filler rod should be the next step.
Question: Why is my TIG arc so noisy?
Answer: A very noisy arc, like loud crackling, often means your arc length is too long. It can also indicate contamination in the weld pool or issues with shielding gas. Try shortening your arc and ensure your gas flow is adequate and free from drafts.
Final Thoughts
Mastering How to Fix Poor Arc Control in TIG Welding is about patience and consistent practice. Focus on a stable hand, the right torch distance, and consistent amperage. Learning to read the weld pool and adjust as you go is vital.
Keep practicing these simple steps, and you’ll see your welds improve dramatically. You’ve got this!