Getting started with TIG welding can feel a bit tricky, especially when you need to do simple tasks like changing a part. One common question for new welders is How to Change the Tip on a TIG Welder Torch. It seems straightforward, but a little confusion is normal when you’re new to the equipment.
Don’t worry, though! This guide will walk you through it step-by-step. We’ll make it super easy.
Key Takeaways
- You’ll learn which parts of the TIG torch need to be removed to access the tip.
- This guide explains how to properly loosen and remove the old tip.
- You’ll discover the best way to install a new tip securely.
- We’ll cover essential safety tips to keep in mind during the process.
- You’ll get advice on choosing the right tip size for your welding needs.
Why Changing the Tip Matters
Your TIG torch is your main tool for making those precise welds. Think of it like a pen; the tip is the nib. The size and type of tip you use directly affect how your weld looks and performs.
Using the wrong tip, or a worn-out one, can lead to a poor gas flow, which means bad welds. It can also make it hard to control the arc. So, knowing how to change it is a basic but important skill for any TIG welder.
What You’ll Need
Before you start, gather a few simple things. You won’t need many special tools for this. Most TIG torches are designed for easy maintenance.
You’ll want to have your new TIG torch tip ready. Make sure it’s the right size for the job you plan to do. You might also need a small wrench or pliers, though sometimes you can do it by hand.
Always have a clean rag handy to wipe things down.
Understanding Your TIG Torch Parts
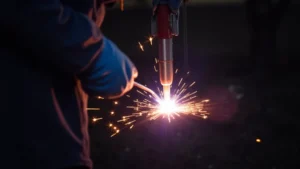
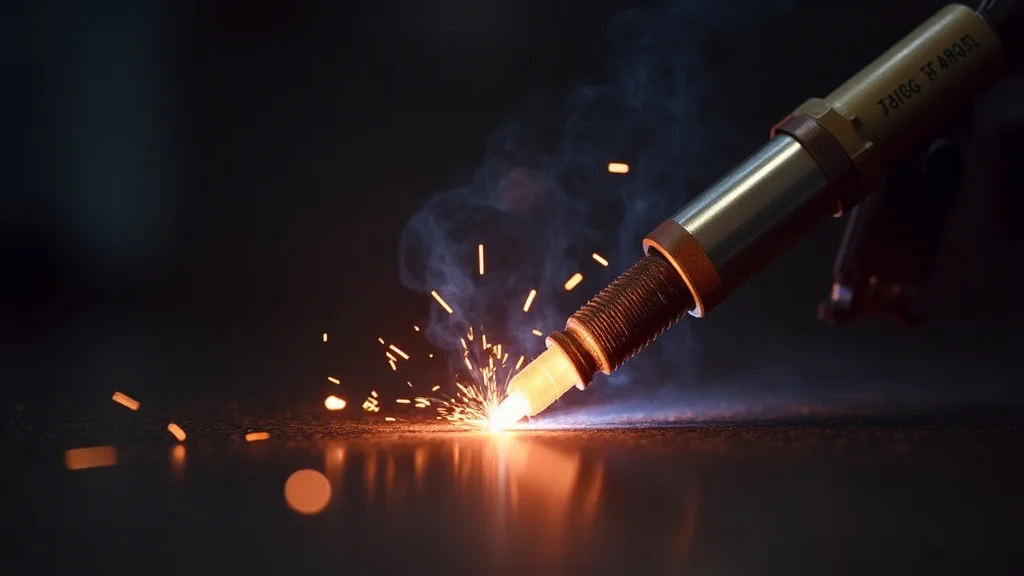
To change the tip, it helps to know the basic parts of your TIG torch. You have the main body of the torch. Attached to the front is the gas cup, which directs the shielding gas.
Inside the gas cup, and what the tungsten electrode passes through, is the collet body. The collet body holds the tungsten in place. The very front part that the tungsten sticks out of and gas flows around is the tip, often called the contact tip.
Sometimes people refer to the collet body and tip as one unit, but they are separate. We are focusing on the contact tip here.
The Role of the Contact Tip
The contact tip is crucial. It’s a small piece of copper or a copper alloy that sits at the very front of the collet body. Its main job is to make electrical contact with the tungsten electrode.
This contact allows the electricity to flow from the welder, through the tungsten, and to your workpiece to create the arc. It also helps focus the gas flow from the cup around the arc.
When to Change Your Tip
You’ll know it’s time to change your tip when you see signs of wear. If the hole in the tip gets too large, it can disrupt the gas flow. This means less protection for your weld puddle.
You might also see deposits of metal or other debris stuck to the tip. Sometimes, the tip can get slightly deformed. If your arc looks unstable or your welds aren’t as clean as they used to be, a worn tip is a common culprit.
Regular checks will help you catch issues early.
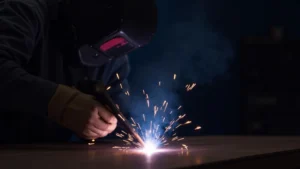
Step-by-Step: How to Change the Tip on a TIG Welder Torch
Let’s get to the main event. Follow these steps carefully, and you’ll have a new tip in place in no time. Safety first, always disconnect your welder from the power source before you begin any maintenance.
Step 1: Safety First – Power Down
This is the most important step. Before you touch anything on your torch, make sure your TIG welder is completely turned off and unplugged from the wall. This prevents any accidental electrical shock.
Safety should always be your top priority when working with welding equipment.
Step 2: Remove the Gas Cup
The gas cup is usually threaded onto the front of the torch. Gently unscrew it. Most gas cups twist off counter-clockwise.
You might need to hold the torch body firmly with one hand and twist the cup with the other. If it feels stuck, a gentle tap or a pair of pliers with a soft grip might help, but be careful not to damage the threads.
Step 3: Expose the Collet and Tip
Once the gas cup is off, you’ll see the collet body. The collet body is what grips the tungsten electrode. The contact tip is usually threaded directly into the front of the collet body.
You might see the end of the tungsten sticking out slightly.
Step 4: Loosen the Old Tip
Now, you need to remove the old contact tip. The tip is often held in place by being screwed into the collet body. You can usually unscrew it by hand.
If it’s tight, use a small wrench or a pair of pliers to grip the tip and turn it counter-clockwise. Be gentle to avoid damaging the threads on the collet body. Sometimes the tip can be a bit stubborn if it has seen a lot of use or has some buildup on it.
Step 5: Remove the Old Tip
With the tip loosened, you can now pull it away from the collet body. It might come off easily once it’s unscrewed. If there’s any residue or buildup, you might need to wiggle it a bit.
Dispose of the old tip properly.
Step 6: Clean the Area
Take your clean rag and wipe down the threads on the collet body. Remove any dust, dirt, or old welding residue. A clean surface ensures the new tip will seat properly and make good electrical contact.
Step 7: Install the New Tip
Take your new contact tip. Carefully screw it into the front of the collet body. Turn it clockwise until it is snug.
You want it to be tight enough to make good electrical contact and stay in place, but don’t overtighten it. Overtightening can damage the threads or even crack the tip.
Step 8: Reattach the Gas Cup
Once the new tip is securely in place, screw the gas cup back onto the torch. Again, turn it clockwise until it is hand-tight. Ensure it’s seated properly to prevent gas leaks.
Step 9: Reinsert Tungsten (If Removed)
If you removed the tungsten electrode at any point, now is the time to reinsert it. Make sure the correct length of tungsten is sticking out of the tip. This length will vary depending on the type of welding you’re doing and your preference.
Generally, for DC welding, you want a sharper point, and for AC welding, a blunter or rounded end. Secure the tungsten by tightening the collet nut.
Step 10: Power Up and Test
With everything back in place, you can now plug your welder back in and turn it on. Perform a quick test weld to check the gas flow and arc stability. You should notice a smoother, more controlled arc with your new tip.
Choosing the Right Tip Size
The size of your contact tip is important. Tips come in different diameters, usually measured in fractions of an inch or millimeters. The most common sizes range from .020 inches (0.5mm) to 1/16 inch (1.6mm) for smaller work, and up to 3/32 inch (2.4mm) or 1/8 inch (3.2mm) for larger projects.
Here’s a general guide:
- Smaller tips (e.g., .020″, 1/16″) are good for thin materials and detailed work. They help focus the arc and reduce heat input.
- Larger tips (e.g., 3/32″, 1/8″) are better for thicker materials. They allow for more gas flow to protect a wider weld puddle and can handle higher amperages.
Always refer to your welder’s manual or consult with experienced welders if you’re unsure. Using the correct tip size ensures proper gas coverage and arc control.
Troubleshooting Common Issues
Sometimes, even after changing the tip, you might run into small problems. Here are a few common ones:
Poor Gas Flow
If you still have poor gas flow, check:
- That the gas cup is screwed on tightly.
- That the new tip is not clogged.
- That the collet body is clean and not damaged.
- That your gas supply (cylinder and regulator) is functioning correctly.
Unstable Arc
An unstable arc can be caused by:
- A worn or damaged tip.
- The wrong size tip for the amperage being used.
- Incorrect tungsten protrusion.
- Contamination on the tip or tungsten.
Difficulty Removing the Old Tip
If an old tip is stuck, try applying a small amount of penetrating oil (ensure it’s TIG safe and won’t contaminate your weld area later). Let it sit for a bit. Gentle heat from a heat gun (not a torch) can sometimes help expand the metal slightly.
Always be patient and avoid forcing it too much.
Maintaining Your TIG Torch
To keep your TIG torch in good working order, and to make changing the tip easier in the future, follow these maintenance tips:
- Regular Cleaning: Wipe down your torch and its components after each use. Remove any spatter or debris.
- Inspect Components: Periodically check the gas cup, collet body, and torch leads for any signs of damage.
- Replace Worn Parts: Don’t wait until a part fails completely. Replace tips, cups, and collets when they show significant wear.
- Proper Storage: Store your torch in a clean, dry place when not in use.
Frequently Asked Questions
Question: Can I use the same tip for steel and aluminum?
Answer: While you can, it’s best practice to use separate tips for different metals if possible. Steel can leave residue that might affect aluminum welds. Keeping them separate helps maintain weld quality.
Question: How often should I change my TIG torch tip?
Answer: There’s no set schedule. Change it when you notice signs of wear, like a widened or deformed hole, or when your welds start looking inconsistent. Some welders change them after a specific amount of welding time, or when they switch to a different material.
Question: Do I need to remove the tungsten to change the tip?
Answer: Not always. If the tungsten is sticking out far enough and doesn’t get in the way, you might be able to leave it. However, it’s often easier to remove the tungsten first for better access to the tip and to avoid damaging the tungsten.
Question: What happens if I overtighten the new tip?
Answer: Overtightening can strip the threads on the collet body or the tip itself, making it difficult to remove later. It can also crack the tip, which would require you to replace it immediately.
Question: Can I use pliers to remove a stuck tip?
Answer: Yes, you can use pliers, but be very careful. Use pliers with a soft grip or wrap the tip in a cloth to prevent scratching or damaging it. Gentle, steady pressure is key.
If it’s extremely stuck, consider other methods before resorting to excessive force.
Final Thoughts
Learning How to Change the Tip on a TIG Welder Torch is a fundamental skill that boosts your welding confidence. You now know the simple steps to remove the old tip, install a new one, and select the right size. Remember to always power down your welder first.
Keep your torch clean, and inspect parts regularly. This attention to detail ensures your equipment works well and your welds are top-notch. Happy welding!