Getting your MIG welder set up right can feel tricky at first, especially when you’re figuring out How to Adjust Voltage on a MIG Welder Correctly. You see all those numbers and settings, and it’s easy to feel a bit lost. But don’t worry!
It’s simpler than it looks. We’ll walk you through it step-by-step so you can start making great welds. Next, we’ll cover the most important things you need to know.
Key Takeaways
- You will learn why voltage is important for MIG welding.
- You will understand how voltage affects your weld bead.
- You will discover the basic steps to set your MIG welder’s voltage.
- You will get tips for fine-tuning your voltage settings.
- You will know how to avoid common mistakes with voltage.
Understanding MIG Welder Voltage
What is Voltage in MIG Welding?
Voltage is one of the main controls on your MIG welder. Think of it like the “heat” setting. It controls how much electricity flows to your welding arc.
A higher voltage means a hotter arc. A lower voltage means a cooler arc.
Why Voltage Matters for Your Weld
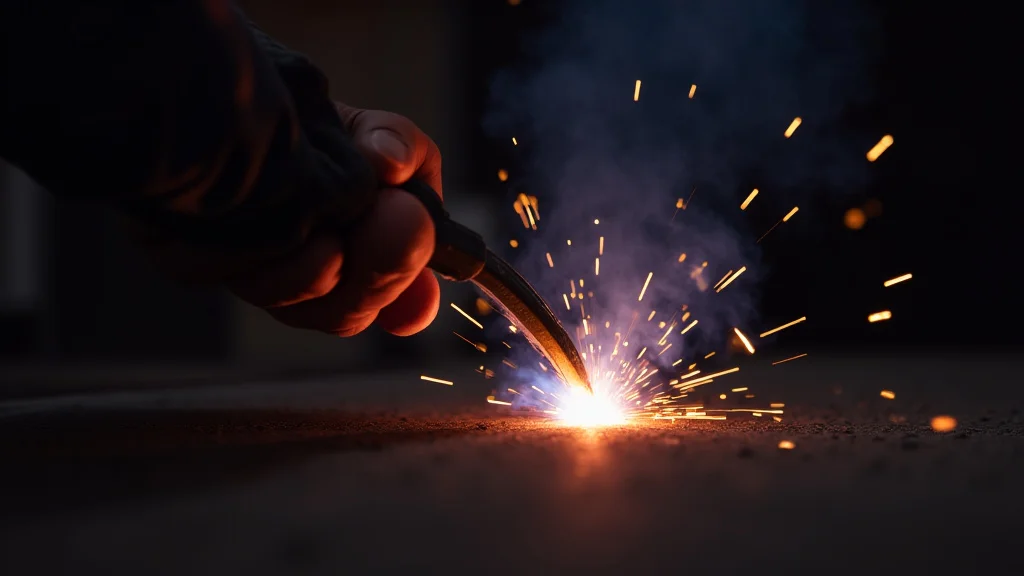
Setting the right voltage is super important for a good weld. If the voltage is too low, your weld won’t melt the metal enough. This can lead to a weak weld that doesn’t stick well.
If the voltage is too high, you can burn holes through your metal. You can also get too much spatter, which is those little drops of metal that fly out.
The goal is to find a voltage that melts the metal just right and makes a smooth, strong bond. It helps the wire feed evenly and creates a nice-looking weld bead.
How to Adjust Voltage on a MIG Welder Correctly: The Basics
Finding the Right Starting Point
Most MIG welders have a dial or buttons to adjust voltage. You’ll often see numbers that go up or down. To start, check your welder’s manual or look for charts that suggest settings for different metal thicknesses and wire sizes.
These charts are a great guide.
Matching Voltage to Metal Thickness
Thicker metal needs more heat to melt through and join properly. So, for thicker steel, you’ll use a higher voltage. For thinner metal, you need less heat to avoid burning through.
This means you’ll use a lower voltage.
As a general rule:
- Thin metal (like sheet metal): Lower voltage
- Medium metal (like car panels): Medium voltage
- Thick metal (like frame parts): Higher voltage
Wire Speed and Voltage Work Together
Voltage and wire speed are like a team. They need to be set together. Wire speed controls how fast the welding wire comes out of the gun.
If you increase the wire speed, you’re adding more metal. You usually need to increase the voltage a bit too, so that extra metal melts properly.
If you set the voltage too high for the wire speed, the wire might melt too fast. This can cause the wire to stick to the tip of your welding gun (called “sticking”). If you set the voltage too low for the wire speed, the wire might not melt enough, leading to a weak weld.
Making Small Adjustments
Once you have a starting point, you’ll likely need to make small changes. This is where practice comes in. Weld a short bead and look at it.
Does it look good? Is it too flat or too bubbly? Is it melting the metal well?
If the weld bead looks flat and wide, you might need to lower the voltage slightly. If the weld bead looks tall and skinny, or if you see a lot of spatter, you might need to increase the voltage slightly.
Step-by-Step Guide to Setting Your Voltage
Here’s a simple way to get your voltage dialed in:
- Gather your materials: Have your MIG welder, welding wire, gas (if using), and the metal you want to weld.
- Select the right wire: Make sure you’re using the correct diameter and type of welding wire for your project.
- Check your metal thickness: Know how thick the metal is that you’re welding.
- Consult a chart: Find a welding chart for your specific welder and wire. It will give you a starting voltage and wire speed for your metal thickness.
- Set your wire speed first: It’s often easier to set the wire speed to a moderate setting that seems appropriate for the metal thickness.
- Set your initial voltage: Adjust the voltage dial to the number recommended on the chart for your wire speed and metal thickness.
- Do a test weld: Make a short weld bead on a scrap piece of the same metal.
- Examine the weld: Look closely at the bead.
- Does it melt into the base metal smoothly?
- Is the bead a nice, rounded shape?
- Is there excessive spatter?
- Is the arc stable and quiet?
- Adjust voltage as needed:
- If the bead is too flat and wide, lower the voltage a little.
- If the bead is too tall and narrow, or if you have lots of spatter, increase the voltage a little.
- If the wire sticks to the tip, your voltage might be too high for the wire speed, or your wire speed might be too high.
- Fine-tune wire speed: Once the voltage is close, you might need to make tiny adjustments to the wire speed to get a perfectly smooth arc and consistent wire feed.
- Make your final weld: Once you’re happy with the test weld, make your actual weld.
Common Mistakes and How to Avoid Them
Beginners often make a few common mistakes when setting voltage:
- Not using a chart: Guessing voltage settings can lead to bad welds. Always start with a recommended setting.
- Only adjusting voltage: Remember that wire speed and voltage work together. If you change one, you might need to adjust the other.
- Not doing test welds: Jumping straight to the project without practicing on scrap metal is a recipe for disaster.
- Ignoring spatter: Too much spatter is a sign that your settings aren’t quite right. It can mean voltage is too high or wire speed is off.
- Not considering metal type: Steel, aluminum, and stainless steel all weld differently and require different settings.
By being aware of these common pitfalls, you can avoid them and get better results faster.
Factors Affecting Voltage Settings
Metal Type and Thickness
We’ve touched on this, but it’s worth repeating. Different metals have different melting points and conductivity. Steel generally requires less heat than aluminum, for instance.
The thicker the metal, the more heat (higher voltage) is needed for proper fusion.
Wire Diameter and Type
A thicker welding wire needs more power to melt. So, if you switch from a 0.030-inch wire to a 0.035-inch wire, you’ll likely need to increase your voltage slightly. The type of wire also matters; solid wire and flux-cored wire can behave differently and require different settings.
Shielding Gas
If you’re using a MIG welder that uses shielding gas (like C25, a mix of argon and CO2), the gas itself can affect the arc. Different gas mixes can create a hotter or cooler arc, and you might need to make small voltage adjustments to compensate. For example, straight CO2 can create a hotter arc than C25.
Welding Position
Welding flat on a workbench is different from welding overhead or vertically. In different positions, gravity plays a role. You might need to adjust your voltage and wire speed slightly to prevent the molten metal from sagging or dripping, especially in out-of-position welding.
Fine-Tuning Your Weld
The Sound of a Good Weld
Experienced welders often listen to the sound of the arc. A good MIG weld usually makes a steady, crackling, bacon-sizzling sound. If it sounds like a sharp, loud hissing or popping, your settings might be off.
Visual Clues of Correct Voltage
Beyond the weld bead shape, look for other signs. You want a smooth transfer of metal from the wire to the workpiece. There shouldn’t be excessive smoke or fumes beyond what’s normal for the metal you’re welding.
When to Adjust Wire Speed vs. Voltage
Think of wire speed as controlling the amount of metal going into the weld, and voltage as controlling the heat of that metal. If you have too much spatter and a rough arc, and the bead is too tall, you might try lowering the voltage. If the wire doesn’t seem to be melting into the base metal well, and the bead is flat, you might need to increase voltage.
If you increase voltage and the wire starts sticking or melting too far back, you might need to increase wire speed to match.
Frequently Asked Questions
Question: What happens if my MIG welder voltage is too high?
Answer: If your voltage is too high, you might burn through your metal, especially if it’s thin. You’ll also likely see a lot of spatter, and the weld bead might be too flat and wide.
Question: What happens if my MIG welder voltage is too low?
Answer: A voltage that’s too low won’t provide enough heat. This can result in a weak weld where the metal doesn’t fuse properly. You might see a tall, narrow bead that sits on top of the metal rather than melting into it.
Question: Do I need to adjust voltage for different wire sizes?
Answer: Yes, generally. Larger diameter wires require more heat to melt effectively. So, if you switch to a thicker wire, you’ll likely need to increase your voltage to match.
Question: How often should I check my voltage settings?
Answer: You should check and adjust your voltage (and wire speed) whenever you change the thickness or type of metal you’re welding, or when you change your wire size or type.
Question: Can I just use the same settings for all my projects?
Answer: No, you really can’t. Each welding job is different. Metal thickness, type, wire size, and even welding position all require different settings to get the best results.
Final Thoughts
Mastering How to Adjust Voltage on a MIG Welder Correctly is key to strong, clean welds. Remember that voltage controls your arc’s heat. Too little heat means weak welds, too much means you burn through.
Always start with a chart and make small adjustments. Watch how the weld bead looks and listen to the arc’s sound. Wire speed and voltage work together, so adjust them as a team.
Practice on scrap metal. You’ll get a feel for it!