Working with thin metals on a MIG welder can feel tricky at first. It’s easy to burn through, leaving holes instead of a nice weld. Many beginners find how to adjust MIG welder for thin metals a big hurdle.
But don’t worry! We’ll break it down simply, step by step. You’ll learn exactly what to change to get clean, strong welds on thin stuff.
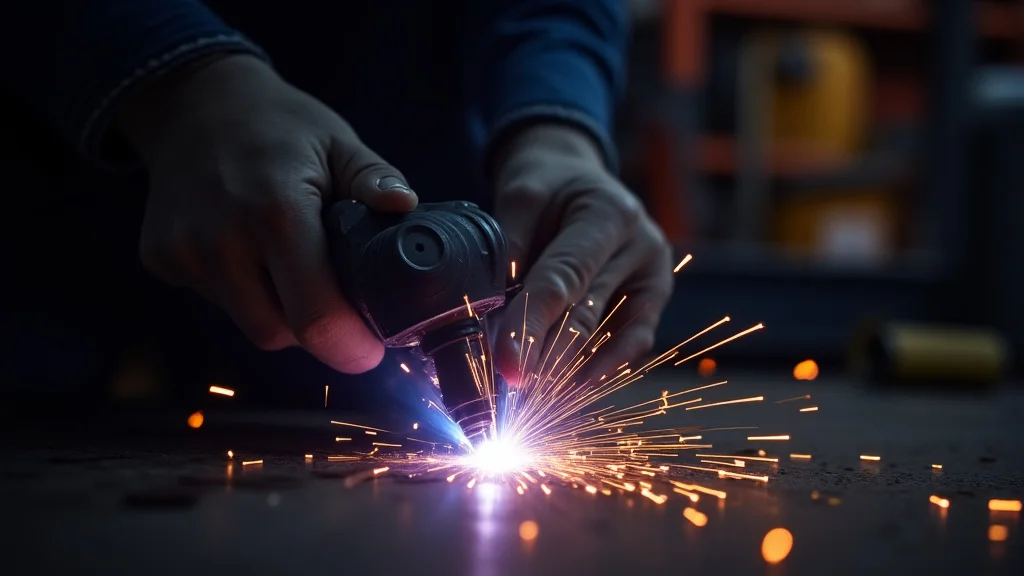
Let’s get your welder set up right.
Key Takeaways
- Setting the right voltage is key for thin metal to avoid burn-through.
- Wire speed directly affects heat input and needs careful adjustment.
- Choosing the correct shielding gas is important for a clean weld.
- Proper gun angle and travel speed prevent overheating and poor penetration.
- Practicing on scrap pieces helps fine-tune settings before welding your project.
Understanding the Challenge of Thin Metals
Why Thin Metals are Different
Thin metals are challenging for MIG welding because they have less material to absorb heat. Unlike thicker metals, thin sheets can overheat very quickly. This means a slight mistake in your settings can easily lead to burning straight through the metal.
This creates holes and ruins your work. Getting the right balance of heat is crucial for a strong weld without damaging the material.
The Goal: Clean and Strong Welds
The main goal when welding thin metal is to create a weld that is both strong and clean. You want enough heat to fuse the metals together properly, but not so much that you burn through. A good weld will look smooth, have consistent bead width, and be free of excessive spatter.
It should join the pieces securely without creating weak spots or holes.
Core MIG Welder Settings for Thin Metals
Voltage: The Heat Control
Voltage is one of the most important settings for welding thin metals. Think of it as controlling the arc length and overall heat. For thin materials, you need a lower voltage.
A lower voltage creates a shorter arc, which means less heat is transferred into the metal. Too high a voltage will cause the arc to be too hot and melt through the thin sheet quickly. Lowering the voltage helps keep the heat controlled.
Wire Speed: Fine-Tuning the Heat
Wire speed controls how fast the welding wire is fed through the gun. This is directly linked to the amperage (current) going through the wire. When you increase wire speed, you increase amperage.
For thin metals, you generally want a lower wire speed. This means lower amperage, which puts less heat into the weld. It’s a fine balance; too slow a wire speed can lead to a spiky, inconsistent arc, while too fast can cause you to burn through.
Relationship Between Voltage and Wire Speed
These two settings work together. Many MIG welders have a recommended chart for thin metals. Often, the chart shows a combination of voltage and wire speed.
The idea is to find a pairing that gives you the right amount of heat. If you’re still burning through, you might need to lower both, but often adjusting one can make a big difference. Start with the manufacturer’s recommendations and adjust from there.
Amperage: The Underlying Power
While you don’t always set amperage directly on many MIG welders (it’s often a result of wire speed), it’s good to know what it does. Amperage is the actual amount of electrical current. Higher amperage means more heat.
For thin metals, you need a lower amperage to prevent melting through. The wire speed setting effectively controls this amperage.
Shielding Gas: Protecting Your Weld
Why Gas Matters
Shielding gas is vital in MIG welding. It protects the molten weld pool from the air. Without gas, oxygen and nitrogen from the air would get into the weld, making it weak and brittle.
For thin metals, the right gas can also help control the arc and reduce spatter, leading to a cleaner finish.
Common Gas Choices for Thin Metals
The most common shielding gas for steel is a blend of Argon and Carbon Dioxide (CO2). A blend with a lower percentage of CO2, like 75% Argon / 25% CO2, is often used for general welding. However, for very thin metals, a blend with even less CO2, such as 90% Argon / 10% CO2, or even pure Argon, can be beneficial.
These mixes provide a softer arc and less heat, which is ideal for preventing burn-through. Pure Argon is often used for aluminum, but for steel, a mix is usually preferred.
Gas Flow Rate
The flow rate of your shielding gas is also important. Too little gas, and you won’t get adequate protection. Too much gas can cause turbulence, which can also draw in air.
For most applications with thin metals, a flow rate of 15-25 cubic feet per hour (CFH) is a good starting point. You might need to adjust this slightly based on drafts or your specific setup.
Consumables: The Right Tools
Welding Wire Selection
The diameter of your welding wire is critical for thin metals. Thicker wires deliver more current and heat. For thin steel, you’ll want to use smaller diameter wires.
Common sizes for thin metals include 0.023 inches (0.6mm) or 0.030 inches (0.8mm). Using a smaller wire allows you to use lower wire speeds and thus lower amperage, which helps prevent burn-through. Always match your wire type to your base metal (e.g., mild steel wire for mild steel).
Contact Tips
The contact tip is the part of the MIG gun that the wire passes through and makes electrical contact. It’s important to use the correct size contact tip for your wire diameter. A worn or incorrectly sized contact tip can cause an inconsistent wire feed and a poor arc.
For 0.023-inch wire, use a 0.023-inch contact tip. For 0.030-inch wire, use a 0.030-inch contact tip.
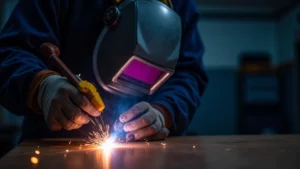
Technique Matters: Your Welding Style
Gun Angle and Stickout
The angle of your MIG gun and how far the wire sticks out from the tip (stickout) both affect the weld. For thin metals, holding the gun at a slight push angle (angling the gun in the direction you are welding) can help reduce heat input. Keep your stickout consistent, usually around 1/4 to 1/2 inch.
Too much stickout can lead to a less focused arc and more spatter.
Travel Speed
Your speed of movement across the joint is also important. If you move too slowly, you’ll deposit too much heat in one spot and burn through. If you move too quickly, you won’t get enough penetration, and the weld will be weak.
Find a steady, consistent speed that allows the metal to melt and fuse properly without creating a hole. Listen to the sound of the arc; it often gives you clues about your speed and heat.
Pulsed MIG Welding (for Advanced Users)
Some advanced MIG welders offer a pulsed welding function. This technology cycles the current between a high peak current and a lower background current. This allows for excellent heat control, making it ideal for welding thin materials.
The short bursts of high current provide good penetration, while the lower background current cools the puddle. If your machine has this feature and you’re working with very thin metals, it can be a game-changer.
Practical Steps: Setting Up Your Welder
Step 1: Identify Your Metal Thickness
Before you do anything, know how thin your metal is. This is the most important factor. You can use a set of calipers or a metal thickness gauge.
Knowing this helps you select the right starting point for your settings.
Step 2: Consult Your Welder’s Chart
Most MIG welders come with a chart inside the cover or in the manual. This chart usually provides recommended voltage and wire speed settings for different metal thicknesses and wire diameters. This is your best starting point.
Find the section for the thinnest metal you’re working with and the wire size you are using.
Step 3: Set Your Initial Wire Speed and Voltage
Based on the chart, set your wire speed and voltage. For example, if the chart suggests 15V and a wire speed of 100 inches per minute (IPM) for 20-gauge steel with 0.023 wire, set your machine accordingly. Don’t be afraid to use the recommended settings as a baseline.
Step 4: Select Your Shielding Gas
Ensure your shielding gas is set to the correct type and flow rate. For thin steel, a common choice is 75% Argon / 25% CO2, or an even leaner mix if available. Set your flow rate to around 15-25 CFH.
Make sure your gas cylinder valve is open and the regulator is functioning correctly.
Step 5: Prepare Your Metal
Clean your metal thoroughly. Remove any rust, paint, oil, or dirt. This is crucial for a good weld.
Contaminants can cause porosity and weak spots. A wire brush or grinder can help with this.
Step 6: Test on Scrap Material
This is non-negotiable. Find a piece of scrap metal that is the same thickness as your project. Make a test weld.
Observe the results. Is it burning through? Is the weld too flat?
Does it sound right?
Step 7: Make Adjustments
If your test weld burns through, you need to reduce heat. Lower the wire speed first, or try a slightly lower voltage. If your weld isn’t penetrating enough or looks too cold, you may need to increase wire speed slightly or adjust voltage.
Here’s a quick look at common adjustments:
- Burning Through: Lower wire speed, lower voltage.
- Not Enough Penetration: Increase wire speed slightly, ensure proper gun angle and travel speed.
- Excessive Spatter: Check wire stickout, ensure correct gas flow, try a slightly lower voltage.
- Rough or Uneven Bead: Adjust travel speed for consistency, check for electrode contamination.
Step 8: Repeat and Refine
Keep making test welds and small adjustments until you achieve a satisfactory result. It might take a few tries. The goal is a smooth, consistent bead that fuses the metal without burning through.
Once you’re happy with your test welds, you can move on to your actual project.
Troubleshooting Common Issues
Burn-Through
This is the most common problem. If you’re burning through, your heat input is too high. Your first step should be to lower your wire speed.
If that doesn’t solve it, try lowering the voltage. Also, ensure you’re using the correct wire diameter for your metal thickness. Sometimes, a faster travel speed can help, but it’s better to fix the heat settings.
Lack of Fusion
This happens when the weld metal doesn’t fully melt and join the base metal. It results in a weak weld. If you’re experiencing this, you might not have enough heat.
Try increasing your wire speed slightly. Ensure your gun angle is correct and you’re not moving too fast. Check that your shielding gas is flowing properly, as insufficient gas can lead to poor fusion.
Excessive Spatter
Spatter is small droplets of molten metal that fly off the weld. While some spatter is normal, excessive amounts can be a sign of incorrect settings or technique. Check your voltage and wire speed.
Often, too high a voltage or wire speed can cause this. Also, check your wire stickout; too long a stickout can increase spatter. Ensure you have the correct contact tip for your wire size.
Porosity
Porosity refers to small holes or bubbles within the weld metal. This is usually caused by contaminants on the metal surface or inadequate shielding gas. Make sure your metal is clean before welding.
Check your gas flow rate and ensure there are no drafts blowing the shielding gas away from the weld. A worn contact tip can also contribute to porosity.
Frequently Asked Questions
Question: What is the most important setting for welding thin metal?
Answer: The most important settings for welding thin metal are voltage and wire speed. They directly control the heat input, which is crucial for preventing burn-through.
Question: Can I use the same settings for all thin metals?
Answer: No, metal thickness and type matter. While the principles are the same, you’ll need to adjust settings based on the specific gauge of metal and its alloy.
Question: What wire diameter is best for thin sheet metal?
Answer: Smaller diameter wires like 0.023 inches (0.6mm) or 0.030 inches (0.8mm) are generally best for thin sheet metal because they allow for lower heat input.
Question: How do I know if I’m using the right shielding gas?
Answer: For steel, a mix of Argon and CO2 is common. For very thin steel, a mix with less CO2 or pure Argon can help reduce heat and spatter, leading to a cleaner weld.
Question: Should I push or pull the MIG gun on thin metal?
Answer: Generally, a slight push angle is recommended for thin metals. Pushing the gun can help reduce heat input and prevent burn-through compared to a pull angle.
Final Thoughts
Getting your MIG welder set up for thin metals is all about managing heat. You learned that lower voltage and wire speed are key. Choosing the right wire size and shielding gas helps a lot too.
Good technique, like a proper gun angle and steady travel speed, makes a big difference. Don’t forget to practice on scrap pieces first. This lets you find the sweet spot for your welder and materials.
Soon, you’ll be welding thin metal with confidence.