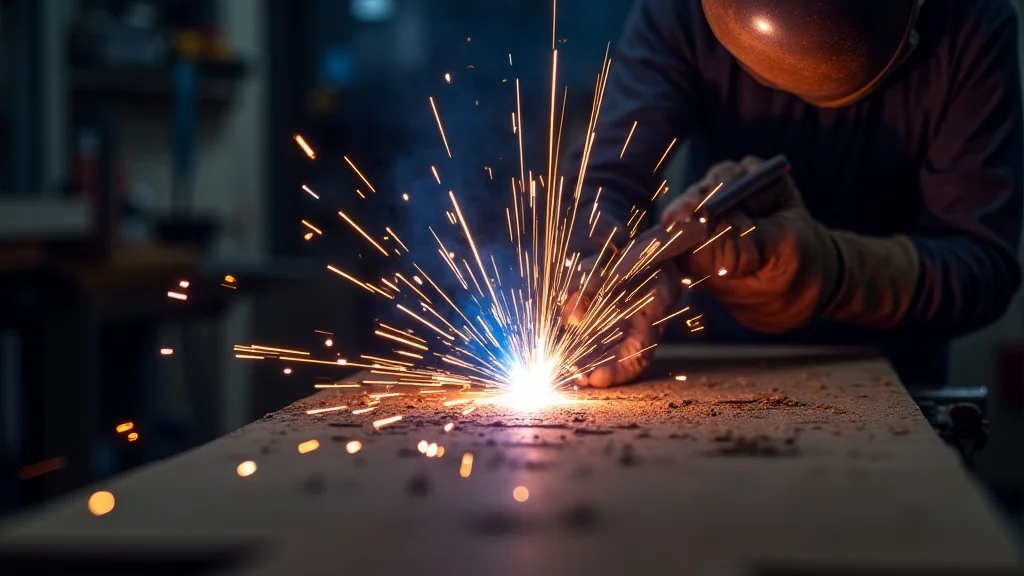
Getting your MIG welder set up right can feel a little tricky at first. You want nice, clean welds, but sometimes you get messy spatter or weak spots. Learning How to Adjust MIG Weld Settings for Better Quality is a common hurdle for many new welders.
Don’t worry, it’s simpler than it looks! We’ll walk through it step-by-step so you can get great results. Stick around to see how easy it can be to make your welds look fantastic.
Key Takeaways
- You’ll learn how wire speed affects your weld bead.
- Discover the role voltage plays in weld penetration and appearance.
- Understand how shielding gas impacts weld quality and protection.
- See how to choose the right contact tip for your wire size.
- Learn about common MIG welding problems and how to fix them.
- Gain confidence in setting up your MIG welder for better welds.
Understanding Your MIG Welder Settings
When you’re MIG welding, you’re essentially using a wire that acts as both the filler material and the electrode. This wire feeds out of a gun, and as it touches your workpiece, an electric arc forms. This arc melts the wire and the base metal, creating the weld. Getting the settings right is key to making sure this process works smoothly and creates a strong, good-looking joint.
Wire Speed: The Engine of Your Weld
Think of wire speed as the gas pedal for your MIG welder. The faster the wire feeds out, the more metal you’re putting into the weld. This also directly affects the voltage. Many welders have a dial that controls wire speed. It’s usually measured in inches per minute (IPM) or meters per minute (MPM).
Higher wire speed means a hotter, larger weld bead. It can also lead to more spatter if it’s too high, or a lack of fusion if it’s too low. Lower wire speed results in a narrower bead and less heat. You want to find a balance that gives you a smooth, consistent bead without excessive spatter.
For different wire diameters, the ideal wire speed will change. A 0.030-inch wire will need a different speed than a 0.045-inch wire to achieve the same heat input. Always check your welder’s manual for recommended starting points based on your wire size and material thickness.
Voltage: Controlling the Arc’s Behavior
Voltage is like the thermostat for your arc. It controls how much electricity flows and dictates the arc length. A higher voltage creates a wider, flatter bead with more heat. This can lead to deeper penetration but also more spatter if it’s too high.
Lower voltage results in a narrower, more rounded bead with less penetration. If the voltage is too low, you might get a “cold lap” where the weld doesn’t fully fuse with the base metal, creating a weak joint.
Voltage is often linked to wire speed. On many machines, turning up the wire speed also increases the voltage. Some advanced machines have independent controls for both, giving you more fine-tuning ability. Generally, you want the arc to be stable and quiet, with a nice hissing sound, not a loud crackling or popping.
Amperage: The Total Power
While wire speed and voltage are the main controls you’ll adjust, they work together to determine the amperage. Amperage is the actual amount of electrical current flowing through the arc. A higher amperage means more heat and deeper penetration.
On most entry-level to intermediate MIG welders, you don’t directly set the amperage. Instead, you set the wire speed and voltage, and the machine figures out the amperage. If you’re using a machine with separate amperage control, it means you have even more precise control over the heat.
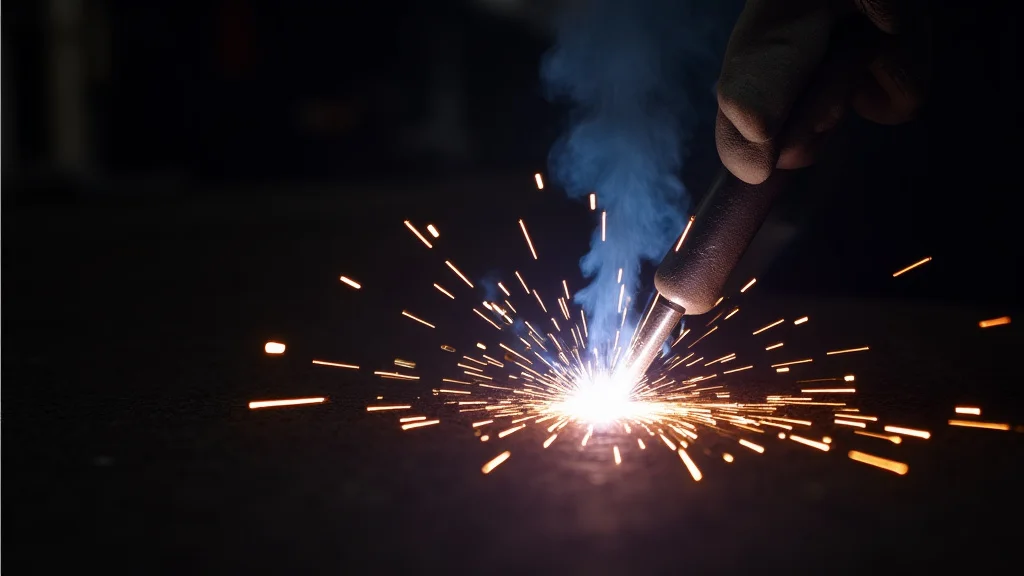
Shielding Gas: Protecting Your Weld
Shielding gas is super important. It flows out of your MIG gun along with the wire. Its job is to protect the molten weld pool from the air. Oxygen and nitrogen in the air can cause contamination, making your welds brittle and weak.
The most common shielding gas for steel is a mix of Argon and Carbon Dioxide (CO2), often called C25 (25% CO2, 75% Argon). This mix is great for general-purpose welding on mild steel. The CO2 helps with penetration and arc stability.
Other gases are used for different materials. Pure Argon is used for aluminum. Tri-mix gases (Argon, Helium, CO2) are used for stainless steel or specific aluminum applications.
The flow rate of your shielding gas is critical. Too little gas, and your weld won’t be protected. Too much gas, and it can create turbulence that actually draws air into the weld pool. A good starting point for C25 is usually around 20-25 cubic feet per hour (CFH), or 10-15 liters per minute (LPM). You can often hear if the gas flow is right; it should be a gentle, steady flow, not a blast.
Contact Tip: The Gateway for Wire
The contact tip is a small, consumable part inside your MIG gun’s nozzle. It’s what the welding wire touches just before it comes out. The contact tip needs to match the diameter of your welding wire exactly. Using the wrong size can lead to feeding problems and poor electrical contact, which affects your arc quality.
If your wire is sticking to the tip or feeding erratically, a worn-out or incorrectly sized contact tip is often the culprit. Regularly inspect your contact tips and replace them when they show signs of wear or damage.
Putting It All Together: Setting Your Welder
So, how do you actually dial in these settings? The best way is to start with a welding chart. Most MIG welder manufacturers provide charts in their manuals or on their websites. These charts give you recommended starting points for wire speed and voltage based on the material thickness, wire type, and shielding gas you’re using.
Let’s look at a common scenario: welding 1/8-inch (3mm) mild steel with 0.030-inch solid wire and C25 gas. A welding chart might suggest a wire speed of around 200-250 IPM and a voltage of 17-19 volts.
The Test Weld Method
Even with a chart, it’s always best to do test welds on scrap material that’s the same thickness as your project.
1. Start with the Chart: Set your wire speed and voltage according to the recommended chart.
2. Make a Test Weld: Weld a short bead on your scrap piece.
3. Evaluate the Weld: Look at the bead.
* Too much spatter? Try slightly reducing the voltage or wire speed. If you have independent control, you might increase wire speed slightly and decrease voltage.
* Bead too high and narrow? Increase voltage or wire speed.
* Bead too flat and wide? Decrease voltage or wire speed.
* Looks like it didn’t penetrate (cold lap)? Increase voltage and wire speed.
* Arc sounds unstable (crackling loudly)? Check gas flow, contact tip condition, and ensure your ground clamp is secure. You might also need to adjust voltage or wire speed.
4. Adjust and Re-test: Make small adjustments based on your evaluation and make another test weld. Repeat until you achieve a smooth, consistent bead with good penetration and minimal spatter.
Remember, welding charts are just starting points. Your specific welder, welding position, and personal preference can all influence the perfect settings.
Common MIG Welding Problems and Solutions
It’s rare to get perfect welds every single time, especially when you’re learning. Here are some common issues and how to fix them.
* Excessive Spatter:
* Cause: Voltage too high, wire speed too high, wrong gas, worn contact tip, dirty metal.
* Fix: Lower voltage slightly, reduce wire speed, check gas flow, replace contact tip, clean your metal thoroughly.
* Lack of Fusion (Cold Lap):
* Cause: Voltage too low, wire speed too low, travel speed too fast, dirty metal.
* Fix: Increase voltage and wire speed, slow down your travel speed, clean your metal.
* Porosity (Holes in the Weld):
* Cause: Contaminated shielding gas, insufficient gas flow, drafty environment, dirty metal.
* Fix: Check gas cylinder pressure, ensure correct flow rate, shield the weld from drafts, clean metal meticulously.
* Uneven or Wavering Bead:
* Cause: Inconsistent travel speed, torch angle not held steady, unstable wire feed.
* Fix: Focus on a consistent pace and angle, ensure the wire feeder is working smoothly.
* Wire Sticking to the Contact Tip:
* Cause: Voltage too low, wire speed too low, wrong size contact tip, dirty contact tip.
* Fix: Increase voltage and wire speed, ensure correct tip size, clean the tip.
Choosing the Right Wire and Gas for Your Project
The material you’re welding will dictate the type of wire and shielding gas you need.
For Mild Steel
* Wire: Solid steel wire is most common. It’s usually ER70S-2 or ER70S-6. ER70S-6 has more deoxidizers, making it more tolerant of slight surface contamination and better for general use.
* Gas: C25 (75% Argon / 25% CO2) is the standard choice. It offers a good balance of penetration, arc stability, and spatter control. Pure CO2 can be used for thicker mild steel, providing deeper penetration, but it results in more spatter and a wider arc.
For Stainless Steel
* Wire: Special stainless steel wires like 308L, 309L, or 316L are used, depending on the type of stainless steel being welded.
* Gas: Typically, a tri-mix gas like 90% Argon / 8% CO2 / 2% Oxygen, or an Argon/CO2 mix with a small percentage of Nitrogen is used. These gases help maintain the corrosion resistance properties of stainless steel.
For Aluminum
* Wire: Aluminum wire, such as 4043 or 5356, is used. The choice depends on the specific alloy of aluminum being welded.
* Gas: Pure Argon is the standard shielding gas for aluminum. It provides a clean arc and prevents oxidation.
It’s crucial to match your wire and gas to your base metal for the best weld quality and strength.
Advanced Tips for Better Quality Welds
Once you’ve got the basics down, a few advanced techniques can elevate your weld quality even further.
Torch Angle and Stick-Out
The angle of your MIG torch and the distance the wire sticks out from the contact tip (stick-out) both matter.
* Torch Angle: For most flat welding, a slight push angle (torch pointing forward in the direction of travel) is preferred. This can help reduce spatter and improve visibility. A drag angle (torch pointing backward) can be used in some situations but is less common for standard MIG. Keep the torch angle consistent.
* Stick-Out: The ideal stick-out is usually about 1/4 to 1/2 inch (6-12 mm). If the stick-out is too long, the wire can get too hot, leading to poor weld quality and increased spatter. If it’s too short, you might not get enough heat into the weld.
Travel Speed
Your travel speed is how fast you move the torch along the joint. Too fast, and you won’t get enough penetration. Too slow, and you can overheat the metal, causing it to sag or burn through. Aim for a consistent speed that creates a nice, even bead width. You’ll often hear a steady “hissing” sound when your travel speed, wire speed, and voltage are all in sync.
Cleaning Your Welds
Always clean your metal before welding. Oil, grease, rust, and paint can all cause weld defects like porosity. Use a wire brush and a degreaser. After welding, clean off any spatter with a wire brush or chipping hammer. For cosmetic welds, you might use a stainless steel wire brush or grinder to smooth out the bead.
Frequently Asked Questions
Question: What is the most important setting for MIG welding?
Answer: While all settings are important, wire speed and voltage work together to control the heat and penetration of your weld. Getting these two right is key to a good weld.
Question: How do I know if I have enough shielding gas?
Answer: You should hear a gentle, steady flow of gas from the torch when you pull the trigger. If you can feel a strong breeze, it’s too much. If you can’t hear or feel anything, it’s likely too little.
Also, check your gas pressure gauge.
Question: Can I use the same settings for different thicknesses of metal?
Answer: No, you’ll need to adjust your settings for different metal thicknesses. Thicker metal requires more heat (higher wire speed and voltage), while thinner metal requires less heat to avoid burning through.
Question: What causes a MIG weld to look lumpy or uneven?
Answer: An uneven or lumpy weld is usually caused by inconsistent travel speed or torch angle. Try to move the torch at a steady pace and keep the angle consistent along the weld joint.
Question: How often should I replace my contact tip?
Answer: You should replace your contact tip when it shows signs of wear, damage, or when you start experiencing wire feeding problems or arc instability. Regularly cleaning it can extend its life.
Final Thoughts
Mastering How to Adjust MIG Weld Settings for Better Quality is a skill that comes with practice. By understanding how wire speed, voltage, and shielding gas work together, you can create strong, clean welds. Always start with a welding chart, then use test welds to fine-tune your settings.
Pay attention to your arc sound and the look of your weld bead. Clean your metal, check your equipment, and don’t be afraid to experiment. Soon, you’ll be making professional-looking welds with confidence.