Getting your TIG welder ready for thin metal can feel tricky at first. It’s easy to burn holes or end up with weak welds. But don’t worry!
Learning How Do You Set Up TIG Welder for Thin Metal? is simpler than you might think. We’ll walk through each step so you can get it right. After this, you’ll know the basics to start welding thin stuff with confidence.
Key Takeaways
- Finding the right amperage is key for thin metal TIG welding.
- Shielding gas settings need careful adjustment to prevent contamination.
- Choosing the correct tungsten electrode makes a big difference.
- Pulse settings help control heat and prevent burn-through.
- Filler metal selection depends on the base metal.
- Practicing on scrap pieces is essential before welding your project.
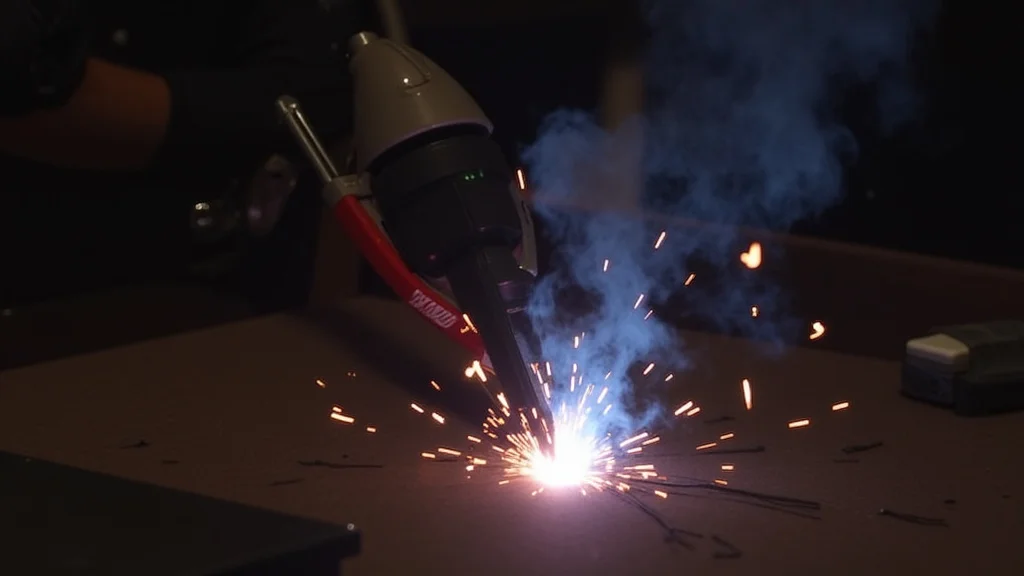
Understanding the Basics of TIG Welding Thin Metal
TIG welding is great for creating strong, clean welds. But when you’re working with thin metal, things get a bit more delicate. The heat from the TIG torch can easily melt right through thin sheets of steel, aluminum, or stainless steel.
This is why knowing How Do You Set Up TIG Welder for Thin Metal? is so important.
Beginners often struggle because thin metal doesn’t have much room for error. Too much heat, and you have a hole. Too little heat, and the weld won’t penetrate.
It’s a fine balance. We’ll break down the main things you need to adjust on your TIG welder to make this balance work for you.
Amperage: The Most Important Setting
What is Amperage?
Amperage is the amount of electrical current your TIG welder uses. It directly controls the heat that melts the metal. For thin metal, you need a lower amperage than you would for thicker materials.
This prevents you from burning through.
Finding the Right Amperage
There’s no single number that works for all thin metal. It depends on a few things:
- Metal Thickness: Thinner metal needs less amperage.
- Metal Type: Different metals conduct heat differently. Aluminum needs more heat than steel for the same thickness.
- Joint Type: Butt welds might need slightly different settings than lap or corner joints.
A good starting point for very thin steel (around 24 gauge or 0.023 inches) might be as low as 20-40 amps. For slightly thicker, but still thin, steel (around 18 gauge or 0.047 inches), you might be in the 50-80 amp range. Aluminum often requires more amps due to its higher thermal conductivity.
The best way to find the perfect amperage is to practice on scrap pieces of the same material and thickness as your project. Make a few test welds and adjust until you get a nice, even bead without burning through.
Choosing the Right Tungsten Electrode
The tungsten electrode is what creates the arc with your TIG welder. The type and size of the tungsten matter, especially for thin metal.
Tungsten Types
- Pure Tungsten: Used mostly for AC welding of aluminum.
- Thoriated Tungsten: A common choice for DC welding of steel and stainless steel.
- Ceriated Tungsten: Works well for both AC and DC, good for lower amperage applications.
- Lanthanated Tungsten: A versatile option that works on AC and DC. Often a good choice for thin metals because it forms a sharp point easily and holds it well.
For thin metal TIG welding, especially on steel or stainless steel, a 2% lanthanated or 2% thoriated tungsten is often recommended. They provide a stable arc at lower amperages.
Tungsten Size
Smaller diameter tungsten electrodes are generally better for thin metal. A common size for low amperage welding on thin materials is 1/16 inch (1.6mm). This allows you to create a finer arc.
Always ensure your tungsten is properly ground to a sharp point for DC welding. For AC welding of aluminum, you can slightly ball the tip.
Shielding Gas: Protecting Your Weld
Shielding gas protects your molten weld pool from the air. Without it, oxygen and nitrogen can get into the weld, making it weak and brittle. For TIG welding steel and stainless steel, pure argon is the most common choice.
For aluminum, pure argon is also standard.
Gas Flow Rate
Setting the correct gas flow rate is crucial. Too little, and you won’t get enough protection. Too much, and the gas stream can actually suck in outside air, contaminating your weld.
It can also cause turbulence and create a messy arc.
A good starting point for gas flow on thin metal is usually between 10-15 cubic feet per hour (CFH). You should see a steady, but not overly aggressive, flow from the TIG torch cup. Listen to the sound; it should be a gentle hiss, not a roar.
Make sure your TIG torch cup is the right size for the job. A smaller cup, like a #6 or #8, is often better for tight spots and controlling gas flow on thin materials.
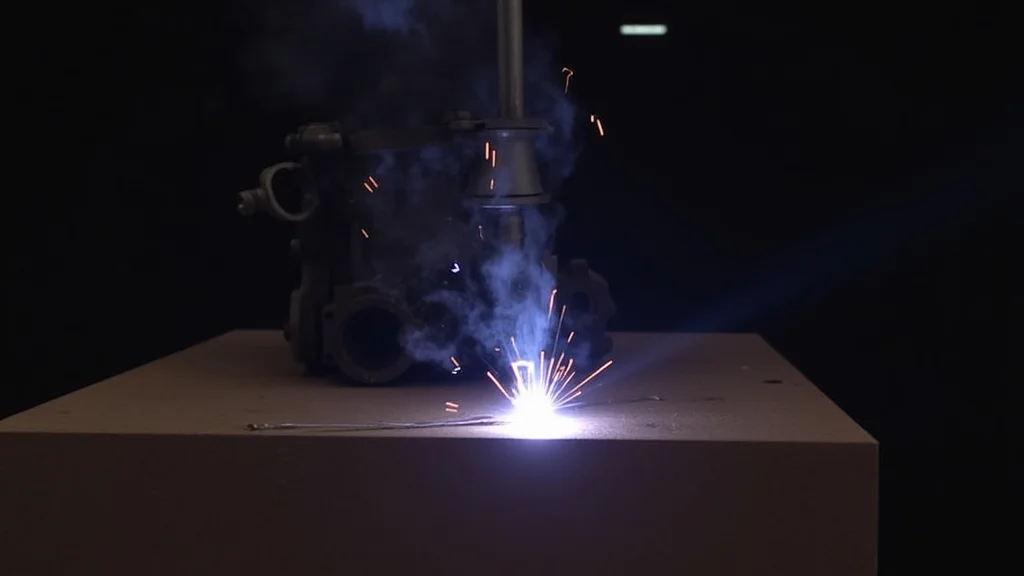
Pulse Settings: Controlling Heat
Many modern TIG welders have a pulse function. This is incredibly helpful when welding thin metal. Pulse welding rapidly alternates between a high peak amperage and a lower background amperage.
How Pulse Helps
- Heat Control: The background amperage cools the weld pool, reducing the risk of burn-through.
- Penetration Control: The peak amperage provides enough heat for good fusion.
- Appearance: Pulse welding can create a very consistent, stacked-dime look.
Setting Up Pulse
When using pulse settings, you’ll typically adjust:
- Peak Amperage: This is your main welding current, similar to what you’d use without pulse.
- Background Amperage: Usually set much lower, around 30-50% of your peak amperage.
- Pulse Frequency (Hz): This is how fast the welder switches between peak and background. For thin metal, a lower frequency (0.5 – 5 Hz) often works well. This gives you more time to see the puddle and control it.
- Pulse Width (% on-time): This controls how long the welder stays at peak amperage. A common starting point might be 50%.
Experimenting with pulse settings on scrap is the best way to dial it in. You’re looking for a setting that allows good fusion without melting through.
Filler Metal Selection
For TIG welding, filler metal is a rod of the same or a compatible alloy as your base metal. Choosing the right filler is important for the strength and integrity of your weld.
Matching Filler to Base Metal
For steel, use steel filler rods. For stainless steel, use stainless steel filler rods. For aluminum, use aluminum filler rods.
The specific alloy number for the filler rod should match or be compatible with your base metal.
Filler Rod Diameter
Just like with tungsten, the diameter of your filler rod matters for thin metal. Use a smaller diameter filler rod for thin materials. Common sizes for thin metal are 0.020 inches (0.5mm) or 1/16 inch (1.6mm).
You want a filler rod that is thin enough to feed easily into the puddle without adding too much extra heat or material.
Practice and Technique
Even with the best settings, your welding technique is vital for thin metal. You need to be comfortable moving the TIG torch and feeding the filler rod smoothly.
Torch Angle and Travel Speed
Maintain a consistent torch angle, typically around 10-15 degrees, pointed in the direction of travel. Your travel speed should be steady and match the rate at which the filler metal is being fused into the puddle.
Feeding Filler Metal
When welding thin metal, you often only need a small amount of filler metal, if any. Sometimes, you can fuse the edges together without adding filler. If you do add filler, dip it lightly into the leading edge of the puddle.
Avoid submerging the rod or adding too much too quickly.
Putting It All Together: A Step-by-Step Guide
Step 1: Prepare Your Metal
Cleanliness is paramount. For thin metals, especially aluminum and stainless steel, make sure the edges you are welding are completely free of rust, paint, oil, and any other contaminants. Use a stainless steel wire brush (dedicated for stainless only to avoid cross-contamination) or a degreaser.
Step 2: Set Your Amperage
Start with a lower amperage. Consult a welding chart if you have one, but always be ready to adjust based on your test welds. For a 24-gauge steel piece, try 30 amps.
For a 16-gauge aluminum piece, you might need 70-90 amps.
Step 3: Select Your Tungsten
Use a 1/16 inch (1.6mm) lanthanated or ceriated tungsten for DC welding, or a balled pure tungsten for AC welding.
Step 4: Set Your Shielding Gas
Set your argon flow to 10-15 CFH. Ensure the gas lens on your torch is properly seated and the cup is sized appropriately.
Step 5: Consider Pulse (If Available)
If your welder has pulse, set it to a low frequency (1-3 Hz) and a background amperage of about 40% of your peak. Peak amperage should be set as you would without pulse.
Step 6: Choose Your Filler Rod
Select a thin filler rod (0.020″ or 1/16″) that matches your base metal alloy.
Step 7: Make Test Welds
Use scrap pieces of the same material and thickness. Weld short beads, adjusting amperage, travel speed, and filler rod application until you achieve a consistent, fused bead without burning through.
Step 8: Weld Your Project
Once you’re happy with your test welds, proceed to your actual project. Maintain consistent settings and technique.
Frequently Asked Questions
Question: What is the biggest mistake beginners make when TIG welding thin metal?
Answer: The most common mistake is using too much amperage, which leads to burning through the thin material. Beginners often start with settings suitable for thicker metals.
Question: Do I always need filler metal for thin metal TIG welding?
Answer: Not always. For very thin materials or certain joint types, you can sometimes fuse the edges together without adding any filler metal. If you do use filler, keep it minimal.
Question: Can I use a stick welder or MIG welder for thin metal?
Answer: While it’s possible to weld thin metal with MIG and even some stick welders with special settings and techniques, TIG welding offers the most control and the cleanest results for very thin materials.
Question: How do I prevent warping on thin metal while TIG welding?
Answer: Warping is caused by uneven heat distribution. Using pulse settings, lower amperage, faster travel speed, and tack welding strategically can help minimize warping.
Question: What if I don’t have a pulse setting on my TIG welder?
Answer: You can still TIG weld thin metal without a pulse setting. You’ll need to rely heavily on precise amperage control, quick foot pedal modulation, and a steady hand to manage heat input and prevent burn-through.
Final Thoughts
Learning How Do You Set Up TIG Welder for Thin Metal? is about finding that sweet spot of heat control. You’ll focus on lower amperages, the right tungsten, a steady gas flow, and perhaps pulse settings. Choosing thinner filler rods and practicing on scrap are your best friends.
Mastering these basics will let you create clean, strong welds on even the thinnest materials with confidence. Keep practicing, and you’ll get the hang of it quickly!