Figuring out How Do You Set Up MIG Welding for Aluminum? can seem tricky at first. Aluminum is different from steel, and using the wrong settings can lead to messy welds or frustration. But don’t worry!
We’ll walk through it step-by-step to make it simple. Get ready to learn what you need to do to get great aluminum welds.
Key Takeaways
- Choosing the right wire, gas, and tip is important for aluminum MIG welding.
- You’ll need a spool gun or a push-pull gun for aluminum to feed the wire smoothly.
- Aluminum welding requires higher voltage and amperage than steel.
- Proper cleaning of the aluminum surface is essential before welding.
- Shielding gas choice, like pure Argon, helps prevent contamination.
- Practice with scrap pieces is key to mastering aluminum MIG welding.
Getting Started with MIG Welding Aluminum
Welding aluminum with a MIG welder can be a bit different than welding steel. It’s often a common question for beginners because aluminum has unique properties. It’s softer, conducts heat faster, and can oxidize quickly.
This means you need to adjust your setup to match. But once you know the basics, it’s quite manageable. We’ll break down exactly How Do You Set Up MIG Welding for Aluminum? so you can get it right.
Why Aluminum is Different for MIG Welding
Aluminum is a fantastic metal, but it presents some unique challenges for MIG welding. Unlike steel, aluminum is much softer. This softness can cause the MIG wire to bunch up or “bird-nest” in the wire feeder, especially with longer distances from the feeder to the gun.
It also melts at a lower temperature but conducts heat very quickly, meaning it can warp or burn through easily if you’re not careful. Another big issue is aluminum oxide. It forms a protective layer on the surface of aluminum almost instantly when exposed to air.
This oxide has a much higher melting point than the aluminum itself and can cause weld porosity and weak joints if not removed properly.
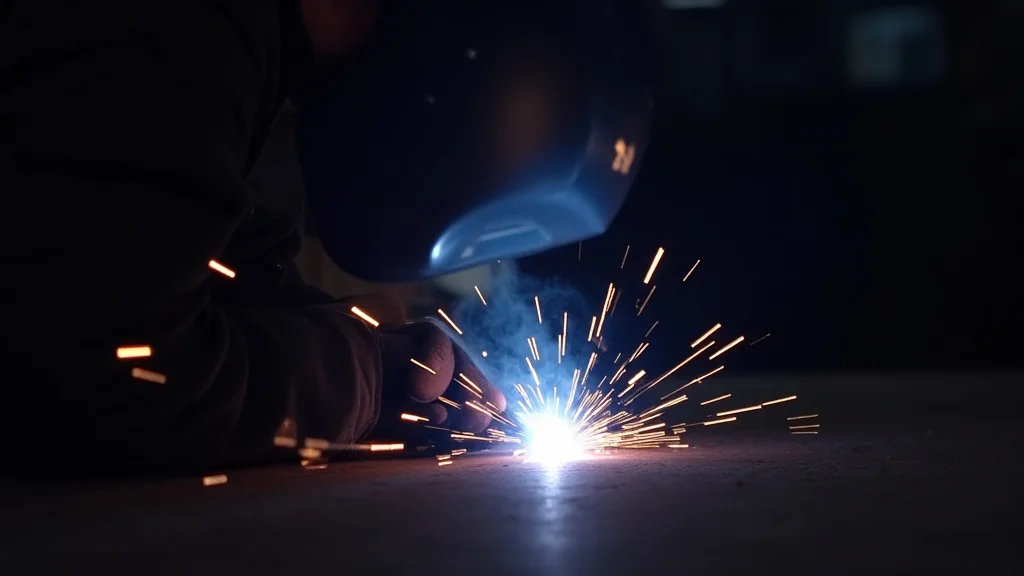
The way aluminum welds is also visually different. It tends to look less like the shiny, smooth bead you might get from steel and can appear duller or have a silvery finish. Understanding these differences is the first step to a successful aluminum weld.
Essential Equipment for Aluminum MIG Welding
To properly set up for MIG welding aluminum, you’ll need a few specific pieces of equipment that differ from a standard steel setup. These are crucial for feeding the soft wire and managing the heat.
Wire Feeder Options: Spool Guns vs. Push-Pull Guns
The biggest challenge with aluminum is feeding the soft wire. Standard MIG feeders often struggle. The wire can kink or get stuck between the drive rollers and the liner.
To overcome this, you have two main options:
Spool Guns
A spool gun is a separate wire feeder that attaches directly to your MIG gun. The wire comes on a small 1-pound spool (about 4 inches in diameter) mounted right on the gun. This drastically reduces the distance the wire has to travel from the drive rollers to the welding tip.
With a shorter path and fewer bends, the wire feeds much more smoothly. Spool guns are generally lighter and easier to maneuver for smaller jobs or when welding overhead or in tight spaces.
Push-Pull Guns
A push-pull gun uses a more robust system. It has drive rollers in the main wire feeder that “push” the wire, and a motor in the gun handle that “pulls” the wire. This dual-action system provides extra power and control, making it excellent for longer cable runs or larger spools of wire (10-pound or 33-pound).
Push-pull guns are often used in production environments or for welding thicker aluminum sections.
Regardless of which you choose, it’s important to use a Teflon or nylon liner in your gun. This provides a slick surface that helps the soft aluminum wire slide through easily, further preventing feeding issues.
Proper Drive Rollers
You can’t use standard steel V-groove drive rollers for aluminum. Aluminum wire is softer and requires knurled U-groove drive rollers. These rollers have a roughened surface that grips the wire without deforming it, ensuring a consistent feed rate.
Gas and Regulator Settings
The shielding gas you use is critical for protecting the molten aluminum from atmospheric contamination. For MIG welding aluminum, pure Argon is almost always the recommended shielding gas. Other gases, like Argon-CO2 mixtures or straight CO2, are not suitable because they can react with the aluminum and cause weld defects.
You’ll need a flowmeter on your gas cylinder to set the correct gas flow rate. A common starting point is around 20-30 cubic feet per hour (CFH), but you may need to adjust this based on your specific welding conditions and the size of your nozzle.
Contact Tips
Aluminum wire is typically softer and larger in diameter than steel wire. Standard steel contact tips can become enlarged or clogged quickly. It’s best to use copper or brass contact tips that are specifically designed for aluminum wire.
These tips have a slightly different geometry and are more durable for aluminum welding. Make sure the tip size matches the diameter of your aluminum wire (e.g., a .035-inch tip for .035-inch wire).
Setting Your MIG Welder for Aluminum
Once you have the right equipment, the next step is to set your welder’s parameters. This is where many beginners run into trouble, as aluminum often requires higher settings than steel for similar thicknesses.
Voltage and Amperage (Wire Speed)
Aluminum requires more heat to melt and fuse properly compared to steel. This means you’ll generally need to use higher voltage and wire speed settings. The voltage controls the arc length, and the wire speed controls the amperage (the amount of current).
For a given wire diameter, increasing the wire speed will increase the amperage.
A good starting point for common aluminum thicknesses (like 1/8-inch or 3mm) using .035-inch wire might be around 18-22 volts and a corresponding wire speed of 300-450 inches per minute (IPM). Thicker aluminum will require higher settings, and thinner aluminum will need lower settings. Always consult your welder’s manual for recommended settings or use a chart if one is available.
Polarity
MIG welding aluminum requires a specific polarity setting on your welder. Most MIG welders can run on either direct current electrode positive (DCEP) or direct current electrode negative (DCEN). For aluminum, you almost always need to set your welder to DCEN (Electrode Negative).
This is different from steel, which is typically run on DCEP. Using DCEN helps to “clean” the aluminum surface as you weld by pushing the oxide layer away from the weld pool. If you accidentally set it to DCEP, you’ll likely experience arc instability, poor weld penetration, and a lot of spatter.
Preparing the Aluminum for Welding
Proper preparation is perhaps the most critical step in successfully MIG welding aluminum. Without it, even the best machine setup will result in poor welds.
Cleaning is Key
As mentioned, aluminum oxidizes very quickly. This oxide layer has a high melting point and can cause serious weld defects if it gets into your molten puddle. Before welding, you must thoroughly clean the surface:
Mechanical Cleaning
Use a stainless steel wire brush that is dedicated only for aluminum. Do not use a brush that has been used on steel, as this will contaminate the aluminum. Brush the area you intend to weld vigorously to remove the oxide layer.
You can also use a scraper or a clean, abrasive pad for this purpose.
Chemical Cleaning (Optional but Recommended)
For best results, especially on critical welds, a chemical cleaner can be used after mechanical cleaning. Specialized aluminum cleaners and degreasers can remove oils and other contaminants. Always follow the manufacturer’s instructions for these products.
After cleaning, avoid touching the prepared area with bare hands, as skin oils can also contaminate the surface.
Removing Contaminants
Beyond the oxide layer, aluminum can also be contaminated with paint, grease, oil, or dirt. These all need to be removed. Acetone or a dedicated aluminum degreaser is effective for removing oils and grease.
If the aluminum has paint on it, it will need to be mechanically removed from the weld area.
Welding Technique for Aluminum
Once your equipment is set up and your aluminum is clean, your welding technique plays a big role in the quality of your welds.
Torch Angle
When welding aluminum, you generally want to use a slightly different torch angle than you would for steel. A push angle (pushing the gun away from you) is often preferred. This helps to blow away the oxide and contaminants and provides better visibility of the weld puddle.
A push angle of about 10-15 degrees is a good starting point.
Travel Speed
Aluminum transfers heat rapidly. If you move too slowly, you risk burning through the material, especially on thinner sections. If you move too quickly, you won’t get enough penetration or fusion.
Find a balance by observing the weld puddle. It should be fluid and melt into the base metal, but not so fluid that it drips or runs away.
Crater Fill
At the end of a weld, the molten puddle needs to be filled to prevent a crack from forming. This is called crater filling. When you stop feeding wire, the weld puddle can collapse, leaving a void.
To counter this, you can pause at the end of the weld, momentarily decrease wire speed or voltage (if your machine has that capability), or quickly run a small bead backwards to fill the crater. Practicing crater filling is essential for strong aluminum welds.
Troubleshooting Common Aluminum MIG Welding Issues
Even with the right setup, you might encounter some problems. Here are a few common issues and how to address them:
Bird-Nesting
Problem: The wire bunches up and gets tangled at the gun or in the feeder.
Solution: Ensure you are using a spool gun or push-pull gun with a Teflon liner. Check that your drive rollers are the correct U-groove type for aluminum. Make sure the tension on the drive rollers is not too tight, which can crush the wire.
Excessive Spatter
Problem: Small droplets of molten metal are flying out of the arc and sticking to the base metal.
Solution: Ensure your polarity is set correctly to DCEN. Check your gas flow rate and ensure you have adequate shielding. Verify that your contact tip is the correct size and not worn out.
Your voltage and wire speed settings might also be too low.
Porosity
Problem: Small holes or voids in the weld bead.
Solution: This is often caused by contamination. Ensure the aluminum is thoroughly cleaned before welding. Check your shielding gas coverage – wind or insufficient flow can lead to contamination.
Make sure you are using pure Argon gas.
Burn-Through
Problem: The weld melts completely through the base metal.
Solution: Reduce your voltage and wire speed settings. Use a faster travel speed. If welding thin material, consider using a pulse MIG setting if your machine has it, as this can help control heat input.
Frequently Asked Questions
Question: What kind of shielding gas should I use for MIG welding aluminum?
Answer: For MIG welding aluminum, you should use 100% pure Argon. Other gas mixtures are not suitable as they can react with the aluminum and cause weld defects.
Question: Do I need a special MIG gun for aluminum?
Answer: Yes, it is highly recommended to use a spool gun or a push-pull gun for MIG welding aluminum. The soft aluminum wire feeds much more reliably through these systems compared to a standard push-style gun.
Question: What polarity do I use for MIG welding aluminum?
Answer: You must set your MIG welder to DCEN (Direct Current Electrode Negative) for aluminum. This is opposite to how you would weld steel.
Question: How do I clean aluminum before welding?
Answer: First, use a dedicated stainless steel wire brush for aluminum to remove the oxide layer. Then, clean the area with acetone or an aluminum degreaser to remove oils and other contaminants. Avoid touching the cleaned surface with bare hands.
Question: My aluminum wire keeps bunching up. What’s wrong?
Answer: This is called “bird-nesting.” It’s usually caused by using a standard push gun, incorrect drive rollers (you need U-groove), or too much tension on the drive rollers. Using a spool gun or push-pull gun and the right U-groove rollers is key.
Final Thoughts
Learning How Do You Set Up MIG Welding for Aluminum? involves a few specific steps that set it apart from steel. You need the right tools like a spool gun or push-pull gun and dedicated U-groove rollers. Crucially, pure Argon gas and DCEN polarity are essential.
Always remember to thoroughly clean the aluminum surface first, as contamination is a major cause of bad welds. Adjusting your voltage and wire speed for the aluminum’s heat conductivity is also important. With a little practice and attention to these details, you’ll be welding aluminum effectively.