Figuring out How Do You Set TIG Welder Pulse Settings Correctly? can seem a bit tricky when you’re starting out. It feels like there are so many buttons and dials, and you want to get it just right. Don’t worry, it’s not as hard as it looks!
We’ll walk through it step-by-step to make it simple. First, let’s cover what pulse settings do and why they matter for your welds.
Key Takeaways
- Pulse TIG welding creates a pulsing effect that controls heat input and bead appearance.
- Understanding pulse frequency, peak time, and background current is key to setting it up.
- Different materials and thicknesses require different pulse settings.
- Setting pulse correctly helps reduce distortion and improve weld aesthetics.
- Practice and observation are vital for mastering TIG pulse settings.
What is TIG Welder Pulse?
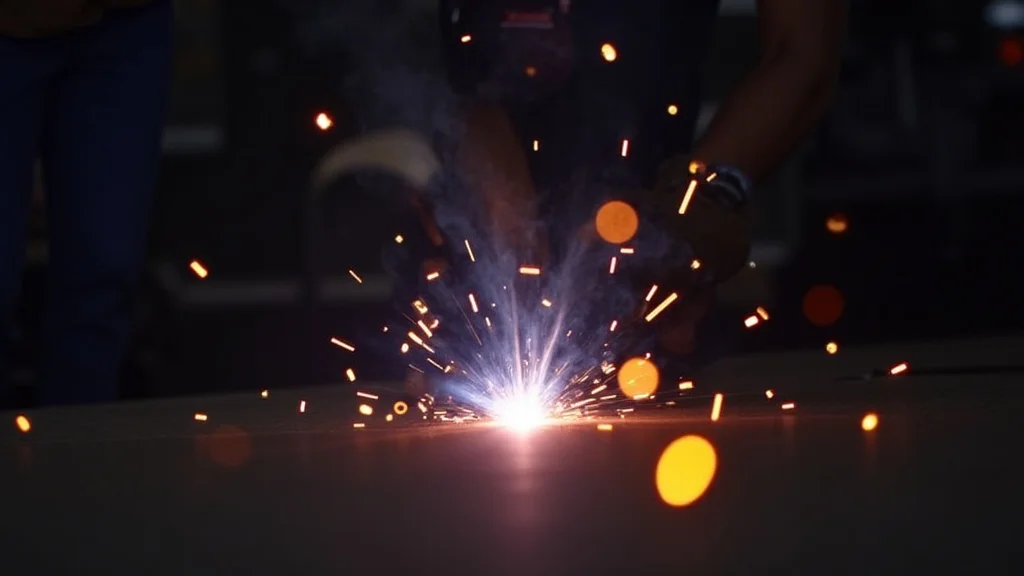
TIG welding, also known as Gas Tungsten Arc Welding (GTAW), is a popular method for creating strong, clean welds. Sometimes, you’ll see machines with a “pulse” setting. This isn’t just a fancy extra; it’s a way to control the welding arc and the heat that goes into your metal.
When you use the pulse function, your TIG welder doesn’t just send out a steady stream of power. Instead, it cycles between a high amperage (peak) and a lower amperage (background). This pulsing action happens very quickly, often many times per second.
It’s like a rapid on-and-off switch for the arc’s intensity.
Why Use Pulse TIG Welding?
Using pulse settings offers several benefits that can make your TIG welding better, especially for beginners. It helps you manage heat more effectively. This is super important because too much heat can warp thin metals or burn through them.
The pulsing action allows the weld puddle to cool slightly between the high-amperage bursts, giving you more control.
Pulse welding also helps create that nice, even, stacked-dime look that experienced welders are known for. It can make your beads more consistent and visually appealing. Plus, it can help reduce distortion, which is a big plus when you’re working with materials that tend to bend or twist under heat.
Understanding the Key Pulse Settings
To set up your TIG welder for pulse, you need to know what the main controls do. There are three core settings you’ll usually find:
1. Pulse Frequency (Hz or PPS)
This is how fast the welder pulses between the high and low amperage. It’s often measured in Hertz (Hz) or Pulses Per Second (PPS). A higher frequency means the pulses are happening very rapidly, creating a tighter, more consistent bead.
A lower frequency means the pulses are slower. This can give you more time to see the weld puddle and manipulate it. For beginners, a medium frequency, like 1 to 5 Hz, is often a good starting point.
It allows for a visible pulse effect without being too fast to manage.
2. Peak Time (%)
This setting controls how long the welder stays at the high amperage (peak) during each pulse cycle. It’s usually shown as a percentage of the total pulse cycle. For example, 50% peak time means the welder is at high amperage for half the pulse and at low amperage for the other half.
A shorter peak time means less heat input during the “on” phase. A longer peak time allows for more heat to be applied. For controlling thin metals, you might want a shorter peak time.
For thicker materials where you need to push more heat, you might use a longer peak time.
3. Background Current (%)
This is the lower amperage that the welder drops to between the high-amperage pulses. It’s also usually shown as a percentage of your main welding amperage. The background current helps maintain an arc but allows the weld puddle to cool slightly.
A higher background current will keep the puddle molten for longer, while a lower background current will allow it to cool down more. You’ll want enough background current to keep the arc stable but not so much that you overheat the material. Often, a background current of 30% to 70% works well.
How Do You Set TIG Welder Pulse Settings Correctly? A Step-by-Step Approach
Now that you know the basic controls, let’s put it all together. Setting your TIG welder pulse correctly isn’t about finding a single perfect number. It’s about matching the settings to the job you’re doing.
Step 1: Know Your Material and Thickness
This is the most important starting point. Different metals have different melting points and conduct heat differently. Thin metal needs less heat than thick metal.
So, the first thing to ask is: What am I welding?
- Thin materials (e.g., 20-gauge sheet metal): You need to be very careful with heat. Lower amperage, shorter peak times, and possibly a slightly higher frequency can help prevent burn-through.
- Medium materials (e.g., 1/8-inch steel): You have more flexibility. You can use a wider range of settings.
- Thick materials (e.g., 1/4-inch steel): You’ll generally use higher amperages and may not need as much pulsing, or you might pulse differently to control heat buildup in larger pieces.
Step 2: Start with a Base Setting
If you’re unsure, it’s best to start with settings that are commonly recommended for your material type. Many welding machine manuals offer starting points for different metals and thicknesses. You can also find charts online or ask experienced welders.
For example, for aluminum, you might start with:
- Frequency: 1-2 Hz
- Peak Time: 50%
- Background Current: 40-50%
For steel, you might try:
- Frequency: 1-5 Hz
- Peak Time: 50-60%
- Background Current: 40-60%
Step 3: Set Your Main Amperage
Before you even think about pulse, you need to set your primary welding amperage. This is the overall power level for your weld. This depends on the thickness of the metal you’re welding.
A good rule of thumb for steel is about 1 amp per thousandth of an inch of thickness. For aluminum, you’ll usually need more amperage, maybe 1.25 to 1.5 amps per thousandth.
Your pulse settings will be based on this main amperage. The peak time and background current are percentages of this number.
Step 4: Adjust Pulse Frequency
Think about the look you want and how much control you need. For a classic “stacked dime” look on steel, a frequency between 1 and 5 Hz often works well. This gives you a visible pulse that helps you see the puddle cooling.
If you’re welding very thin material or need to really control heat, a slightly higher frequency might help. For aluminum, sometimes a slower pulse (1 Hz) is preferred to allow the puddle to solidify a bit between pulses.
Step 5: Dial in Peak Time and Background Current
This is where you fine-tune the heat. Remember, peak time is how long you’re hot, and background is how long you’re cooler.
- If your puddle is too fluid and spreading out: Try decreasing your peak time or decreasing your background current. This gives the puddle less time to spread.
- If your puddle is freezing up too quickly or you can’t get good fusion: Try increasing your peak time or increasing your background current. This keeps the puddle molten for longer.
The goal is to have a puddle that you can easily control. It should look like it’s expanding and contracting slightly with each pulse, but it shouldn’t get too big or too small.
Step 6: Test and Observe
Always practice on scrap pieces of the same material and thickness as your project. Watch how the weld puddle behaves. Does it look consistent?
Are you getting good penetration without burning through? Is the bead wetting out nicely onto the base metal?
Make small adjustments to one setting at a time and see how it affects the weld. It takes practice to develop a feel for these settings.
Pulse Settings for Different Materials
While the principles are the same, different metals will respond differently to pulse settings.
Steel
Steel is forgiving and often a great material to learn pulse welding on. You can achieve beautiful, consistent beads with pulse.
- Thin Steel (e.g., 18-20 gauge): Use lower overall amperage. Try a frequency of 2-5 Hz, peak time around 50%, and background current of 40-50%. This helps prevent warping.
- Thicker Steel (e.g., 1/4 inch): Higher amperage. You might use a frequency of 1-3 Hz, peak time of 50-60%, and background current of 50-60%. This helps ensure good penetration.
Stainless Steel
Stainless steel can be tricky because it doesn’t conduct heat as well as mild steel. Pulse welding is very beneficial here to manage heat and prevent distortion.
- Generally, you’ll want a frequency between 1 and 10 Hz.
- Peak time around 50%.
- Background current often around 30-50%. Lower background current can help with cooling.
- The appearance of the stainless steel (heat tint) can also be affected by pulse settings.
Aluminum
Aluminum requires more amperage than steel for the same thickness and is very prone to overheating. Pulse welding is almost essential for controlling the weld puddle.
- Aluminum welding is DC or AC. For pulse, it’s typically DC electrode positive or AC for thicker sections and out-of-position.
- Frequency: Often in the 1-3 Hz range to see the puddle melt and freeze.
- Peak Time: 50%.
- Background Current: 40-60%. You want enough to keep the arc going but allow for cooling.
- The AC balance and frequency settings on an AC welder also play a big role with aluminum, separate from pulse.
When Not to Use Pulse
While pulse is great, it’s not always necessary or the best choice. If you’re welding very thick material where heat control isn’t a major concern, or if you’re doing quick, high-amperage welds where the speed is more important, you might turn the pulse off. Sometimes, for very simple, straightforward joints on robust materials, a steady arc is perfectly fine and might even be faster.
Frequently Asked Questions
Question: Is pulse TIG welding harder than regular TIG welding?
Answer: For beginners, pulse TIG welding can seem a little more complicated because there are more settings to consider. However, once you understand what each setting does, it can actually make welding easier by giving you more control over the heat and the weld puddle.
Question: What does a high frequency pulse do?
Answer: A high frequency pulse makes the weld bead look smoother and more consistent, almost like a continuous bead. It can also help to reduce the size of the heat-affected zone, which is good for some materials.
Question: What if my weld looks bumpy with pulse?
Answer: If your weld looks bumpy or inconsistent, you might need to adjust your pulse frequency or your peak time. A frequency that’s too slow might lead to uneven cooling, and a peak time that’s too long can make the puddle too large.
Question: Can I use pulse welding on all metals?
Answer: Pulse welding is most commonly used on steel, stainless steel, and aluminum. While it might be possible to use on other metals, it’s most beneficial and widely applied to these common materials where heat control is important.
Question: How do I know if I’m using the right background current?
Answer: You’ll know your background current is about right if the arc remains stable between pulses, but the weld puddle has a chance to cool and firm up slightly. If the puddle gets too liquid and spreads out, your background current might be too high, or your peak time too long.
Final Thoughts
Mastering How Do You Set TIG Welder Pulse Settings Correctly? comes down to practice and observation. You learned that pulse welding controls heat by cycling through high and low amperages. The key settings are frequency, peak time, and background current, each influencing the weld’s appearance and performance.
By starting with material type and thickness, then adjusting these settings step-by-step, you can achieve better welds. Don’t be afraid to experiment on scrap metal. With a little patience, you’ll find the perfect pulse for your project.


