Choosing the right welding helmet can seem tricky when you’re just starting out. There are so many options, and you want one that keeps you safe and lets you see clearly. It’s natural to wonder, How Do You Choose the Right Welding Helmet? Don’t worry, we’ll break it down simply, step by step.
We’ll help you find the perfect helmet for your needs. Ready to see what makes a helmet great?
Key Takeaways
- Understand the different types of welding helmets.
- Learn about auto-darkening lenses and their benefits.
- Know what safety features are important for a welding helmet.
- Discover how lens shades and viewing areas affect your work.
- Find out how comfort and fit play a role in helmet choice.
- Learn how to match a helmet to your welding tasks and budget.
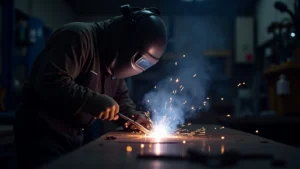
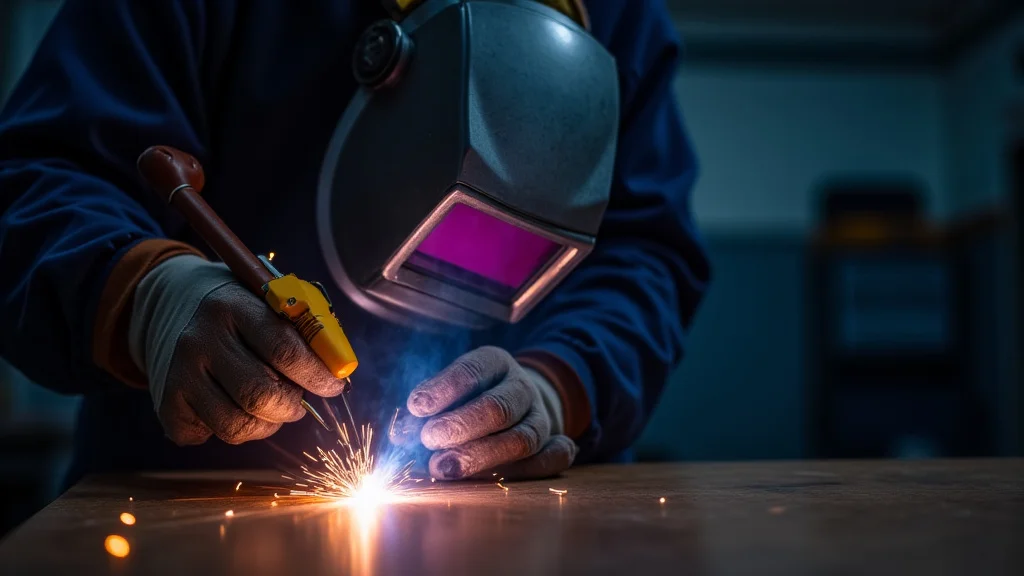
Understanding Welding Helmet Basics
Welding creates bright light. This light can hurt your eyes. A welding helmet protects your face and eyes from this light.
It also protects you from sparks and heat. Think of it as your shield.
Types of Welding Helmets
There are a few main kinds of welding helmets. The simplest ones have a dark lens that you have to lift. This is called a passive helmet.
It’s good for quick jobs or when you’re not welding a lot.
Most welders today use auto-darkening helmets. These have special lenses that get dark instantly when they sense the welding arc. This is a big help because you don’t have to flip your helmet up and down.
You can keep both hands on your work.
Passive Welding Helmets
Passive helmets are the most basic. They have a fixed shade lens, usually shade 10 or 11. You look through this dark lens when you weld.
Before you start, you might need to lift the helmet or have someone hold it for you. This can slow you down and make it harder to position your weld.
They are usually cheaper. For hobbyists or people doing very occasional welding, they can work. But for anyone welding more often, auto-darkening is much better.
Auto-Darkening Welding Helmets (ADF)
Auto-darkening helmets have revolutionized welding. They use electronic sensors to detect the bright light of a welding arc. When the arc starts, the lens darkens automatically in a fraction of a second.
When the arc stops, it becomes clear again.
This means you can keep your helmet down. You can see your weld preparation clearly before you start. You can also see after the weld is done.
This makes welding faster and easier, especially for beginners.
Auto-Darkening Lens Features
Auto-darkening lenses have important features to consider. These features affect how well the helmet works and how much it costs.
Shade Settings
ADF lenses can usually adjust their darkness level. This is called the shade setting. Different welding processes need different shade levels.
For example, TIG welding might use a shade 9 or 10. Stick welding might use a shade 10 or 11. MIG welding can also vary.
Many helmets have variable shade settings. This means you can pick the exact shade you need. This is very useful.
Some helmets also have a “grind” mode. This keeps the lens clear so you can grind metal without the lens darkening.
Sensitivity Control
Sensitivity control lets you adjust how much light it takes for the lens to darken. If you’re welding near other welders, you might need to lower the sensitivity. This stops your helmet from darkening when their arc flashes.
If you’re welding in a very bright area, you might need to increase sensitivity.
Delay Control
The delay control adjusts how long the lens stays dark after the welding arc stops. A short delay is good for fast, light welding. A longer delay is better for bright, heavy welding.
This helps protect your eyes from the bright “afterglow” of the weld puddle.
Number of Sensors
ADF lenses have sensors that detect the welding arc. Most helmets have two sensors. Better helmets have four sensors.
More sensors mean the lens is less likely to turn off if the arc is partly blocked. This is important for difficult welding positions.
Viewing Area Size
The viewing area is how much you can see through the helmet lens. A larger viewing area gives you a better view of your work. This is especially helpful for beginners who need to see clearly where they are welding.
Some helmets have very wide viewing areas.
A standard viewing area is about 3.5 by 1.7 inches. Larger ones can be 3.7 by 3.7 inches or even more. Consider what you’ll be welding.
For complex welds or tight spaces, a bigger view is a plus.
Lens Clarity and Color
The clarity of the lens is important. It affects how you see the weld puddle. Modern lenses have good clarity, often rated as optical class 1/1/1.
This means they have good clarity, good diffusion of light, and good variation in viewing angle.
Some lenses have a green tint. Others have a more natural, blue tint. The blue tint is often preferred by welders because it shows colors more accurately.
This helps you see the heat color of the metal better.
Safety Standards and Ratings
Always look for helmets that meet safety standards. In the US, this is usually ANSI Z87.1. In Europe, it’s EN379.
These standards mean the helmet has been tested for protection against impact and optical quality.
A good helmet protects your face, head, and neck. The shell should be strong enough to resist heat and impact. Make sure the helmet fits well and covers all necessary areas.
Comfort and Fit
You’ll be wearing the helmet for a while. It needs to be comfortable. Look at the headgear.
It should be adjustable and padded. A good headgear distributes the weight of the helmet evenly.
The helmet should balance well on your head. You don’t want it to be too front-heavy or slip down. Try to adjust the straps and pivot points to find a snug but not tight fit.
A comfortable helmet means you can focus on welding.
Power Sources for ADF Helmets
Auto-darkening helmets need power. Most use a combination of solar power and small batteries. The solar panel uses light from the welding arc to help power the lens.
The batteries are for when there isn’t enough light, or for backup.
Batteries are usually replaceable. When buying a helmet, check what kind of batteries it uses. Also, consider the battery life.
Some helmets have indicator lights to show when the battery is low.
Types of Welding and Helmet Choice
The type of welding you do matters. Different processes have different needs.
Stick Welding (SMAW)
Stick welding creates a very bright arc. You’ll need a helmet with a high shade setting, like 10 or 11. Variable shade is helpful.
Auto-darkening is a big plus here.
MIG Welding (GMAW)
MIG welding can also be quite bright. The shade needed can vary depending on the wire and amperage. A variable shade helmet is ideal.
Four sensors are good for MIG because the arc can be less consistent.
TIG Welding (GTAW)
TIG welding uses a less intense arc but requires a lot of precision. Many TIG welders prefer a lens with excellent optical clarity and a good, natural color tint. Shade 9 or 10 is common, but variable shade is best.
Some TIG welders like a wider viewing area.
Budget Considerations
Welding helmets range in price. Passive helmets are the cheapest, maybe $20-$50. Basic auto-darkening helmets can be $50-$150.
Higher-end helmets with more features and better optics can cost $150-$400 or more.
For beginners, a good mid-range auto-darkening helmet is usually the best value. It offers protection, convenience, and good features without breaking the bank. You can always upgrade later if needed.
Frequently Asked Questions
Question: What is the most important feature in a welding helmet for a beginner?
Answer: For a beginner, the most important feature is an auto-darkening lens. This lets you keep your helmet down and focus on seeing your weld line, making it much easier to learn.
Question: Do I need a helmet with four sensors?
Answer: Four sensors are better because they detect the welding arc more reliably, especially in different welding positions. Two sensors are often enough, but four offer added peace of mind and better performance.
Question: How dark should my welding helmet lens be?
Answer: The darkness, or shade, depends on the welding process. For example, stick welding might need shade 10-11, MIG shade 9-13, and TIG shade 9-13. A helmet with variable shade settings is very useful.
Question: Can I use a welding helmet for grinding?
Answer: Many auto-darkening helmets have a “grind” mode. This keeps the lens clear so you can grind without it darkening. Always check if your helmet has this feature.
Question: How long do the batteries in an auto-darkening helmet last?
Answer: Battery life varies. Most helmets use small,
Final Thoughts
When you’re trying to figure out How Do You Choose the Right Welding Helmet?, think about what you’ll be doing. Auto-darkening is a must for most people, especially beginners. Look for a comfortable fit, good optical clarity, and adjustable shade settings.
Don’t forget safety standards like ANSI Z87.1. With these tips, you can pick a helmet that keeps you safe and lets you focus on making great welds. You have the knowledge to make a smart choice.