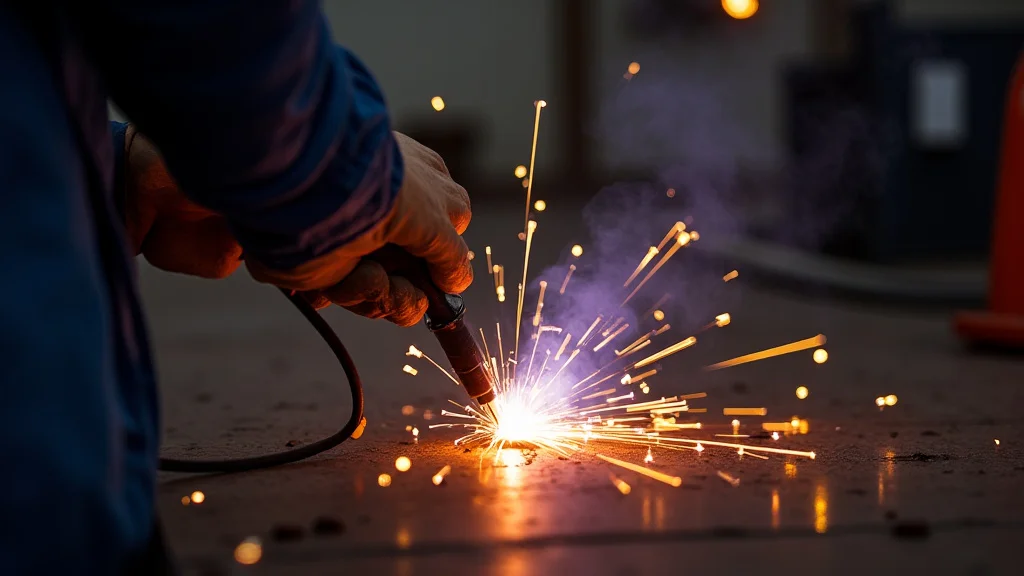
Getting a good weld can feel tricky when you’re starting out. Many new welders wonder, “How Do You Adjust Welding Voltage for Better Arc?” It’s a common question because the arc is the heart of welding. Too high or too low, and your weld won’t be smooth or strong.
But don’t worry! We’ll break it down simply and show you exactly how to get that perfect arc. Let’s explore how to make your welds look and work great.
Key Takeaways
- You will learn what welding voltage actually does.
- You will discover how voltage affects your welding arc.
- You will find out the signs of voltage that is too high or too low.
- You will get tips on how to set the right voltage for different situations.
- You will understand how voltage works with other settings.
Understanding Welding Voltage
What is Welding Voltage?
Welding voltage is like the “push” behind the electricity that makes your arc. Think of it as the power that makes the metal melt and join together. It’s measured in volts (V).
When you set your welding machine, you’re telling it how much voltage to send. This voltage works with the amperage (the amount of current) to create the heat needed for welding.
Why Voltage Matters
Voltage has a big impact on your welding arc. It helps control the length and intensity of the arc. A good voltage creates a stable, consistent arc.
This stable arc makes it easier to melt the metal evenly and create a strong, clean weld. If the voltage is wrong, the arc can become unstable. This makes your welding much harder.
Voltage vs. Amperage
It’s important to know that voltage and amperage are different but work together. Amperage is about the heat you’re putting into the metal. It’s like the “volume” of the electricity.
Voltage is more about how the arc behaves. It influences how the metal transfers from your electrode to the weld. Usually, when you change voltage, you might also need to tweak your amperage a little to get the best results.
How Voltage Affects Your Arc
The Ideal Arc
A good welding arc is often described as smooth and consistent. It makes a gentle “sizzling” sound, not a loud “crackling” or “hissing” sound. The molten pool of metal should be easy to see and control.
The electrode should feed into the weld smoothly. This is what you aim for with the right voltage.
When Voltage is Too Low
If your welding voltage is too low, you’ll notice a few things. The arc will be short and might feel “stubby.” It’s like the electricity is struggling to jump. You might hear a “hissing” sound.
This can lead to a weld that is narrow and doesn’t penetrate the metal enough. It might also have a bumpy or uneven surface. The weld won’t be as strong because the metals aren’t joining properly.
Signs of Low Voltage:
- Short, “stubby” arc
- Hissing sound
- Narrow weld bead
- Poor penetration
- Rough weld surface
When Voltage is Too High
When the voltage is too high, the arc becomes long and “floppy.” It might sound like loud crackling or popping. The molten pool can get too large and spread out too much. This makes it hard to control.
You might also see a lot of spatter, which is small droplets of molten metal flying out. High voltage can cause the weld to be too wide and not deep enough, or it could even burn through thin metal.
Signs of High Voltage:
- Long, “floppy” arc
- Loud crackling or popping sound
- Excessive spatter
- Wide, shallow weld bead
- Risk of burning through material
Adjusting Voltage for Different Situations
Welding Different Metals
The type of metal you are welding matters. Steel, aluminum, and stainless steel all have different melting points and properties. For instance, aluminum melts at a lower temperature than steel.
You might need to adjust your voltage accordingly. Always check the welding machine’s manual or charts for recommended settings for specific metals.
Welding Different Thicknesses
Thicker metals need more heat to melt through properly. This usually means you’ll need higher amperage. However, voltage also plays a role.
For thicker materials, you often want a slightly higher voltage to help with good penetration and a strong bead. For very thin metals, you need to be careful. Too much heat or voltage can easily burn through.
You’ll typically use lower voltage and amperage for thin materials.
Welding Positions
Welding in different positions (flat, horizontal, vertical, overhead) can affect how the molten metal behaves. In the flat position, gravity helps the weld pool stay in place. You might use a standard voltage.
When welding vertically or overhead, gravity works against you. The molten metal wants to sag or drip. You might need to adjust your voltage, often a bit lower, and use quicker welding movements to control the weld pool.
Types of Welding Processes
The specific welding process you are using also has standard voltage ranges. For example, MIG (GMAW) and Flux-Cored welding often have recommended voltage settings based on the wire type and size. Stick welding (SMAW) can be a bit more dependent on electrode angle and travel speed, but voltage still plays a role in arc stability.
Practical Tips for Setting Voltage
Start with Recommendations
Your welding machine likely has a chart inside the cover or in the manual. This chart gives you a good starting point for voltage and amperage based on the material thickness and type. Always use these as your first guide.
Listen to Your Arc
The sound of the arc is a great indicator. A smooth sizzle is what you want. A loud crackle or a faint hiss means you need to adjust.
Train your ear to recognize the sounds of a good and bad arc.
Watch the Weld Pool
Observe how the metal is melting. Is the puddle too big and runny? Your voltage might be too high.
Is the puddle small and not melting enough? Your voltage might be too low. You want a puddle that is manageable and allows the electrode to feed smoothly into it.
Look at the Weld Bead
After you make a test weld, look at the bead. Is it wide and flat with lots of spatter? Try lowering the voltage.
Is it narrow, bumpy, and doesn’t seem to have melted into the base metal well? Try increasing the voltage.
Make Small Adjustments
When you’re adjusting voltage, make small changes. Don’t jump from a very low setting to a very high one. Change it by one or two volts at a time and make another test weld.
This helps you pinpoint the sweet spot.
Practice, Practice, Practice
The best way to learn how to adjust voltage is to practice. Take some scrap pieces of metal and experiment. Try different settings and see how they affect your arc and the resulting weld.
You’ll develop a feel for it over time.
Using a Voltage/Amperage Chart
Many welding machines, especially MIG welders, use charts to help set your machine. These charts are very helpful for beginners. They typically look like a table.
| Material Thickness (Gauge or inches) | Wire Diameter (inches) | Recommended Voltage (V) | Recommended Amperage (A) |
|---|---|---|---|
| 24-20 gauge (thin) | 0.023″ – 0.030″ | 15 – 18V | 50 – 90A |
| 18-14 gauge | 0.030″ – 0.035″ | 18 – 22V | 90 – 140A |
| 1/8″ – 1/4″ steel | 0.035″ | 22 – 25V | 140 – 180A |
| 1/4″ – 1/2″ steel | 0.045″ | 24 – 28V | 180 – 250A |
Remember, these charts are starting points. You will still need to make small adjustments based on your specific situation and preference.
Frequently Asked Questions
Question: What is the main job of welding voltage?
Answer: Welding voltage controls how long and how strong the electrical arc is. It helps the electricity jump from the wire to the metal, creating the heat to melt and join them.
Question: How can I tell if my voltage is too low?
Answer: If your arc sounds like a hiss, is short, and the weld bead is narrow and bumpy, your voltage is likely too low.
Question: What happens if my welding voltage is too high?
Answer: A high voltage causes a long, crackling arc with lots of spatter. The weld pool can become too wide and shallow, and you risk burning through thin materials.
Question: Do I need to change voltage for different metals?
Answer: Yes, different metals have different melting points. You might need to adjust voltage, along with amperage, to suit materials like steel, aluminum, or stainless steel.
Question: Should I change voltage when welding overhead compared to flat?
Answer: Yes. For overhead welding, you often use a slightly lower voltage to help control the molten metal so it doesn’t sag or drip down due to gravity.
Final Thoughts
Adjusting welding voltage for a better arc becomes easier with practice. Focus on the sound of the arc and the look of the weld puddle. Start with your machine’s recommended settings, and then make small tweaks.
Listen for that smooth sizzle and watch for a well-formed bead. You’ve got this!