Getting your TIG welder set up just right can feel tricky, especially when you’re starting out. You might wonder, How Do You Adjust TIG Welding Current Correctly? It’s a common question because the wrong setting can lead to weak welds or burnt metal. Don’t worry, it’s not as hard as it seems!
We’ll break it down step-by-step to make it easy for you. Let’s get your TIG welding on track.
Key Takeaways
- You’ll learn how metal thickness guides your TIG welding current.
- Discover how different metals need different amperages for TIG welding.
- Understand how joint type impacts the TIG welding current setting.
- Find out how tungsten size and gas flow affect your TIG current.
- Learn simple checks to confirm your TIG welding current is correct.
- Get tips on making quick adjustments for better TIG welds.
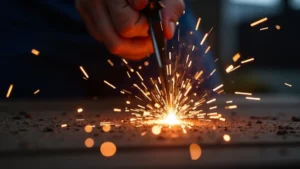
Why TIG Welding Current Matters
TIG welding, or Tungsten Inert Gas welding, is a popular method for creating strong, clean welds. It’s used in many industries, from making cars to building airplanes. A big part of TIG welding is controlling the heat.
The amount of heat you use comes from the electrical current. If this current is too low, your weld won’t melt the metal enough, and it will be weak. If the current is too high, you can burn right through the metal, creating holes.
This is why knowing How Do You Adjust TIG Welding Current Correctly? is so important for anyone wanting to TIG weld well.
Beginners often find setting the right current challenging because there are a few things to think about. It’s not just one number that works for everything. You have to consider what you’re welding and how you’re welding it.
But once you understand the basic rules, it becomes much simpler. We’ll walk you through it, so you can feel confident about your settings.
Factors That Influence TIG Welding Current
To set your TIG welder’s current correctly, you need to look at several key factors. Think of them as puzzle pieces that fit together to give you the perfect weld.
Metal Thickness
The thickness of the metal you are welding is probably the most important factor. Thicker metal needs more heat to melt and join properly. Thinner metal needs less heat to avoid burning through.
A general rule of thumb is to use more amps for thicker metal. For example, if you are welding thin sheet metal, like 20-gauge steel, you might use around 30-50 amps. If you are welding thicker steel plate, say half an inch thick, you could need 150 amps or more.
It’s also good to remember that different metals conduct heat differently. Aluminum, for instance, spreads heat much faster than steel. This means you often need more amperage to TIG weld aluminum compared to steel of the same thickness.
Type of Metal
Different metals have different melting points and properties, which means they need different amounts of heat. Here’s a quick look:
- Steel: Steel is pretty forgiving. You can use a wide range of amperages for different thicknesses.
- Stainless Steel: Stainless steel doesn’t conduct heat as well as regular steel. This means it can get hotter in one spot. You might need slightly less amperage than for mild steel or weld a bit faster.
- Aluminum: Aluminum is a great conductor of heat. It spreads heat quickly, which is good, but it also means you need more amperage to melt it effectively. Aluminum also forms an oxide layer that needs to be broken through, often requiring AC (alternating current) TIG welding.
- Other Metals: Metals like titanium, copper, and brass have very specific needs and often require specialized knowledge or settings. For beginners, it’s best to stick to steel, stainless steel, and aluminum first.
Joint Type and Preparation
The way you plan to join the metal pieces also plays a role. Are you doing a butt joint, a lap joint, or a corner joint? Each might require slight adjustments.
Butt Joints: These are when two pieces of metal are laid edge to edge. You often need consistent heat to fuse them together nicely. If the edges aren’t perfectly aligned, you might need to adjust your heat slightly to compensate.
Lap Joints: Here, one piece of metal overlaps another. You’re essentially welding through the top piece into the bottom piece. This can sometimes require a bit more heat to ensure good penetration into both pieces.
Fillet Welds (Corner or T-Joints): This is where two pieces meet at an angle, like the letter ‘T’. You’re building up a bead on the outside corner. The amount of heat needed depends on the thickness of the material forming the corner.
Good joint preparation is key. Clean metal and tight-fitting parts make welding easier and require fewer current adjustments. If there are gaps, you’ll need more filler metal and might have to manage your heat to avoid blowing through.
Tungsten Electrode Size and Type
The tungsten electrode is the part of your TIG torch that creates the arc. Its size and type affect how much current it can handle and how the arc behaves.
Larger diameter tungstens can handle more current without melting or degrading quickly. Smaller tungstens are for lower amperages.
- Thin materials (under 1/8″): Use a 1/16″ or 3/32″ tungsten.
- Medium materials (1/8″ to 1/4″): Use a 3/32″ or 1/8″ tungsten.
- Thick materials (over 1/4″): Use a 1/8″ or larger tungsten.
Different types of tungsten (like pure, thoriated, ceriated, or lanthanated) also have different characteristics. Lanthanated and ceriated are generally good all-around choices for most applications and offer stable arcs at various amperages.
Shielding Gas Flow Rate
Your TIG torch uses a gas, usually Argon, to protect the molten weld pool from the air. This gas is critical for a clean weld.
The flow rate of the gas needs to be set correctly. Too little gas, and you won’t get enough protection, leading to contamination and weak welds. Too much gas can create turbulence around the arc, which can also draw in air or cause sputtering.
A common starting point for Argon is 15-25 cubic feet per hour (CFH), but this can vary based on your torch cup size and ambient conditions (like wind).
AC vs. DC Current
TIG welders can use Direct Current (DC) or Alternating Current (AC). Which one you use depends on the metal.
- DCEN (Direct Current Electrode Negative): This is the most common setting for steel and stainless steel. The majority of the heat goes into the workpiece, allowing for good penetration.
- DCEP (Direct Current Electrode Positive): This is rarely used in TIG welding as it causes the tungsten to overheat rapidly.
- AC (Alternating Current): This setting is essential for welding aluminum and magnesium. The alternating nature of the current helps to break up the oxide layer on aluminum, while still providing good penetration. When using AC, the balance control on your machine can be adjusted. A balance towards EN (negative) gives more penetration, while a balance towards EP (positive) gives more cleaning action on the aluminum oxide.
Finding Your Starting Point
Now that you know what factors matter, how do you actually find the right number on your TIG welder? Here’s a practical approach.
Use Manufacturer Recommendations
Many TIG welding machine manufacturers provide charts or guidelines for suggested amperage settings based on metal type and thickness. These are excellent starting points. Check your machine’s manual or the manufacturer’s website.
Use Welding Calculators and Charts
There are many online welding calculators and charts available that offer amperage recommendations for various materials and thicknesses. These are also great for getting a ballpark figure.
For example, a simple chart might suggest:
| Metal Thickness (Gauge) | Steel Amperage (DCEN) | Aluminum Amperage (AC) |
|---|---|---|
| 26 ga (0.018″) | 20-30 A | 30-40 A |
| 20 ga (0.035″) | 40-60 A | 50-70 A |
| 14 ga (0.075″) | 70-90 A | 90-120 A |
| 1/4″ (0.250″) | 120-160 A | 160-200 A |
Remember, these are just starting points. Your actual setting might need to be slightly higher or lower.
Test Welds
The best way to dial in your settings is to practice on scrap pieces of the same material you plan to weld. This is called doing a test weld.
Step 1: Set your welder to the recommended amperage for your material thickness.
Step 2: Make a test weld on your scrap material. Try to keep your travel speed and torch angle consistent, just like you would on your real project.
Step 3: Examine the weld.
- If the weld looks like it didn’t penetrate enough, or you had to work really hard to get the puddle to form, your amperage is likely too low. Increase it by 5-10 amps and try again.
- If you’re burning holes through the metal, or the weld looks spattered and messy, your amperage is too high.
Decrease it by 5-10 amps and try again.
- If the weld looks good, with even penetration and a nice, clean bead, you’ve found your setting!
Also, look at the edge of the weld. If it looks like a sharp, burned edge, it’s too hot. If it’s just a shallow, weak fusion, it’s too cold.
Adjusting Your Settings in Real-Time
Sometimes, you’ll be welding and realize your current setting isn’t quite right. Or, you might encounter a situation that requires a quick adjustment. Here’s how to handle it.
During the Weld
If you’re using a foot pedal or a thumb control for amperage, you can adjust it as you go.
- If you see the weld puddle becoming too large and uncontrollable (too hot), ease up on the pedal or dial down the amperage.
- If the puddle is too small, or you’re struggling to get it to form and merge with the base metal (too cold), apply more pressure to the pedal or increase the amperage slightly.
This takes practice, but it’s a crucial skill for smooth TIG welding.
For Different Positions
Welding in different positions (flat, horizontal, vertical, overhead) can affect how heat behaves.
- Vertical Up: Often requires slightly lower amperage because gravity pulls the molten metal down, and you want to avoid excessive sag.
- Overhead: Similar to vertical up, you might need to reduce amperage slightly to prevent the puddle from drooping too much.
- Horizontal: Usually done at standard settings, but you need to watch for sag on the bottom edge of the bead.
Changing Tungsten or Tip Size
If you’re having trouble with arc stability or penetration, it might be related to your tungsten. A tungsten that’s too small for the amperage can become unstable. A tungsten that’s too large might not concentrate the arc enough for thin materials.
If you notice the tungsten is glowing too brightly, melting, or the arc is sputtering, check its size and ensure it’s properly sharpened to a point for DC welding or a balled tip for AC aluminum welding.
Common Mistakes to Avoid
Even with the best intentions, beginners can make mistakes when setting TIG welding current. Being aware of these can save you a lot of frustration.
- Using a “one-size-fits-all” setting: The biggest mistake is thinking there’s a single current value that works for everything. Always consider metal type and thickness.
- Not prepping the metal: Dirty or oily metal requires more heat to clean and can lead to porous welds. Always clean your base metal thoroughly.
- Incorrect tungsten size: Using a tungsten that’s too small or too large for the job can lead to arc instability and poor welds.
- Ignoring machine settings: Modern TIG welders have many settings (like AC balance, frequency, pulse). While you’ll learn these later, for now, focus on getting the amperage right and understanding AC/DC use.
- Not doing test welds: Skipping test welds on scrap material is a sure way to waste time and materials on your actual project.
Frequently Asked Questions
Question: What is the easiest way to remember how to set TIG current for different metal thicknesses?
Answer: Think of it like cooking. Thicker food takes longer and needs more heat. Thinner food cooks fast with less heat.
So, thicker metal needs more amps, and thinner metal needs fewer amps.
Question: If I’m welding steel and my welds keep blowing holes, what should I do?
Answer: Your current is too high. You need to reduce the amperage on your TIG welder. Also, check if your travel speed is too slow; moving faster can help prevent burning through.
Question: When welding aluminum, how do I know if I’m using the right AC balance?
Answer: With AC welding on aluminum, if you see lots of shiny, clean metal and the arc feels like it’s pushing away from the tungsten, you might have too much cleaning action (more positive balance). If the weld looks dull and has dark spots, you might need more cleaning action (more negative balance). Aim for a smooth, consistent arc and a clean puddle.
Question: Do I need a foot pedal or a torch control for TIG welding?
Answer: A foot pedal or a thumb control on the torch is highly recommended. It lets you adjust the amperage on the fly, which is essential for controlling the weld puddle, especially when starting and stopping, or welding different thicknesses in one go.
Question: How much amperage do I need for very thin sheet metal, like 30 gauge?
Answer: For very thin metals like 30 gauge (around 0.012 inches), you’ll need very low amperage, typically in the range of 15-25 amps. You might also need to use a pulse setting on your TIG welder to help control the heat and prevent burn-through.
Final Thoughts
Learning How Do You Adjust TIG Welding Current Correctly? is key to making good TIG welds. It’s all about matching the heat to the metal. Start by looking at how thick your metal is and what kind of metal it is.
Use charts and manufacturer guides as a starting point. Always practice on scrap pieces first to fine-tune your settings. If your weld is weak, add more amps.
If it burns through, reduce the amps. Adjusting your current, especially with a pedal, lets you control the weld puddle precisely. With a little practice, you’ll get the feel for it and be creating strong, clean welds in no time.