Learning to TIG weld can be a bit tricky, and many people wonder, How Do You Adjust TIG Torch Height Correctly? It’s a common question because getting the torch just right affects your weld a lot. If it’s too high or too low, your weld might not look good or be strong. Don’t worry!
We’ll show you a simple way to get it right every time. Stick around, and you’ll be welding like a pro in no time.
Key Takeaways
- Proper TIG torch height helps create strong, clean welds.
- Too high or too low a torch can cause weld defects.
- The arc length is a good indicator of correct torch height.
- Different materials and situations might need slight adjustments.
- Practice is key to developing a feel for the right height.
- Maintaining a consistent distance is vital for consistent results.
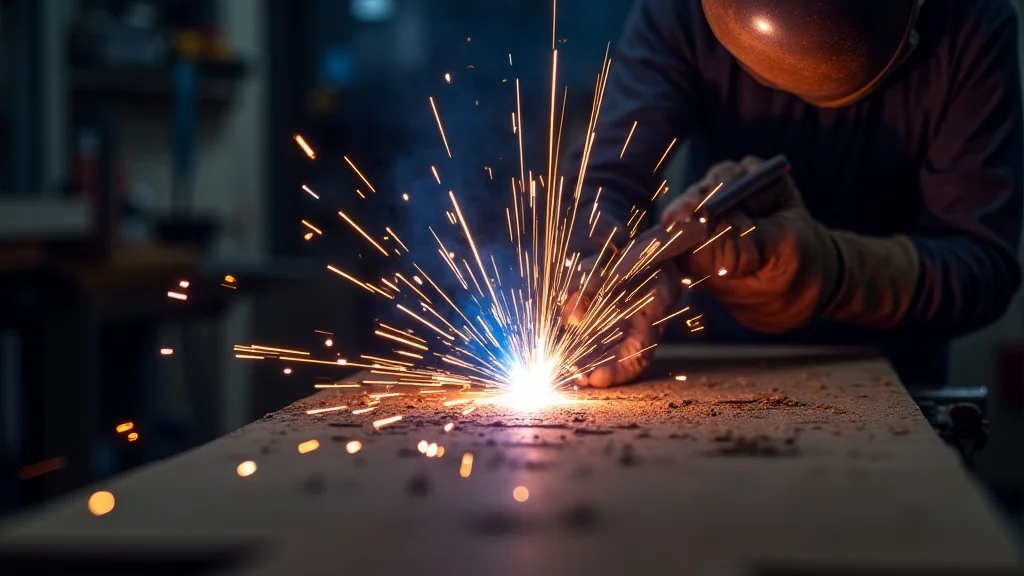
Why Torch Height Matters in TIG Welding
TIG welding, or Gas Tungsten Arc Welding, is known for creating beautiful, strong welds. But it takes practice and attention to detail. One of the most important details for beginners is getting the TIG torch height just right.
It might seem like a small thing, but it makes a big difference in the quality of your weld.
Think of it like this: the distance between the tip of your tungsten electrode and the metal you’re welding is your “arc length.” This arc length is critical. It controls how the electricity flows and how the heat transfers to the metal. If this distance is off, your weld can suffer.
Common Problems from Incorrect Torch Height
When beginners struggle with How Do You Adjust TIG Torch Height Correctly?, they often run into a few common issues:
- Undercut: This looks like a groove melted into the base metal next to the weld bead. It happens when the arc is too close to the base metal and melts too much of it away.
- Lack of Fusion: This means the filler metal and the base metal didn’t fully join together. It’s often caused by the arc being too far away, not generating enough heat.
- Porosity: These are little holes or bubbles in your weld. They can be caused by the shielding gas not protecting the molten pool properly, which can happen if the arc is too far out.
- Rough Weld Appearance: Even if the weld is strong, incorrect height can make it look uneven, spattered, or inconsistent.
These problems can make your welds weak and look bad. They’re frustrating for anyone starting out. But the good news is that learning the right way to set your torch height solves most of these issues.
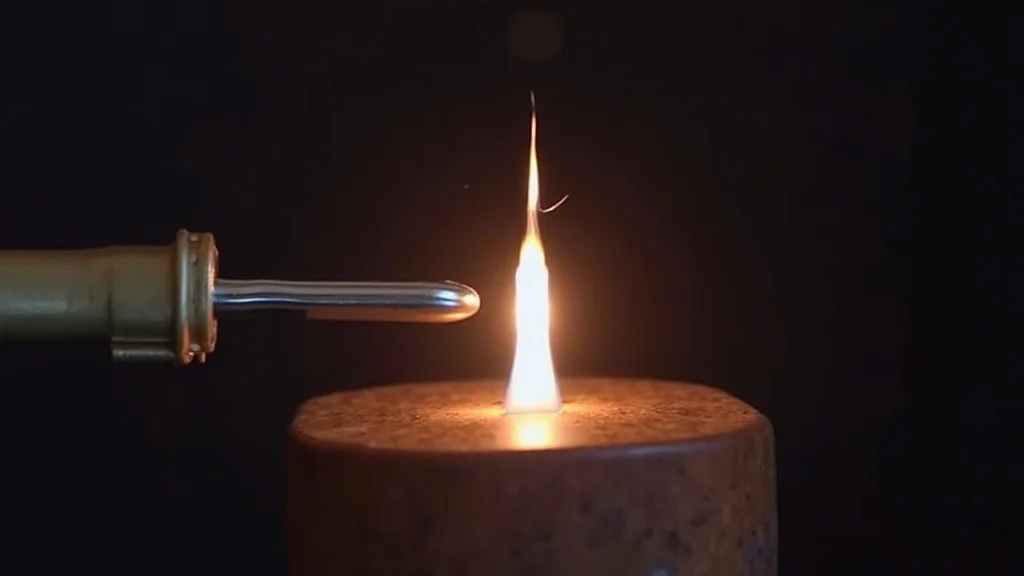
Understanding Arc Length
The key to knowing the correct TIG torch height is understanding arc length. The arc is the electrical current jumping from the tungsten electrode to the workpiece. The distance of this jump is the arc length.
When you’re TIG welding, you want a consistent arc. This means maintaining a steady distance between the tungsten and the metal. Imagine a small, controlled lightning bolt reaching out to melt and join your metal.
You want that bolt to be just the right length.
What is the Ideal Arc Length?
For most TIG welding situations, the ideal arc length is about the same as the diameter of the tungsten electrode you are using. For example, if you are using a 1/16-inch tungsten, you want your arc length to be about 1/16 inch.
This rule of thumb is a great starting point. It provides enough heat to melt the metal and fuse the filler rod, but not so much that it blows holes or causes undercut. It also allows the shielding gas to effectively protect the molten weld pool.
Factors Affecting Ideal Arc Length
While the tungsten diameter is a good guide, a few other things can influence your ideal arc length:
- Amperage: Higher amperage usually requires a slightly longer arc to manage the heat. Lower amperage might need a slightly shorter arc.
- Material Thickness: Thicker metals often need more heat, so you might run a slightly longer arc. Thinner metals require less heat, so a shorter arc is generally better.
- Type of Joint: Some joints, like a corner joint, might require a slightly different torch angle and height than a flat butt joint.
- Shielding Gas: The type and flow rate of your shielding gas can also play a role. Ensure your gas is flowing correctly to protect the arc.
How to Set Your TIG Torch Height
Now that you know why it’s important, let’s get to the practical part: How Do You Adjust TIG Torch Height Correctly? It’s about consistency and feel.
The easiest way to think about it is to keep your torch tip a consistent distance from the metal. This distance should be about the same as the diameter of your tungsten electrode. Many welders use their filler rod as a guide.
Using a Filler Rod as a Gauge
A very common and effective technique for beginners is to use a filler rod as a visual guide for torch height. Here’s how:
- Prepare Your Tungsten: Make sure your tungsten electrode is properly ground to a point. The sharper the point, the more focused the arc.
- Position the Filler Rod: Hold your filler rod next to the tungsten, but not touching it. Imagine where the tip of your tungsten would be.
- Find the Right Gap: Adjust the distance between the tip of your tungsten and the metal so that it’s roughly the same as the diameter of the filler rod you are using. If you’re using a 1/16-inch filler rod, aim for a 1/16-inch gap between the tungsten tip and the metal.
- Maintain the Gap: As you weld, focus on keeping this gap consistent. Your eye will get used to seeing this distance.
This method works well because filler rods are usually quite thin, and their diameter is often close to the ideal tungsten diameter for many common applications. It gives you something tangible to look at.
Developing the “Feel” for Torch Height
As you practice, you’ll develop a “feel” for the correct torch height. This means you’ll start to instinctively know when your torch is too high or too low just by looking at the arc and listening to the sound.
What to listen for:
- Too High: The arc will sound “crackly” and weak. The weld pool will be harder to control, and you might see sputtering.
- Too Low: The arc will sound like a “hissing” or “roaring” sound. You risk “stubbing” the tungsten (touching the metal), which contaminates the tungsten and can lead to inclusions in your weld.
- Just Right: The arc will sound steady and consistent, like a smooth hum. The weld pool will be fluid and easy to manage.
What to look for:
- Consistency: The arc should be stable, not flickering or wandering.
- Weld Pool: You should see a nice, molten puddle that moves predictably.
- Penetration: You’ll get good fusion without excessive melting of the base metal.
Adjusting for Different Materials and Situations
While the tungsten diameter rule is a great starting point, remember that you might need to make slight adjustments.
- Steel: For general steel welding, the tungsten diameter rule is usually spot on.
- Aluminum: Aluminum is a great heat sink, so you might need to run a bit more amperage and potentially a slightly longer arc to achieve proper fusion.
- Stainless Steel: Stainless steel can be prone to warping. A slightly shorter arc and precise heat control are often beneficial.
- Thin Metal: For very thin metals, it’s crucial to keep the arc short to avoid burning through.
- Thick Metal: On thicker metals, you might need more heat, which can sometimes translate to a slightly longer arc, but always prioritize control.
Practical Tips for Consistent Torch Height
Here are some easy tips to help you maintain the right torch height every time:
- Keep Your Tungsten Ground Properly: A sharp, well-shaped tungsten provides a more stable arc.
- Use the Right Tungsten Diameter: Match your tungsten to your amperage and material thickness.
- Maintain a Consistent Angle: While focusing on height, also keep your torch angle consistent.
- Focus on the Arc: Train your eyes to see the arc length. It becomes second nature with practice.
- Practice on Scrap: Use scrap pieces of the same material you’ll be welding. This is the best way to build muscle memory and refine your technique.
- Watch Your Shielding Gas: Ensure your gas is flowing correctly and shielding the arc and puddle. Wind or drafts can disrupt this.
What About Different Torch Angles?
While this guide focuses on height, remember that your torch angle also plays a role. Generally, you want to hold the torch at a slight angle, usually around 10-15 degrees, leaning in the direction of travel. This helps push the shielding gas onto the weld pool and maintain visibility.
However, even with a slight angle, the principle of keeping the distance between the tungsten tip and the workpiece consistent remains the same. The distance is measured perpendicular to the surface of the workpiece.
When to Make Adjustments
You’ll learn to make on-the-fly adjustments. If you see your weld pool getting too wide or too hot, you might subtly pull the torch back a tiny bit. If you feel like you’re not getting enough heat or fusion, you might bring it a little closer.
These are small, incremental changes.
Pay close attention to how the metal melts and flows. The appearance of the weld pool is your best indicator. If it’s too fluid and spreading out rapidly, your arc might be too long or your amperage too high.
If it’s sluggish and not melting well, your arc might be too short or your amperage too low.
Frequently Asked Questions
Question: Is it okay to touch the tungsten to the metal while TIG welding?
Answer: No, it’s not okay. Touching the tungsten to the metal will contaminate the tungsten, ruin its point, and likely cause defects in your weld. You need to restart your arc if this happens.
Question: How do I know if my shielding gas is flowing correctly?
Answer: You can often hear a gentle “hissing” sound from the gas nozzle when you strike an arc. Also, observe the weld pool; it should look clean and free of discoloration. Shielding gas prevents atmospheric contamination.
Question: Can I use a longer arc on thicker materials?
Answer: Generally, yes. Thicker materials often require more heat, and a slightly longer arc can help deliver that heat. However, you must maintain control over the weld pool to avoid defects.
Question: What happens if my tungsten is not sharp enough?
Answer: An unsharpened or blunted tungsten will create a less stable, wider arc. This can lead to a wider bead with less penetration and a less attractive weld. Always maintain a sharp, pointed tungsten for DC welding.
Question: How much filler rod should I use?
Answer: The amount of filler rod depends on the joint and the desired bead size. Generally, you want to feed just enough filler rod to fill the gap and build up the bead without being excessive. It takes practice to get the feed rate right.
Final Thoughts
Getting the TIG torch height right is a fundamental skill. It directly impacts weld quality, strength, and appearance. By using the diameter of your tungsten or filler rod as a guide, listening to the arc, and practicing consistently, you’ll quickly master this crucial technique.
Remember, a steady hand and a keen eye for the arc length are your best tools. Keep welding, and focus on maintaining that consistent distance – you’ve got this.