Having an uneven weld bead can be frustrating when you’re learning to TIG weld. It’s a common hiccup for beginners because TIG welding requires a lot of coordination between your hands, feet, and eyes. But don’t worry, fixing this is simpler than you think!
We’ll walk you through a straightforward TIG Welder Uneven Weld Bead? Step Fix process. Let’s get your welds looking smooth and consistent.
Key Takeaways
- Understand the main reasons why TIG weld beads become uneven.
- Learn how to adjust your travel speed for a smoother bead.
- Discover the importance of consistent filler metal addition.
- See how electrode angle affects your weld bead shape.
- Grasp how amperage and heat control play a role.
- Find easy steps to correct uneven welds on your next try.
Why TIG Weld Beads Go Uneven
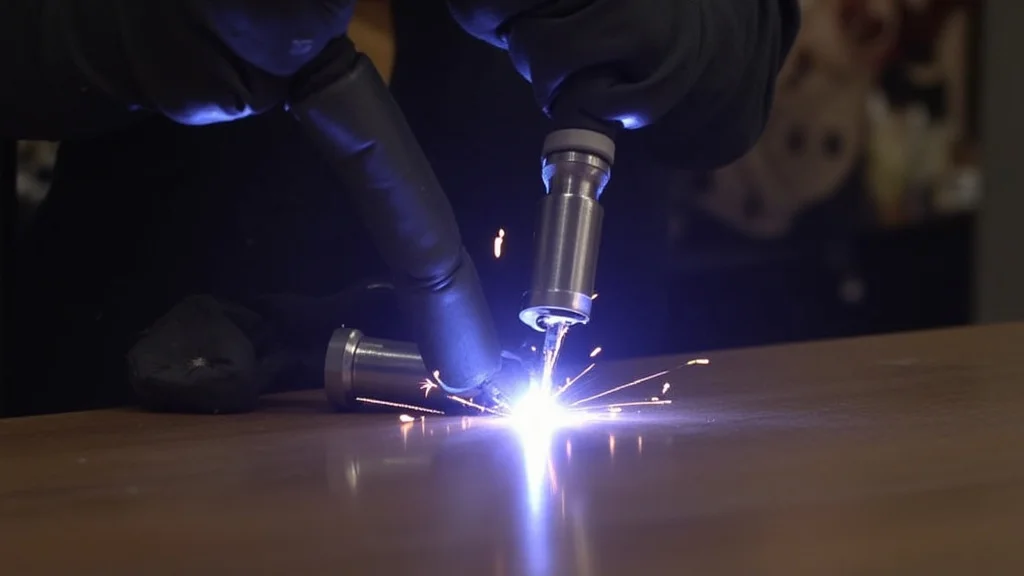
TIG welding, or Gas Tungsten Arc Welding, is known for making beautiful, clean welds. But sometimes, the bead you lay down doesn’t look so great. It might be lumpy, too wide in spots, or have a wavy edge.
This usually happens when a few things aren’t quite right. Think of it like drawing: if your hand shakes or you press too hard and then too soft, your line won’t be smooth.
For someone new to TIG welding, getting a perfectly even bead takes practice. It’s not just about moving the torch; you also have to feed in the filler metal and manage the heat. When these elements aren’t balanced, the weld bead suffers.
A common issue is inconsistent speed. If you move too fast, the weld won’t have enough material. If you move too slow, it can build up too much, creating a hump.
Another big reason is how you add the filler rod. TIG welding often uses a separate filler rod that you dip into the molten pool. If you dip it too fast, too slow, or at an angle, it adds metal unevenly.
This can make the bead bulge out or create gaps.
Heat control is also key. If the metal gets too hot, it can spread out too much, making a wide, flat bead. If it’s not hot enough, the metal won’t flow well, leading to a narrow, raised bead.
The arc itself can also be a factor. How you hold your electrode and the angle you use can push the molten metal in different directions.
The Role of Travel Speed
Your travel speed is how fast you move the TIG torch along the joint. This is probably the most important factor for an even weld bead. If you move too slowly, the weld puddle gets too big.
The metal has more time to spread out, creating a wide, often flat bead. It can also overheat the base metal.
On the other hand, moving too quickly means the weld puddle doesn’t have enough time to form properly and join the metals. You end up with a narrow, raised bead that might not even fuse the parts together well. It can look like a string of beads rather than a smooth, consistent line.
Finding the right speed is about matching it to your amperage and the type of metal you’re welding. For most common metals like steel and aluminum, you’re looking for a steady, consistent pace. Imagine you’re painting a line with a marker; you want to go at a speed that allows the ink to flow smoothly without drying out or pooling up.
Practice is the best way to get this right. Try welding on scrap pieces of metal. Focus on keeping your torch moving at a constant speed.
You’ll start to feel how fast you need to go to get a nice, consistent width to your bead. Look at the puddle; it should be a consistent size as you move.
Filler Metal Addition
When you’re TIG welding, you often use a filler rod to add extra metal to the joint. How you add this filler rod has a huge impact on the final bead. The goal is to add just enough metal, at the right time, to create a smooth, slightly rounded bead that sits nicely on the joint.
A common mistake beginners make is dipping the filler rod into the weld puddle too much or too little. If you dip too often, you can add too much material, making the bead tall and uneven. If you don’t dip enough, you won’t have enough filler metal, and the bead might be too thin or even have gaps.
The angle at which you hold the filler rod also matters. If you hold it at a steep angle, it can make the weld puddle splatter or cause uneven heating. A shallow angle, almost parallel to the base metal, usually works best.
You want to lightly touch the edge of the molten puddle with the tip of the filler rod.
Timing is everything. As you move your torch, you should be dipping the filler rod into the front edge of the weld puddle. This way, the filler metal melts into the puddle as it moves forward.
It should be a rhythmic, consistent motion, just like your travel speed.
Think of it as a dance between your torch hand and your filler rod hand. They need to move in sync. As the torch moves forward, the filler rod dips in, adds material, and then pulls back slightly, all in a smooth, continuous flow.
Consistent filler metal addition builds a strong, even bead.
Electrode Angle and Stickout
The angle of your tungsten electrode relative to the workpiece, and how much of the tungsten is sticking out (stickout), are also important. These might seem small, but they affect how the arc hits the metal and how the molten pool forms.
For most flat welding, you want the electrode to be almost straight up and down, maybe with a slight angle forward (like 5-15 degrees) in the direction of travel. This helps push the arc and heat into the joint efficiently. If you angle it too much, you can steer the molten metal, leading to an uneven bead.
The stickout is the length of the tungsten electrode that extends beyond the ceramic cup of the TIG torch. If you have too much stickout, the arc will spread out more. This can make it harder to control the heat and the weld puddle, often resulting in a wider, flatter bead that’s harder to manage.
Too little stickout can sometimes cause you to hit the tungsten to the workpiece, which contaminates the tungsten and can ruin your weld. A good rule of thumb is to have the stickout about the same length as the diameter of your tungsten electrode. For a common 3/32-inch tungsten, you’d have about 3/32-inch sticking out.
Keeping your electrode angle and stickout consistent helps maintain a stable arc. A stable arc leads to a predictable weld puddle. A predictable weld puddle, combined with good travel speed and filler metal control, is the recipe for a nice, even weld bead.
Amperage and Heat Control
Amperage is the amount of electrical current flowing through your TIG welder. It directly controls the heat of the arc. Getting the right amperage is crucial for creating a well-formed weld bead.
Too little amperage, and you won’t melt the metal enough. Too much, and you’ll burn through or create a huge, uncontrolled puddle.
When the amperage is too low, your weld bead will likely be narrow and raised. The metal won’t flow together properly, and the bead might look like it’s just sitting on top of the joint instead of fusing into it. You might also notice the arc is weak and hard to maintain.
If the amperage is too high, you’ll have too much heat. This makes the weld puddle very large and difficult to control. The bead will probably be wide, flat, and could even have excess spatter.
In thin materials, too much heat can easily cause a burn-through, creating a hole.
Finding the correct amperage often comes down to the thickness and type of metal you’re welding. There are charts available that give good starting points for different materials. However, you’ll always need to fine-tune it based on your specific setup and technique.
Heat control isn’t just about setting the right amperage; it’s also about how you manage it during the weld. On some welders, you can use a foot pedal to adjust the amperage on the fly. This allows you to increase heat to start the puddle or bridge a gap, and then reduce it to prevent overheating.
This skill takes practice but greatly improves weld quality.
Step Fix for Uneven TIG Weld Beads
Let’s put it all together into a simple TIG Welder Uneven Weld Bead? Step Fix. If your welds are coming out uneven, follow these steps:
Step 1: Check Your Amperage
Make sure your welder’s amperage setting is appropriate for the material thickness. If you’re unsure, consult a welding chart or start a bit lower and increase it if needed.
Step 2: Focus on Travel Speed
This is key. Try to move your torch at a steady, consistent speed. Imagine you’re drawing a straight line.
Look at the weld puddle; it should be a consistent size as you move along the joint.
Step 3: Consistent Filler Rod Dips
If you’re using a filler rod, aim to dip it into the front edge of the weld puddle with a rhythmic motion. Don’t flood the puddle with too much rod, and don’t starve it by dipping too little.
Step 4: Maintain Electrode Angle and Stickout
Keep your tungsten electrode nearly vertical (a slight forward angle is fine). Ensure your stickout is short – roughly the diameter of your tungsten.
Step 5: Practice and Observe
Weld on scrap pieces of metal. Pay close attention to what the weld puddle is doing. Adjust your speed and filler rod dips based on what you see.
A slightly rounded bead is usually ideal.
If your bead is too wide and flat, you might be moving too slowly or adding too much filler. Try speeding up slightly or using less filler. If it’s too narrow and raised, you might be moving too fast, not adding enough filler, or your amperage could be too low.
Frequently Asked Questions
Question: Why is my TIG weld bead wavy?
Answer: A wavy bead is often caused by inconsistent travel speed or irregular filler metal addition. Try to maintain a steady pace and dip your filler rod smoothly into the puddle.
Question: My TIG bead is too wide and flat. What am I doing wrong?
Answer: This usually means you’re moving too slowly, your amperage is too high, or you’re adding too much filler rod. Try increasing your travel speed or reducing filler metal. You can also try a slightly lower amperage.
Question: My TIG weld bead is too narrow and raised. How can I fix this?
Answer: This often happens if you’re moving too fast, not adding enough filler rod, or your amperage is too low. Try slowing down your travel speed, dipping the filler rod more consistently, or increasing your amperage slightly.
Question: Does the type of tungsten electrode matter for bead shape?
Answer: While tungsten type primarily affects arc stability and cleaning action (especially on aluminum), a properly prepared and maintained tungsten ensures a focused arc. An unfocused or contaminated arc can contribute to uneven beads.
Question: How much filler rod should I use for a TIG weld?
Answer: You should use just enough filler rod to create a smooth, slightly rounded bead that fuses well with the base metal. It’s about building up the joint without making the bead excessively high or wide.
Final Thoughts
Getting a nice, even weld bead with TIG welding is all about balance. Focus on keeping your travel speed steady, like a consistent rhythm. Add filler metal smoothly, just enough to fill the puddle nicely.
Make sure your electrode angle and how much tungsten sticks out are consistent. Setting the right amperage helps control the heat. Small adjustments in these areas make a big difference.
With a little practice on scrap metal, you’ll soon be making smooth, consistent TIG welds.
Leave a Reply