Getting your TIG welder to work right can be tricky sometimes. For new welders, seeing “TIG Welder Gas Flow Low? Quick Fix” pop up can feel confusing.
It’s a common issue, but don’t worry! This guide will make it simple. We’ll show you easy steps to fix it fast.
Keep reading to learn how to solve this problem and get back to welding.
Key Takeaways
- You will learn the most common reasons for low TIG welder gas flow.
- This guide will explain how to check your gas cylinder pressure correctly.
- You will find out how to inspect and clean your TIG torch and consumables.
- We will cover troubleshooting the flowmeter and regulator.
- You will discover how to properly set your gas flow rate for different metals.
- This article offers quick solutions to get your TIG welder running smoothly again.
Why TIG Welder Gas Flow Low? Quick Fix Is Important
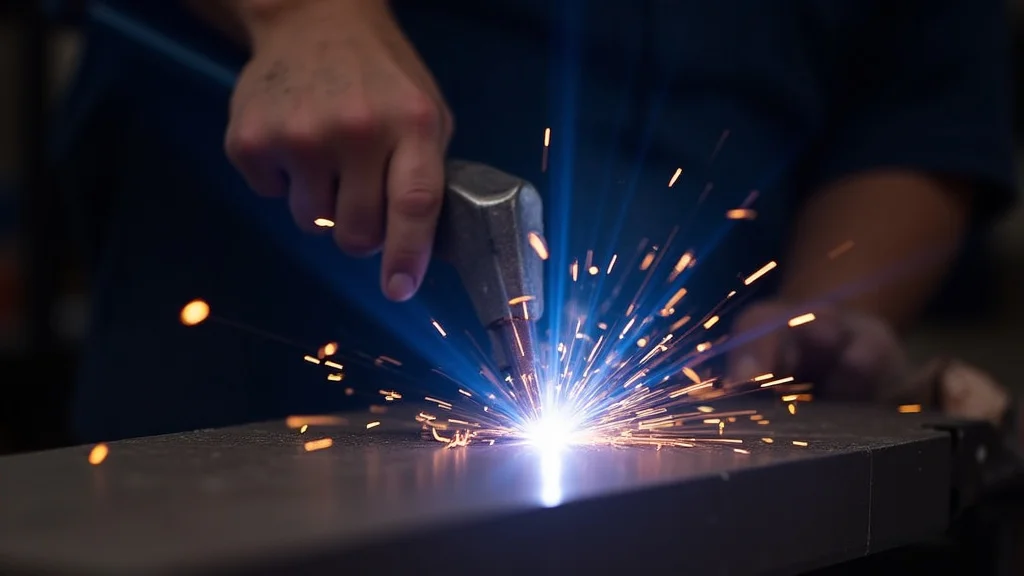
Proper gas flow is super important for TIG welding. It protects your weld from the air. Without enough gas, your weld can get dirty.
This makes it weak and look bad. A TIG Welder Gas Flow Low? Quick Fix is something every new welder will run into.
It’s not a sign of a bad welder, just a common thing to learn. The gas shields the hot metal. It stops oxygen and nitrogen from getting in.
These can make your weld brittle. It also helps cool the tungsten electrode. Low gas means the shield isn’t strong enough.
This leads to problems like porosity. Porosity is tiny holes in your weld. It can also cause contamination.
Contamination can ruin the strength of your weld. Knowing how to fix this quickly saves you time and materials.
Common Causes for Low Gas Flow
Several things can cause your TIG welder to have low gas flow. Understanding these reasons helps you find the problem faster. The most common causes are simple.
They often involve things you can check yourself.
Gas Cylinder Issues
The most basic check is your Argon gas cylinder. Is it empty or nearly empty? This is the first thing to look at.
Even if the gauge looks like it has some gas, it might be too low to push through the system. Argon is a heavy gas. It needs a certain pressure to flow properly.
Regulator and Flowmeter Problems
Your regulator and flowmeter control the gas pressure and flow rate. If these are not set right, or if they are faulty, you will have low flow. Sometimes the settings can be bumped or changed by accident.
Other times, the parts might be worn out.
Torch and Consumable Blockages
The gas travels from the cylinder through hoses, to the regulator, then to your TIG torch. Inside the torch, there are parts like the gas lens, collet body, and ceramic cup. If these get dirty or clogged, the gas can’t escape properly.
Debris from previous welds can build up here.
Hose Leaks
A leak in the gas hose can lose a lot of Argon. The gas escapes before it even reaches the torch. This can happen at the connection points.
It can also happen if the hose itself is damaged.
Incorrect Flow Rate Setting
Each welding job needs a specific gas flow rate. This depends on the metal you are welding, the thickness, and the type of joint. If the flow rate is set too low for the job, it will seem like you have low gas flow.
Step-by-Step Troubleshooting Guide
Let’s walk through how to fix these issues. We will start with the simplest checks and move to more detailed ones.
Step 1: Check the Gas Cylinder
First, make sure your Argon cylinder has enough gas. Look at the main pressure gauge on the cylinder itself. If it’s very low (below 500 psi), you likely need a new or refilled cylinder.
Even if it’s higher, the pressure might be too low to sustain flow under welding conditions.
Step 2: Inspect the Regulator and Flowmeter
Look at your regulator and flowmeter. Ensure the main valve on the cylinder is fully open. If you have a two-gauge regulator, the first gauge shows cylinder pressure, and the second shows regulated pressure.
Check that the regulated pressure is set correctly. The flowmeter part (often a glass tube with a ball) should show the flow rate in Cubic Feet per Hour (CFH) or Liters per Minute (LPM) when you open the torch valve slightly. If the ball is stuck or doesn’t move, there might be a blockage or a faulty regulator.
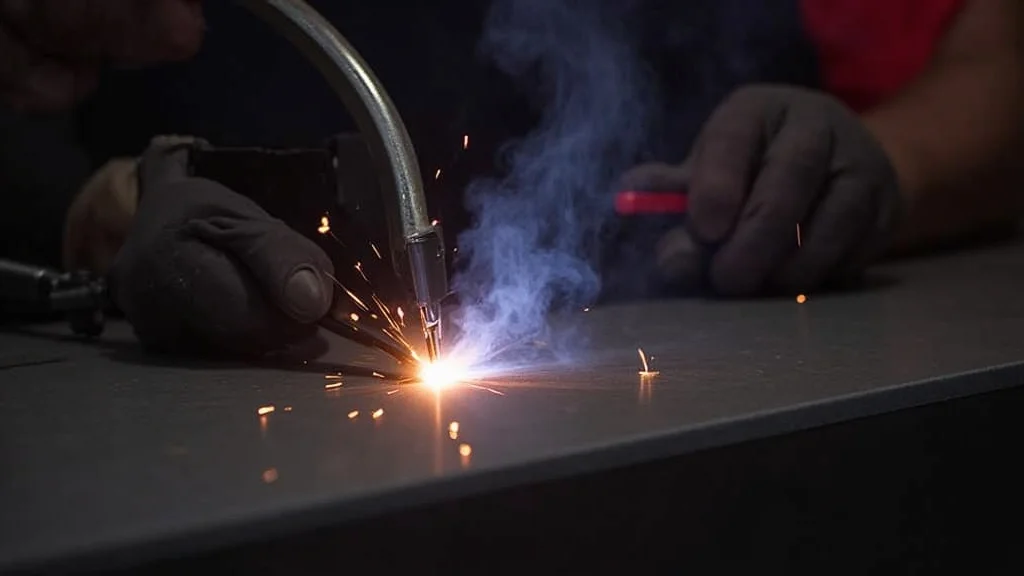
Step 3: Examine Your TIG Torch and Consumables
Take apart your TIG torch. Carefully remove the ceramic cup, collet, and collet body. Look for any dirt, slag, or metal particles.
If you are using a gas lens, make sure the mesh screen is clean and not damaged. Clean these parts gently with a soft brush or compressed air. Do not use anything sharp that could scratch the metal.
Reassemble the torch ensuring everything is snug but not overtightened.
Step 4: Check for Hose Leaks
Inspect the gas hose that runs from your regulator to the TIG torch. Check all connections. Ensure they are tight.
You can also use a soapy water solution. Apply it to the connections and hose. If you see bubbles forming, there’s a leak.
Fix any leaks by tightening the fittings or replacing the hose if it’s damaged.
Step 5: Set the Correct Gas Flow Rate
This is critical. The right flow rate depends on what you are welding. Here are general guidelines:
- Aluminum: For thinner aluminum (up to 1/8 inch), try 20-25 CFH (10-12 LPM). For thicker aluminum, you might need 25-30 CFH (12-14 LPM).
- Steel: For thinner steel (up to 1/8 inch), 15-20 CFH (7-10 LPM) is usually good. For thicker steel, you can go up to 20-25 CFH (10-12 LPM).
- Stainless Steel: Similar to steel, start with 15-20 CFH (7-10 LPM) and adjust as needed.
Always test your flow rate. Open the gas on your torch and hold it about an inch from your hand. You should feel a steady, cool stream of gas.
Adjust the flowmeter until you get the right amount of shielding.
Step 6: Test the Weld Shielding
After making adjustments, perform a test weld on scrap metal. Watch the weld pool carefully. If you still see discoloration (like straw yellow or blue instead of shiny silver), your gas flow might still be too low or you have another issue.
If you see excessive turbulence from the gas, your flow might be too high, which can actually pull in air.
Advanced Checks (If Problems Persist)
If you’ve gone through the basic steps and still have low gas flow, there might be more complex issues.
Faulty Flowmeter or Regulator
Sometimes the internal parts of the flowmeter or regulator can fail. If the ball in the flowmeter is erratic or doesn’t move at all, the unit itself might be bad. These parts can be replaced, but it’s often easier to swap out the whole regulator/flowmeter assembly.
You can buy replacement parts from welding supply stores.
Regulator Diaphragm Issues
The diaphragm inside the regulator can wear out. If it tears or gets damaged, it won’t be able to regulate the pressure correctly. This usually leads to inconsistent gas flow or a complete loss of flow.
Internal Blockages in the Welder
Less common, but possible, are blockages within the welder’s gas lines. This could be due to debris that made its way past the regulator or a manufacturing defect. These are harder to fix and might require professional service.
Torch Liner or Manifold Problems
Some older TIG torches have an internal liner for gas. If this liner is damaged or crimped, it can restrict gas flow. Also, the gas manifold inside the TIG machine (where the torch connects) could have issues.
Tips for Maintaining Proper Gas Flow
Keeping your TIG welder running smoothly involves regular maintenance. A little bit of care can prevent most common gas flow problems.
- Store Cylinders Properly: Always store gas cylinders upright and secured. Keep them away from heat sources.
- Handle Regulator Gently: Regulators are sensitive instruments. Avoid dropping them or banging them around.
- Clean Consumables Regularly: Make cleaning your torch cup, collet, and gas lens part of your routine.
- Inspect Hoses: Periodically check your gas hoses for cracks or wear. Replace them if they look damaged.
- Use the Right Gas: Always use pure Argon (or the recommended gas mix) for TIG welding. Other gases can cause contamination.
- Bleed the System: After shutting off the cylinder, briefly open the torch valve to bleed residual gas from the lines. This helps prevent moisture buildup.
Understanding Gas Flow Rates with Examples
Let’s look at why different metals need different gas flow rates. The goal is always to create a clean, strong weld with good appearance.
Steel Welding Example
When welding mild steel, you want a stable weld pool. Too little gas and the weld gets oxidized, turning black or dark grey. Too much gas can cause turbulence.
This can suck in oxygen, leading to porosity. For a 1/8-inch steel plate, around 15-20 CFH is a good starting point. You can test this by watching the weld.
If it’s clean and silver, the flow is likely correct. If it turns dark, increase the flow slightly.
Aluminum Welding Example
Aluminum welding is different. It requires more gas flow. Aluminum oxidizes very quickly.
The oxide layer has a much higher melting point than the aluminum itself. A strong gas shield is needed to push this oxide out of the way and protect the molten pool. For thin aluminum (e.g., 1/16 inch), you might need 20-25 CFH.
For thicker aluminum (1/4 inch or more), you might increase it to 30 CFH or even slightly more, especially if welding outdoors or in a breezy area.
Stainless Steel Welding Example
Stainless steel welding is similar to regular steel in its gas requirements. However, proper gas flow helps maintain the stainless steel’s corrosion resistance. Poor shielding can lead to sugaring on the backside of the weld.
This is a brittle, oxidized layer that degrades the metal’s properties. For most stainless steel applications, 15-20 CFH is sufficient. Using a gas lens can also improve shielding for stainless steel, especially on the root pass.
| Metal Type | Thickness | Recommended Flow Rate (CFH) | Recommended Flow Rate (LPM) |
|---|---|---|---|
| Mild Steel | Up to 1/8″ | 15-20 | 7-10 |
| Mild Steel | Over 1/8″ | 20-25 | 10-12 |
| Aluminum | Up to 1/8″ | 20-25 | 10-12 |
| Aluminum | Over 1/8″ | 25-30 | 12-14 |
| Stainless Steel | All thicknesses | 15-20 | 7-10 |
Frequently Asked Questions
Question: Why does my TIG welder gas flow seem low even with a full cylinder?
Answer: Even with a full cylinder, a blockage in the torch, a leaking hose, or a faulty regulator can restrict gas flow. Always check these components in addition to cylinder pressure.
Question: How do I know if my gas lens is clogged?
Answer: A clogged gas lens will restrict gas flow, causing poor shielding. You might see discoloration on your weld or the ball in the flowmeter might not rise as expected. Visually inspect and clean the mesh screen.
Question: Can I use a different gas than Argon for TIG welding steel?
Answer: For general steel TIG welding, pure Argon is standard. Some specialized applications might use Argon with a small amount of CO2 or Helium, but for a quick fix and general use, stick to Argon.
Question: What does it mean if the ball in my flowmeter is bouncing erratically?
Answer: Erratic bouncing can indicate inconsistent pressure from the regulator or a problem with the flowmeter itself. It might mean the regulator needs adjustment or servicing.
Question: How often should I clean my TIG torch consumables?
Answer: It’s best to clean your torch consumables, especially the gas lens and cup, every few hours of welding or whenever you notice a change in gas flow or weld quality.
Final Thoughts
Fixing low TIG welder gas flow is usually straightforward. You learned to check your cylinder, regulator, and torch parts. Following these steps helps you find the issue fast.
Keeping your equipment clean and in good shape prevents many problems. Remember to set your gas flow correctly for each job. This makes your welds stronger and look better.
Don’t let a gas flow problem stop your welding. You have the knowledge to fix it now. Go weld!