Many people getting started with stick welding get frustrated when their welder just stops working mid-weld. It’s a common problem that can feel like a big hurdle. But don’t worry, we’ll break down why this happens and give you easy steps to fix it.
We’ll help you get back to welding smoothly in no time. Let’s look at some common causes for a Stick Welder Stopping Randomly? Troubleshoot Here.
Key Takeaways
- You’ll learn why your stick welder might stop working unexpectedly.
- We will cover simple checks you can do yourself to fix the problem.
- You’ll discover how power issues can cause your welder to cut out.
- We will explain how arc issues can lead to your welder stopping.
- You’ll get tips on keeping your welder in good shape to prevent future problems.
Why Your Stick Welder Stops Working
It’s super annoying when your stick welder just dies on you. You’re in the middle of a weld, feeling good, and then. nothing.
This happens to a lot of beginners, and it can make you feel like you’re not cut out for welding. But most of the time, it’s a simple fix. Your welder stops for a few key reasons, and we can figure them out together.
Power Problems
The most common reason a stick welder stops working is related to its power source. Think of your welder like a car – it needs good fuel to run. If the “fuel” (electricity) isn’t right, the car (welder) won’t go.
Voltage Issues
Your stick welder needs a steady flow of electricity. If the voltage coming into your welder drops too low, it might not have enough power to keep the arc going. This can happen for a few reasons.
- Extension Cords: Using a cord that’s too long or too thin can make the voltage drop. It’s like trying to drink a thick milkshake through a tiny straw – the flow is slow and weak.
- Circuit Overload: If too many other things are plugged into the same electrical circuit as your welder, it can draw too much power and cause the breaker to trip. This is your home’s safety system stopping the flow to prevent damage.
- Home Wiring: Older homes might have wiring that can’t handle the high power draw of a welder. The wires might get hot, or the breaker might trip more easily.
Amperage and Duty Cycle
Amperage is like the “push” of electricity. Your welder is set to a certain amperage for your weld. Duty cycle is how long your welder can run at a certain amperage before it needs to cool down.
If you weld for too long without a break, especially at high amperages, your welder will have an overheat protection that shuts it off.
Most welding machines have a light or indicator that tells you when it’s overheating. It’s usually a yellow or red light. When this light comes on, you need to stop welding and let the machine cool down.
Trying to force it to work when it’s hot can damage it.
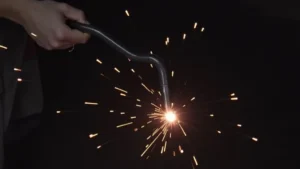
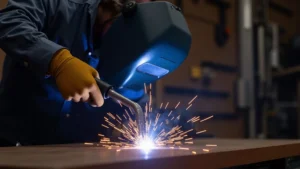
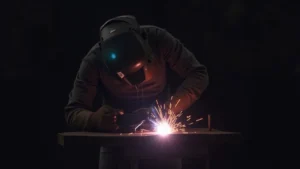
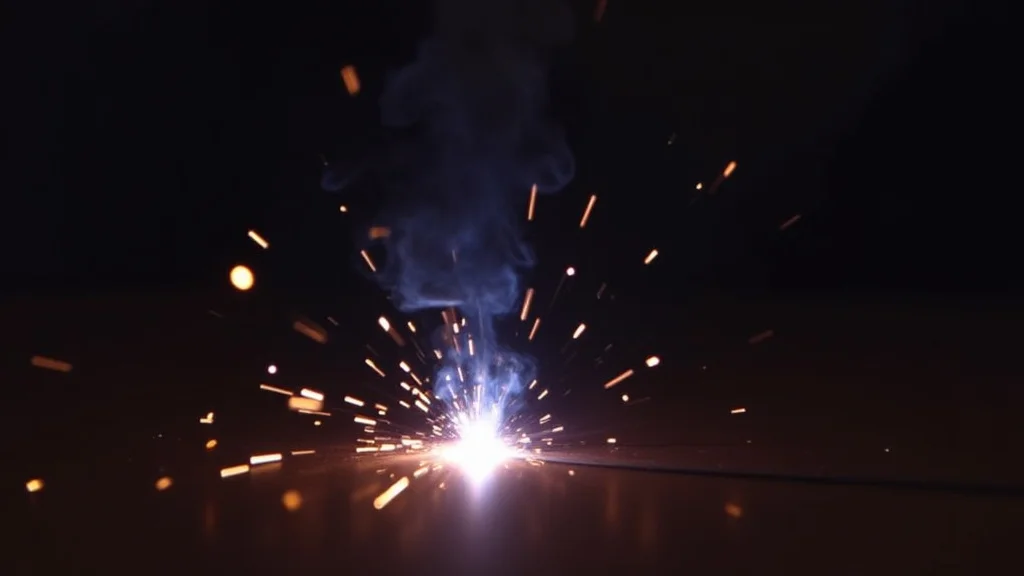
Arc and Electrode Issues
Sometimes, the problem isn’t with the power coming in, but with how the welder is creating the arc and melting the electrode. The arc is that sparky, bright light you see when you’re welding. It’s what melts the metal and the rod.
Dirty Metal
If the metal you’re welding on is dirty, rusty, or covered in paint, it can make it hard to start and keep a good arc. The dirt can get in the way of the electricity. Always clean your metal before you start.
Damp Electrodes
Stick welding electrodes (the rods you use) can absorb moisture from the air. If your electrodes are damp, they won’t strike an arc well, and they might sputter or stop working. Keep your electrodes in a dry place, and use them up.
If you suspect they’re damp, you might need to bake them in a special oven, but for most home users, it’s better to just get new ones.
Electrode Angle and Length
How you hold the electrode matters. If you hold it at a bad angle or drag it too close to the metal, the arc can be unstable. Also, if the electrode is too short, it can be hard to maintain a consistent arc.
Machine Faults
While less common than power or electrode issues, sometimes the welder itself might have a problem.
Loose Connections
Check all the connections on your welder. This includes the ground clamp, the electrode holder, and any cables that plug into the machine. Loose connections create resistance, which can heat up and cause power loss, or even stop the machine from working entirely.
Internal Issues
If you’ve checked everything else and your welder still stops, there might be an internal problem. This could be a faulty circuit board, a damaged fan, or other components. For these issues, it’s best to contact the manufacturer or a qualified repair person.
Troubleshooting Steps
When your stick welder stops, don’t panic. Follow these steps to find the problem.
Step 1: Check the Power Source
This is the first and most important thing to look at.
- Is the welder plugged in? It sounds silly, but double-check the plug is fully in the outlet.
- Check the breaker: Look at your home’s electrical panel. If a breaker has tripped (it’s usually in the middle position or “off”), flip it completely off, then back on. If it trips again right away, you have a bigger electrical problem.
- Inspect your extension cord: If you’re using one, make sure it’s heavy-duty and rated for the amperage your welder needs. Shorter, thicker cords are better. Try welding without the extension cord if you can, directly into the wall outlet.
- Test the outlet: Plug in something else, like a lamp or a power tool, into the same outlet to make sure the outlet itself is working and providing good power.
Step 2: Inspect Your Welder and Cables
Once you’re sure the power is good, look at the machine and its parts.
- Ground Clamp: Make sure the ground clamp is attached firmly to clean metal. If the metal is painted or rusty, scrape it clean where the clamp attaches. A poor ground is a very common reason for welding problems.
- Electrode Holder: Check that the electrode is held securely in the holder. Make sure the holder itself is connected well to its cable.
- Cables: Look for any signs of damage, cuts, or worn insulation on the power cables and ground cable. If they look bad, they need to be replaced.
- Overheat Light: Does your welder have an overheat indicator light? If it’s on, you just need to wait for the machine to cool down.
Step 3: Examine Your Electrodes and Workpiece
Now, look at what you’re welding and what you’re welding with.
- Electrode Condition: Are your electrodes dry? If they’ve been sitting out in a damp garage, they might be the issue. Try a fresh pack of electrodes.
- Workpiece Surface: Is the metal clean and free of rust, paint, oil, or dirt? Sand or grind it down to bare metal before you try welding again.
- Electrode Type: Make sure you’re using the right type of electrode for your welder and the metal you’re joining. Some electrodes need specific settings or AC power, while others work best with DC.
Step 4: Test Your Welder
After checking these things, try welding again. Start with a low amperage setting to see if you can get a stable arc. Slowly increase the amperage if needed.
Common Welding Scenarios and Fixes
Let’s look at a few specific situations and how to solve them.
Scenario 1: Welder Stops After a Few Seconds
This often points to a power issue or an overheat problem.
- Fix: Check your extension cord. If you’re not using one, look at your home’s breaker. If your welder has an overheat light, wait for it to cool. Try cleaning the metal and using fresh electrodes.
Scenario 2: Welder Won’t Start an Arc
This could be a bad ground, damp electrodes, or incorrect settings.
- Fix: Ensure a solid connection with the ground clamp on clean metal. Try new electrodes. Double-check that your amperage setting is high enough for the electrode you’re using. Make sure your welder is set to the correct power type (AC or DC).
Scenario 3: Arc is Unstable and Stops
This might be dirty metal, wrong electrode angle, or a fluctuating power supply.
- Fix: Clean your workpiece thoroughly. Adjust your electrode angle and travel speed. If you suspect power issues, try plugging into a different outlet or using a shorter, heavier extension cord.
Maintaining Your Stick Welder
A little bit of care goes a long way in preventing problems.
- Storage: Keep your welder in a dry place. If you live in a humid area, consider using a dehumidifier in your workshop or storing your electrodes in a sealed container with desiccant packs.
- Cleaning: Periodically clean the dust and debris from the cooling vents and fan. A clogged fan can lead to overheating.
- Regular Checks: Before each use, quickly check cables for damage and ensure connections are tight.
Frequently Asked Questions
Question: My stick welder keeps tripping the breaker. What should I do?
Answer: This usually means the welder is drawing too much power for the circuit. Make sure you’re using a heavy-duty extension cord if you need one, and that it’s not too long. Also, check if other high-power appliances are running on the same circuit.
You might need a dedicated circuit for your welder.
Question: How long do I need to wait for my welder to cool down?
Answer: The time needed depends on your specific welder and how hard you were using it. If the overheat light is on, wait at least 15-30 minutes. You should be able to hear the cooling fan stop running when it’s ready.
Question: Can I use any extension cord with my stick welder?
Answer: No, you must use a heavy-duty extension cord rated for the amperage your welder needs. Using a light-duty cord can cause voltage drop, overheating, and could damage your welder or the cord.
Question: What does it mean if the welding arc sputters and dies?
Answer: Sputtering can be caused by damp electrodes, dirty metal, or incorrect amperage settings. Try fresh, dry electrodes, clean your workpiece thoroughly, and ensure your amperage is set appropriately for the electrode size and type.
Question: My welder works fine for a while, then stops. Is it the duty cycle?
Answer: It very well could be. Stick welders have a duty cycle that limits how long they can run at a certain amperage. If you’re welding continuously for a long period, especially at higher amperages, the welder might be shutting off to cool down.
Check your welder’s manual for its duty cycle rating and allow it to cool when the overheat indicator is on.
Final Thoughts
When your stick welder stops working randomly, it’s usually not a big mystery. Most often, it’s a simple fix related to power, dirty connections, or your welding rods. By checking your power source, making sure all connections are tight, and keeping your work area and rods clean, you can solve most issues.
Don’t get discouraged; these problems are common for beginners. Follow these steps, and you’ll get back to making good welds.