Many beginners find their stick welder rod sticking to the metal. It can be frustrating when this happens, making it hard to get a good weld. Don’t worry, though!
This is a very common problem, and we’ll show you exactly why it happens and how to fix it. We’ll walk through simple steps to help you get welding smoothly.
Key Takeaways
- Understand common reasons why stick welder rods stick.
- Learn how to adjust amperage for better welding.
- Discover the importance of electrode angle and movement.
- Identify how to fix problems with your welding surface.
- Recognize how your welding speed affects rod sticking.
Why Does My Stick Welder Rod Keep Sticking?
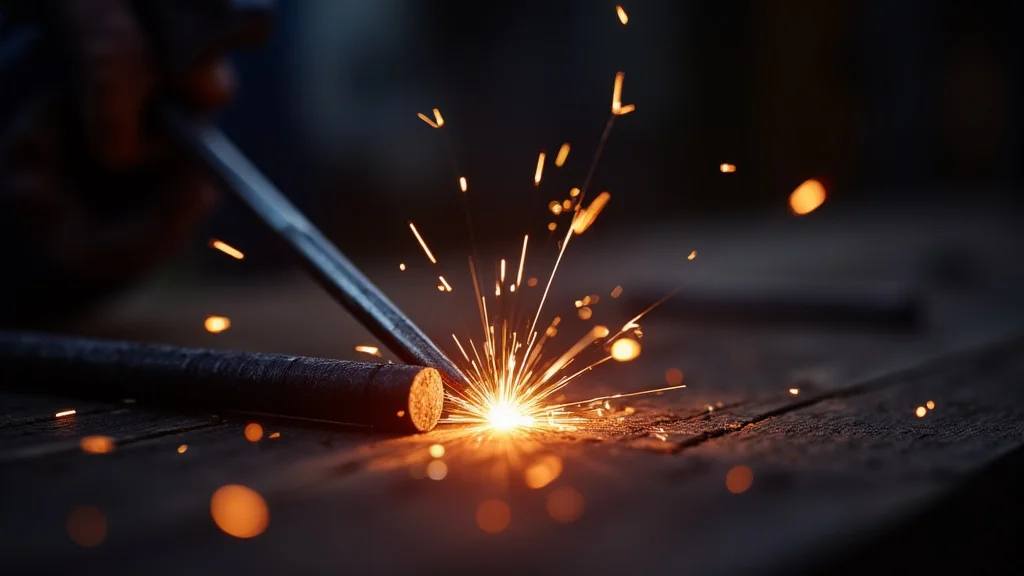
It’s a common scene for anyone learning to stick weld: you strike an arc, and instead of a smooth weld forming, the rod just sticks to the metal like glue. This problem, often described as Stick Welder Rod Sticking? Troubleshoot, can make you feel like you’re not making any progress.
It’s not your fault! There are several simple reasons this happens, and once you know them, you can fix them easily. We’ll go through each one so you can get back to making great welds.
Understanding the Basics of Stick Welding
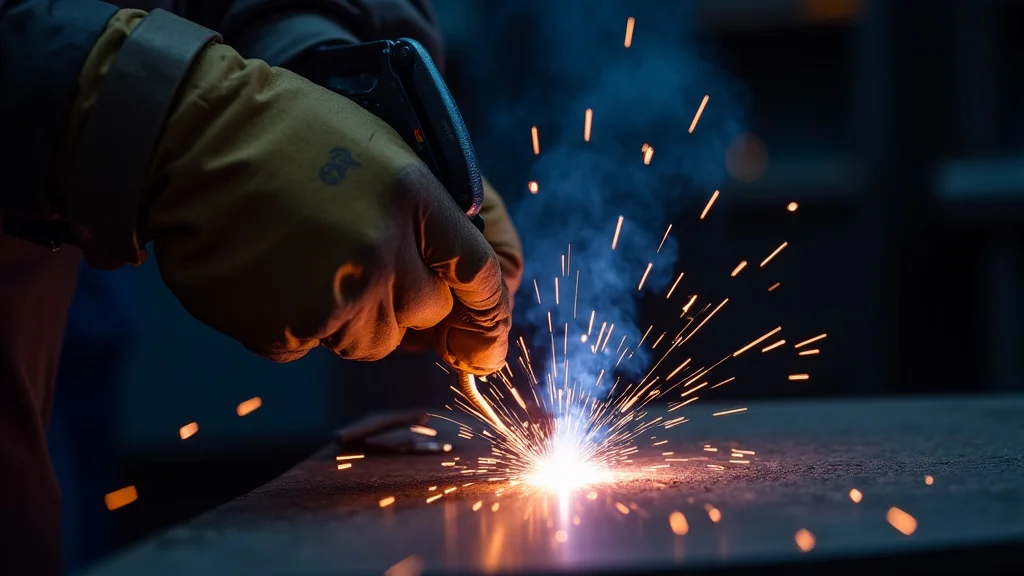
Stick welding, also known as Shielded Metal Arc Welding (SMAW), uses an electrode covered in a flux coating. When you touch the electrode to the metal and pull it away slightly, an electric arc forms. This arc melts both the electrode and the base metal, allowing them to fuse together.
The flux coating melts and creates a shield of gas and slag, protecting the molten pool from the air.
The Role of Amperage
Amperage is like the heat setting on your welder. Too little amperage, and the rod won’t melt properly and will stick. Too much amperage, and you’ll burn through the metal too quickly and have a messy weld.
Getting the right amperage for your electrode size and the metal thickness is key.
Finding the Right Amperage
Electrode manufacturers usually suggest a welding amperage range on the electrode’s packaging or in their technical data. This is a great starting point. For example, a 1/8-inch E6013 electrode might recommend a range of 75-125 amps.
As a general guide:
- Thin metal: Use lower amperage.
- Thicker metal: Use higher amperage.
If your rod is sticking, your amperage is likely too low. Try increasing it in small steps.
Electrode Angle and Movement
How you hold and move the electrode is also very important. The angle you hold the rod affects how the molten metal flows and how the arc behaves. A general rule is to hold the electrode at a slight push or pull angle, usually between 10 and 30 degrees, depending on the electrode type and desired bead shape.
Push vs. Pull Technique
Some electrodes work better with a slight push, while others prefer a pull. For most general-purpose electrodes like E6013, a slight push is often recommended. This helps push the molten metal forward and create a flatter bead.
If the rod is sticking, you might be holding it too straight up and down or pushing too hard into the metal.
Maintaining a Consistent Arc Length
Arc length is the distance between the tip of the electrode and the surface of the weld pool. A good arc length is usually about the diameter of the electrode core wire. If the arc length is too short (electrode too close to the metal), it will stick.
If it’s too long, the arc will be unstable and spatter excessively.
When you strike the arc, try to maintain this consistent distance. If the rod starts to stick, it usually means your arc length is too short. Pull back slightly to lengthen the arc.
Surface Preparation
The surface you’re welding on makes a big difference. If the metal is rusty, dirty, or covered in paint or oil, it can interfere with the arc and cause the rod to stick. The contaminants can also get into the weld, making it weaker.
Cleaning the Metal
Always clean the area you’re going to weld. Use a wire brush or an angle grinder to remove any rust, paint, or mill scale. For oily or greasy surfaces, use a degreaser.
A clean surface allows for a cleaner arc and better fusion.
Welding Speed
How fast or slow you move the electrode along the joint affects the heat input and bead size. If you move too slowly, you’ll deposit too much heat and metal, and the rod can get stuck. If you move too fast, you won’t get enough fusion, and the weld may not penetrate properly.
Finding the Right Speed
For most stick welding, you want a steady, consistent speed that allows the electrode to melt and deposit metal without piling up. Think of it as moving the electrode at a pace that creates a nice, uniform bead. If the rod sticks, you’re likely moving too slow or not keeping a consistent arc length.
Electrode Type and Condition
Not all stick welding electrodes are the same. Different types are designed for different metals, positions, and welding characteristics. Some electrodes are more prone to sticking than others, especially for beginners.
Common Electrode Types
E6010 and E6011: These are deep-penetrating electrodes that produce a forceful arc. They can be a bit trickier for beginners and might stick more easily if not handled correctly. They are good for dirty or rusty metal.
E6013: This is a very popular all-position electrode known for its smooth arc and easy slag removal. It’s often recommended for beginners because it’s less likely to stick compared to E6010/E6011.
E7018: This is a low-hydrogen electrode that produces strong, high-quality welds. It requires a clean surface and careful handling, but when set up correctly, it can provide a very stable arc.
Electrode Storage
Electrodes need to be kept dry. If they absorb moisture from the air, they can become brittle and harder to work with, which can lead to sticking. Always store your electrodes in a dry place, and if they come in a sealed container, keep them in it when not in use.
Troubleshooting Steps When the Rod Sticks
When your stick welder rod sticks, don’t panic. Take a deep breath and go through these steps:
1. Check Your Amperage
This is the most common culprit. If the rod is sticking, turn up your amperage. Small adjustments are best.
Try increasing it by 5-10 amps and see if that helps. If you’re not sure where to start, check the electrode packaging for recommendations.
2. Adjust Your Arc Length
If you’re holding the electrode too close to the metal, it will stick. Try to maintain a consistent arc length, roughly the diameter of the electrode core. If it feels like it’s sticking, pull the electrode away slightly to lengthen the arc.
3. Review Your Electrode Angle
Make sure you’re holding the electrode at the correct angle. For most general-purpose rods, a slight push angle (10-20 degrees) is good. Avoid holding the electrode straight up and down or pushing too hard into the joint.
4. Ensure Proper Surface Preparation
Is the metal clean? Rust, paint, oil, or dirt can cause problems. Grab a wire brush or grinder and clean the weld area thoroughly.
A clean surface makes a big difference.
5. Assess Your Travel Speed
Are you moving too slowly? If you’re hesitating or stopping too much, the rod can get stuck. Try to maintain a steady, consistent movement along the joint.
Imagine you are “drawing” the weld bead smoothly.
6. Consider the Electrode Type
If you’re using a more challenging electrode like an E6010 and struggling, try switching to an E6013. E6013 is generally more forgiving for beginners and less prone to sticking.
7. Check Electrode Condition
Are your electrodes dry? Damp electrodes can cause issues. If you suspect they might be damp, try using a different, dry electrode from the same pack.
Common Stick Welding Scenarios and Solutions
Let’s look at a few specific situations where your rod might stick and what to do.
Scenario 1: Starting the Weld
You strike the arc, and it immediately sticks. This is often due to:
- Amperage too low: Turn it up.
- Arc length too short: Pull back slightly.
- Incorrect strike technique: A quick scratch or tap is usually best. Don’t press the rod into the metal too hard on strike.
Scenario 2: Welding a Lap Joint
You’re welding two pieces of metal where one overlaps the other. Sticking can happen if:
- Amperage is too low: You need enough heat to melt both pieces.
- Travel speed is too slow: You’re building up too much heat in one spot.
- Electrode angle is wrong: Make sure you’re directing the arc into the corner where the two pieces meet.
Scenario 3: Welding on Thin Material
Thin metal is easily burned through, but it also makes rods stick if the amperage isn’t right.
- Amperage too low: This will cause sticking. You need enough heat to melt the rod and fuse it, but not so much that you blow a hole.
- Travel speed is too slow: Again, too much heat in one spot.
- Electrode too large: Use a smaller diameter electrode for thin materials.
Often, for thin metal, you might need a slightly higher amperage than you think, combined with very fast travel speed and a good arc length to avoid burning through.
Advanced Tips for Smoother Welds
Once you’ve got the basics down, a few advanced tips can make your welding even better and help prevent sticking.
Listen to the Arc
A good arc sounds like a steady sizzle, similar to frying bacon. A sputtering, popping sound often means your arc length is too long or your amperage is too high. A loud, harsh buzzing can mean your arc length is too short or your amperage is too low.
Watch the Weld Pool
Pay attention to the molten puddle. It should be fluid but not running away from you. If the puddle is too small or the rod is sticking before it melts, your amperage might be too low.
If it’s too large and hard to control, your amperage might be too high, or you’re moving too slowly.
Practice Makes Perfect
The best way to get better at stick welding and stop your rod from sticking is to practice. Find scrap metal and just weld. Try different settings and techniques.
The more you do it, the more you’ll develop a feel for it.
Frequently Asked Questions
Question: Why does my stick welder rod stick right when I try to start it?
Answer: This usually means your amperage is too low, or you’re holding the electrode too close to the metal. Try increasing your amperage slightly and make sure to maintain a consistent arc length. A quick scratch or tap to start the arc is also better than pressing hard.
Question: Can the type of electrode I’m using make it stick more?
Answer: Yes. Electrodes like E6010 and E6011 can have a more aggressive arc that might feel like it sticks more if you’re not used to it. E6013 is generally more forgiving and less likely to stick for beginners.
Question: My welds look rough and the rod keeps sticking. What am I doing wrong?
Answer: This often points to low amperage. Turn up your welder’s heat setting. Also, check that the metal surface is clean and that you’re maintaining a consistent arc length and travel speed.
Question: How do I know if my amperage is too high or too low?
Answer: If the rod sticks, your amperage is likely too low. If you’re burning through the metal quickly, spattering a lot, or the weld is flat and wide, your amperage might be too high. Look for a steady sizzle sound and a controlled molten pool.
Question: Should I always use the same settings for stick welding?
Answer: No, settings depend on the electrode type, its diameter, and the thickness of the metal you’re welding. Always check the manufacturer’s recommendations on the electrode packaging and adjust based on your specific situation.
Final Thoughts
Learning to stick weld can be a bit tricky at first, especially when the rod keeps sticking. But now you know the main reasons it happens: often it’s too low amperage, too short an arc length, or not preparing your metal surface properly. You’ve also learned how adjusting your electrode angle and travel speed can help a lot.
Remember to practice with clean metal and listen to the sound of the arc. You’ve got the tools to fix this common problem and get welding smoothly.
Leave a Reply