Getting your stick welder electrode to stick to your metal and start a good arc can be tough when you’re just starting out. It’s a common hurdle, but don’t worry! This guide will break down the Stick Welder Electrode Sticking Problem?
Fix in simple steps. We’ll show you exactly what to do to get you welding smoothly in no time. Ready to learn the secrets to a perfect arc?
Key Takeaways
- You’ll learn the main reasons why stick welder electrodes stick.
- We will cover how to adjust your machine settings for better results.
- You’ll discover the right way to strike an arc to avoid sticking.
- Tips on electrode angle and movement will be explained.
- Troubleshooting common sticking issues will be addressed.
- You will gain confidence in fixing your stick welding problems.
Why Does My Stick Welder Electrode Keep Sticking?
It’s frustrating when your stick welder electrode glues itself to the metal instead of creating a nice, clean weld. This happens a lot for new welders. You try to strike an arc, and bam!
The rod is stuck fast. It feels like you’re wrestling with your machine more than welding. But there are simple reasons this happens, and even simpler ways to fix it.
The core issue usually comes down to a few main things: the settings on your welder, how you’re trying to start the arc, and the way you hold and move the electrode. Think of it like learning to ride a bike; you might wobble and fall at first, but with a little practice and knowing what to adjust, you’ll be riding smoothly.
Common Causes of Electrode Sticking
Let’s break down why your electrode might be sticking. Knowing the cause is the first step to fixing it.
Incorrect Amperage Settings
Amperage is like the “heat” setting on your welder. If it’s too low, your electrode won’t melt properly and will just stick to the metal. It’s like trying to toast bread with a weak light bulb – it just won’t get hot enough.
On the other hand, if the amperage is too high, you’ll melt the electrode too quickly, and it can also lead to sticking or the electrode burning through your base metal. Finding that sweet spot is key.
Wrong Polarity
Your welder has a positive and negative terminal. The electrode you use has a recommended polarity. Using the wrong one can cause the electrode to stick or not run well.
Most common stick electrodes (like E6013) run on DC+ (Direct Current Electrode Positive), but some require DC- or AC. Always check your electrode’s packaging.
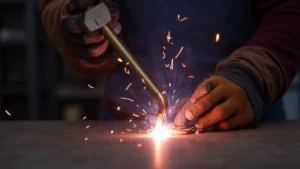
Poor Arc Striking Technique
How you start the arc is super important. New welders often push down too hard or hold the electrode against the metal for too long. This just makes it stick.
There are two main ways to strike an arc: the “scratch start” and the “tap start.” If you’re scratching like you’re lighting a match, but you don’t pull away quickly enough, it sticks. If you’re tapping like a drumstick, and you don’t lift slightly, it can also get stuck.
Electrode Angle and Movement
Even after you start the arc, the angle you hold the electrode and how you move it affects your weld. If you hold the electrode too upright or drag it too slowly, the molten metal can get trapped and cause sticking.
Similarly, if you hold it at a very sharp angle, it might dig into the metal and stick. A slight drag angle is usually best.
Contaminated Metal Surface
If the metal you’re welding on is dirty, rusty, or covered in paint or oil, it makes it much harder to get a good arc started. These contaminants get in the way and prevent a clean connection, often leading to sticking.
Electrode Condition
Old or damaged electrodes can be tricky. If the flux coating is chipped or if the electrode itself is bent, it can affect how it melts and makes striking an arc more difficult.
Fixing the Stick Welder Electrode Sticking Problem: Step-by-Step
Now that we know the common problems, let’s look at how to fix them. This is where you’ll get your welding back on track.
1. Check Your Amperage Settings
This is the first and most common fix. Most welding machines have a dial or buttons to adjust amperage. For beginners, it’s best to start with the manufacturer’s recommended settings for your specific electrode type and the thickness of your metal.
- For thinner metals (like 1/8 inch or 3mm), you’ll need lower amperage. Try starting around 60-80 amps for smaller diameter electrodes (like 3/32 inch or 2.5mm).
- For thicker metals (like 1/4 inch or 6mm), you’ll need higher amperage. Try 80-120 amps for the same electrode size.
Tip: If you’re unsure, it’s often better to start a little lower and increase it gradually if the electrode is sticking or the weld isn’t penetrating. You can always add more heat, but it’s hard to take it away.
2. Ensure Correct Polarity
This is easy to check. Look at the packaging for your welding electrodes. It will clearly state the recommended polarity.
- DC+ (Electrode Positive): This is the most common for many all-purpose electrodes. It means your electrode holder connects to the positive terminal on your welder, and your ground clamp connects to the negative.
- DC- (Electrode Negative): Some electrodes, like certain aluminum or stainless steel rods, require this.
- AC (Alternating Current): Some older machines or specific welding jobs use AC.
If you’re using an AC welder, you don’t need to worry about polarity. But for DC welders, getting this right is crucial for a stable arc and preventing sticking.
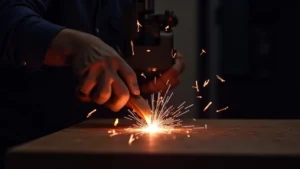
3. Master the Arc Strike
This takes practice, but once you get it, it’s second nature. Forget about pressing hard like you’re trying to carve into the metal.
Scratch Start (like a match):
- Hold the electrode at a slight angle (about 15-20 degrees) from the metal surface.
- Quickly “scratch” the tip of the electrode across the metal, just like striking a match.
- As soon as you see a spark or the beginning of an arc, lift the electrode about 1/8 inch (3-4mm) away from the metal.
Tap Start (like a drumstick):
- Hold the electrode almost perpendicular to the metal surface.
- Gently “tap” the tip of the electrode onto the metal.
- Immediately lift the electrode about 1/8 inch (3-4mm) away from the metal.
The key for both methods is to be quick and light. You’re not trying to gouge the metal; you’re just trying to initiate an electrical connection. If it sticks, don’t pull hard!
Try to twist the electrode slightly or quickly pull it away. Sometimes, a quick jerk can break it free.
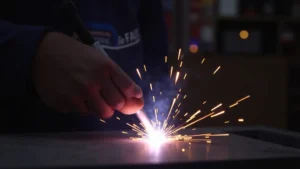
4. Maintain the Correct Electrode Angle and Movement
Once your arc is started, keep the electrode at a consistent angle. For most welding, a slight drag angle is best.
- Drag Angle: Hold the electrode so it’s pointing slightly backward in the direction you are welding. This is typically about 10-20 degrees from vertical.
- Travel Speed: Move at a steady pace. If you move too slowly, you’ll build up too much molten metal and the electrode can get stuck. If you move too fast, you won’t get enough penetration, and the weld might look like a string of beads.
- Arc Length: Try to keep the arc length consistent, about the diameter of the electrode. If the arc is too long, it becomes unstable and can lead to spatter and poor welds. If it’s too short, it can lead to sticking.
5. Clean Your Metal Surface
Never weld on dirty metal. Before you start, make sure the area you plan to weld is clean.
- Use a wire brush to remove rust, paint, oil, or any other debris.
- For very dirty or rusty metal, you might need a grinder to get down to bare metal.
A clean surface allows for a consistent electrical connection and a much more stable arc, greatly reducing the chances of sticking.
6. Use Good Quality Electrodes
Ensure your electrodes are dry and in good condition. If you suspect they’ve been exposed to moisture (which can happen with some types), you can dry them out in a special oven or a regular kitchen oven at a low temperature (check electrode specifications for exact temperatures).
Bent or damaged electrodes should be straightened or discarded. They make consistent welding much harder.
Troubleshooting Specific Sticking Scenarios
Sometimes, even with the right settings, you might run into specific sticking issues. Here’s how to handle them.
Electrode Sticks Immediately Upon Striking
Cause: Amperage too low, too much pressure when striking, or wrong polarity.
Fix: Increase amperage slightly. Practice a lighter scratch/tap. Double-check polarity.
Electrode Sticks Mid-Weld
Cause: Traveling too slowly, holding the electrode too close to the puddle, or arc length too short.
Fix: Speed up your travel. Maintain a consistent arc length (about the electrode diameter). Ensure you’re using a slight drag angle.
Electrode Sticks and Won’t Break Free
Cause: Already melted into the base metal. Trying to force it.
Fix: Don’t pull hard! Try a slight twisting motion. If that doesn’t work, you’ll likely have to cut the electrode off or grind it free.
This often means you need to restart the weld bead a little further back or in a new spot.
Frequently Asked Questions
Question: What is the best amperage for stick welding?
Answer: The best amperage depends on the type of electrode you are using and the thickness of the metal. Always check the recommendations on the electrode packaging. For a common 1/8 inch (3.2mm) E6013 electrode, a good starting range is often 75-100 amps.
Question: How do I know if my polarity is correct?
Answer: Check the packaging of your welding electrodes. It will tell you if it needs DC+, DC-, or AC. If using DC power, the electrode holder connects to the positive terminal for DC+ and the negative terminal for DC-.
Question: My electrode is sticking. Should I push harder or pull away faster?
Answer: You should pull away faster. When striking an arc, a quick scratch or tap followed by an immediate lift is key. If it sticks, try a slight twist to break it free rather than pulling hard.
Question: What’s the difference between a scratch start and a tap start?
Answer: A scratch start is like lighting a match – you quickly scratch the electrode tip on the metal and then lift it to establish an arc. A tap start is like tapping a pencil on a desk; you gently tap the electrode tip and then lift it to create the arc.
Question: Can old electrodes cause sticking problems?
Answer: Yes, old electrodes can sometimes be more problematic. If they have absorbed moisture or the flux coating is damaged, they might not run as smoothly and can be more prone to sticking.
Final Thoughts
Learning to stick weld takes practice, and electrode sticking is a normal part of that process. By understanding why it happens – from amperage and polarity to your striking technique and metal cleanliness – you have the power to fix it. Remember to check your settings, clean your work area, and focus on a light, quick arc strike.
Small adjustments make a big difference. Keep practicing, and you’ll soon be laying down smooth, consistent beads.