Having your stick welder electrode not heat up can be super frustrating when you’re trying to get a project done. It’s a common problem that stops beginners in their tracks. But don’t worry!
We’ll walk you through exactly what might be going wrong and how to fix it, step by step. You’ll be welding again in no time.
Key Takeaways
- You will learn the most common reasons why a stick welder electrode might not be heating up.
- We will show you how to check your power source and connections to ensure they are working correctly.
- You’ll discover how electrode selection and condition play a big role in heating.
- Simple troubleshooting steps will be provided to help you identify and fix the issue.
- Tips for maintaining your welder and electrodes will be shared to prevent future problems.
Why Your Stick Welder Electrode Isn’t Heating Up
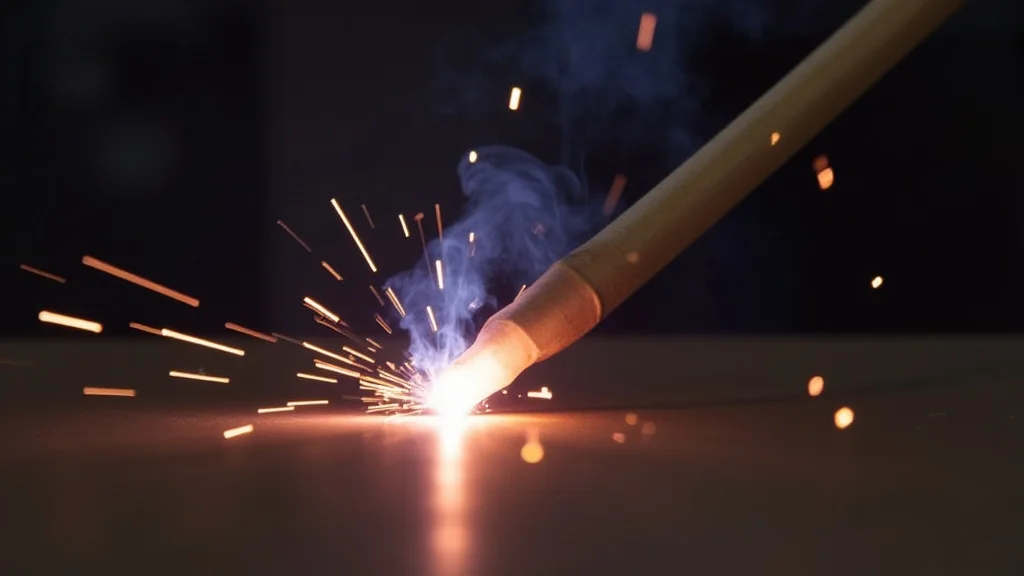
It’s a puzzling situation when you strike an arc, but nothing happens. Your stick welder electrode is supposed to glow red-hot and melt, creating a weld. When it just sits there, it’s a clear sign something isn’t right.
For beginners, this can feel like a huge roadblock. You might be all set with your project, ready to go, and then… nothing. It’s easy to feel confused because welding has a lot of moving parts, and a problem with the heat is fundamental to the whole process.
The good news is, most of the time, the fix for a Stick Welder Electrode Not Heating? Step Fix is quite straightforward. We’ll break down the most likely causes and give you clear actions to take.
Checking the Power Source
The very first thing to look at is where your welder gets its power. Without enough electricity, your electrode simply won’t get hot enough to do its job. This is true for both older transformer-based welders and newer inverter-style machines.
Power Input
Make sure your welder is plugged into the correct power outlet. Some welding machines require a higher amperage circuit than standard household outlets. If you’re using an extension cord, ensure it’s heavy-duty and rated for the amperage your welder needs.
A thin or undersized extension cord can cause a voltage drop, meaning less power reaches the machine.
Circuit Breaker/Fuses
Check your home’s electrical panel to see if the circuit breaker for the welder has tripped or if a fuse has blown. If it has, try resetting the breaker or replacing the fuse. If it trips again right away, there might be a problem with the welder itself or the circuit wiring.
Power Switch
It sounds simple, but ensure the welder’s main power switch is actually turned on. Sometimes, in the rush to start welding, this basic step can be overlooked. Also, check if there’s a specific “output” or “weld” switch that needs to be activated.
Examining the Connections
Loose or dirty connections are another common culprit for welding issues, including a lack of heat. Electricity needs a clear path to flow; any obstruction or poor contact will reduce its effectiveness.
Electrode Holder (Stinger)
The electrode holder is where you clamp the welding rod. Make sure the electrode is clamped in firmly. A loose grip means poor electrical contact.
Also, inspect the holder itself for any signs of damage, corrosion, or loose wires where the cable connects.
Work Clamp
The work clamp, also called a ground clamp, is crucial. It connects the welder to the metal you are welding. This connection needs to be clean and tight.
Remove any paint, rust, or dirt from the metal surface where you attach the clamp. A dirty or loose ground clamp is one of the most frequent reasons for a weak arc or no arc at all, which directly impacts heat.
Welding Cables
Inspect your welding cables for any damage, such as cuts, nicks, or frayed insulation. Damaged cables can cause power loss. Also, check the connections where the cables attach to the welder and to the electrode holder and ground clamp.
Ensure these are clean and securely tightened. Corrosion on the cable lugs can prevent good electrical flow.
Understanding Electrode Issues
The welding electrode, or rod, is the consumable that melts to create the weld. If the rod itself is problematic, you won’t get the heat you need.
Electrode Type
Different welding applications require different types of electrodes. Using the wrong type for your machine or material can lead to poor performance. For example, some electrodes require higher amperage than others.
Check the packaging or the rod itself for its classification (e.g., 6013, 7018) and ensure it’s appropriate.
Electrode Condition
Electrodes can go bad over time, especially if not stored properly. Moisture is a major enemy of welding rods. If electrodes become damp or wet, the flux coating can degrade.
This leads to poor arc stability, excessive spatter, and insufficient heat. You might notice the flux coating looks chalky, crumbly, or discolored. If you suspect moisture, try using a brand-new, properly stored electrode.
For certain types like 7018, baking them in a special oven (a rod oven) is often recommended before use to ensure they are completely dry.
Electrode Size
The diameter of the electrode you’re using needs to match the amperage settings on your welder and the thickness of the metal you’re welding. If you’re trying to use a large diameter rod on a low amperage setting, it won’t heat up enough. Conversely, a tiny rod on a very high setting might melt too quickly or not get the right penetration.
Troubleshooting Amperage and Polarity Settings
Your welder has settings that control how much power it outputs and how it flows. Getting these wrong will definitely affect electrode heating.
Amperage Setting
This is the most direct control over the heat your electrode produces. If the amperage is set too low for the electrode you’re using and the material thickness, it won’t get hot enough. Consult your welder’s manual or look up recommended amperage ranges for the specific electrode type and diameter you’re using.
Start with the lower end of the recommended range and gradually increase it if needed.
Polarity Setting
Most stick welders can operate on either DC (Direct Current) or AC (Alternating Current). They also have DC+ (Direct Current Electrode Positive) and DC- (Direct Current Electrode Negative) settings. The electrode and the polarity setting work together.
- DC+ (Straight Polarity): More heat goes into the workpiece.
- DC- (Reverse Polarity): More heat goes into the electrode.
- AC: Heat is split between the electrode and the workpiece.
Different electrodes are designed to run on specific polarities for optimal performance. For example, 6013 rods often run well on AC or DC+, while 7018 electrodes typically perform best on DC+ or DC-. If your welder is set to the wrong polarity for your electrode, you might experience weak heat or an unstable arc.
Always check the electrode manufacturer’s recommendations for polarity.
Checking the Welder Itself
While less common for beginners, internal welder issues can prevent heat.
Duty Cycle
Welders have a duty cycle, which is the percentage of time they can run at a given amperage within a 10-minute period before needing to cool down. If you’ve been welding for a while and the machine overheats, its thermal protection might kick in, shutting off the output. Allow the welder to cool down completely before trying again.
Overheating can lead to temporary shutdowns or, in severe cases, damage.
Internal Faults
If you’ve checked all external factors and still have no heat, there could be an internal problem with the welder. This might involve damaged internal wiring, faulty components, or issues with the cooling fan. If you suspect an internal problem, it’s best to consult a qualified repair technician or the manufacturer for assistance.
Frequently Asked Questions
Question: Why is my stick welder electrode not melting at all?
Answer: This usually means there isn’t enough power reaching the electrode. Check your power source, connections, amperage settings, and ensure the electrode itself is suitable and in good condition.
Question: Can a bad ground clamp stop my electrode from heating?
Answer: Absolutely. A dirty or loose ground clamp creates resistance, preventing the necessary electrical current from flowing, which stops the electrode from heating properly.
Question: What if my electrode is heating up a little but not enough to weld?
Answer: This often indicates your amperage setting is too low for the electrode size or material thickness. Try increasing the amperage.
Question: I just got a new stick welder and the electrode isn’t heating. What’s the first thing I should check?
Answer: Start with the power cord and ensure it’s plugged into a working outlet with sufficient power. Then, check the electrode holder and ground clamp connections for tightness and cleanliness.
Question: Can old or wet welding rods cause a lack of heat?
Answer: Yes, old or moisture-contaminated rods have a degraded flux coating, leading to poor arc stability and insufficient heat transfer for welding.
Final Thoughts
Fixing a stick welder electrode that isn’t heating up often comes down to simple checks. You need to ensure your power is strong, all connections are clean and tight, and you’re using the right electrode at the correct settings. Don’t forget to look at the electrode itself – moisture can ruin its performance.
With these straightforward steps, you can get back to welding with confidence. Keep these checks in mind, and you’ll quickly become adept at solving this common issue.


