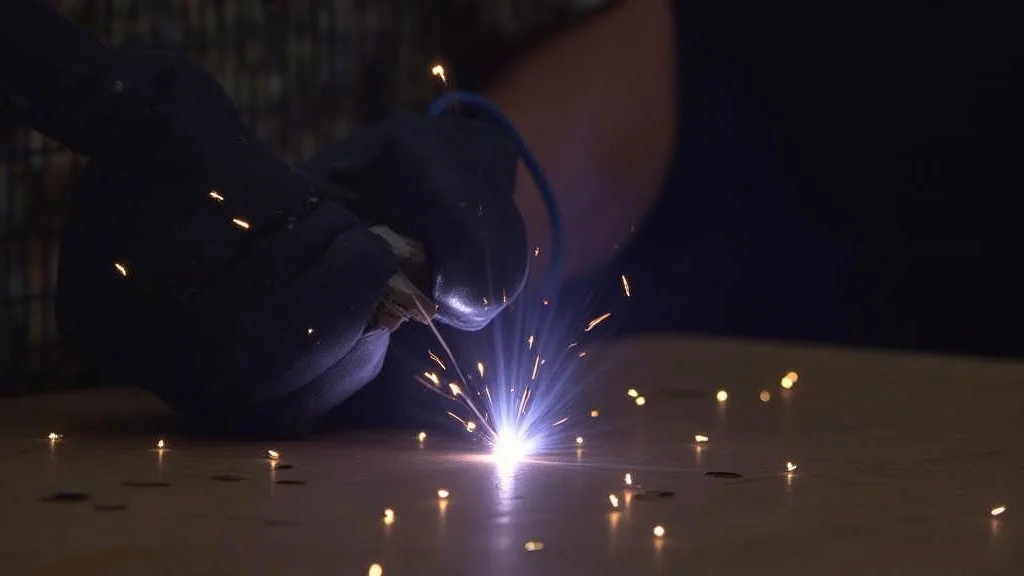
When you’re just starting out with a MIG welder, you might run into a few tricky spots. One common hurdle is figuring out the MIG Welder Wire Feed Speed Issue? Fix.
It can be a bit confusing at first because the wire speed affects your weld quality a lot. But don’t worry! We’ll walk through simple steps to get it just right.
Get ready to learn how to fix this common problem and make your welds look great. We’ll cover what causes these issues and how to solve them easily.
Key Takeaways
- You’ll learn the main reasons why your MIG welder’s wire feed speed might be off.
- We will explain how to check and adjust your wire feed speed settings.
- You’ll discover common problems like wire bird nesting and drive roller issues.
- We’ll show you how to fix a slipping drive roller.
- You’ll understand how to choose the right drive roller and liner for your wire.
- We will provide simple tips to ensure smooth wire feeding every time.
Understanding MIG Welder Wire Feed Speed
What is Wire Feed Speed?
Wire feed speed is how fast the welding wire comes out of your MIG gun. Think of it like a faucet; you control how much water comes out. For welding, this speed is super important.
It needs to be just right for the amount of electricity (amperage) you’re using. If it’s too fast or too slow, your welds won’t turn out well.
When the wire feed speed is correct, it blends perfectly with your voltage and gas flow. This creates a stable arc. The molten metal from the wire melts into your base metal, making a strong, clean joint.
It’s a delicate balance that beginners often find challenging to get right on their first try.
Why Wire Feed Speed Matters
Getting the wire feed speed wrong can cause several problems. If the wire feeds too fast, you might get too much heat and melt through your metal. It can also make the arc unstable and spattery.
Too slow, and you might not get enough heat, leading to weak welds or a “cold” weld that doesn’t fuse properly. Your weld might look rough and uneven.
A good wire feed speed helps create a smooth, consistent arc. This means you’ll have fewer weld defects. You’ll also find welding much easier and more enjoyable.
Fixing these speed issues is a key step to becoming a better welder.
Common MIG Welder Wire Feed Speed Issues and Fixes
Issue 1: Wire Bird Nesting
Bird nesting is when the welding wire bunches up and tangles around the drive roller inside the welder. It looks like a messy bird’s nest, hence the name. This usually happens when the wire can’t get through the MIG gun liner or nozzle smoothly.
It’s a very frustrating problem for new welders.
Causes:
- Kinked wire: If the wire on the spool gets bent or kinked, it can get stuck.
- Tight liner: The liner inside your MIG gun might be too tight or have a sharp bend.
- Wrong drive roller size: The drive roller might not match the size of your welding wire.
- Damaged nozzle: The tip of your MIG gun might be clogged or damaged.
- Too much tension: The tension arm on the drive roller might be set too high.
Fixes:
- Check the wire spool: Carefully unspool a few feet of wire to see if it’s kinked. If it is, try to straighten it or replace the spool.
- Inspect the liner and gun: Make sure the MIG gun liner isn’t bent sharply. If it’s old or damaged, it might need replacing.
- Verify drive roller size: Look at the wire spool. It will tell you the diameter of the wire (e.g., 0.030″, 0.035″). Make sure the “V” groove on your drive roller matches this size. If you’re using flux-cored wire, you might need a different roller (U-groove).
- Clean or replace the nozzle: Remove the nozzle and check the contact tip. Clean off any spatter. If the tip is worn or damaged, replace it.
- Adjust drive roller tension: Loosen the tension arm slightly. The wire should feed smoothly without slipping, but also without being so loose that it can get crushed.
Issue 2: Wire Slipping at the Drive Rollers
This happens when the drive rollers can’t grip the wire properly. The motor inside the welder is spinning, but the wire isn’t moving out of the gun. This leads to an inconsistent arc and poor welds.
It’s like trying to turn a doorknob with greasy hands – it just spins.
Causes:
- Worn drive rollers: The grooves in the rollers can get worn down over time.
- Incorrect roller type: Using the wrong groove type (V-groove for solid wire, U-groove for flux-cored) or size.
- Insufficient tension: The tension arm isn’t pressing down hard enough on the wire.
- Dirty wire: Oil or dirt on the wire can prevent the rollers from gripping it.
- Damaged liner: A damaged liner can cause too much friction, making the rollers work harder and potentially slip.
Fixes:
- Inspect and replace rollers: Look at the drive rollers. If they look smooth or the grooves are flattened, replace them. Make sure you have the correct size and type for your wire.
- Set proper tension: Adjust the tension arm so it applies enough pressure to grip the wire firmly but not so much that it crushes it. A good test is to try to pull the wire out of the gun by hand while the welder is on (be careful!). It should be difficult but possible.
- Clean the wire: Sometimes, especially with solid wire, a quick wipe with a clean cloth can help. If the wire is very dirty, consider using a wire brush designed for welding wire.
- Check the liner: A severely damaged liner can cause this. If you suspect your liner is the issue, consider replacing it.
Issue 3: Wire Not Feeding Consistently (Jerky Feed)
Instead of a smooth flow, the wire comes out in fits and starts. This makes your arc jumpy and difficult to control. It can result in uneven weld beads and spatter.
Causes:
- Partially blocked MIG gun liner: Debris or damage inside the liner can create friction.
- Rough spots in the wire: The wire itself might have rough spots or burrs.
- Internal damage to the welder’s drive mechanism: Less common, but possible.
- Incorrect wire straightening: If the wire isn’t feeding straight from the spool.
Fixes:
- Clean or
- Inspect the wire: Feed out a section of wire and visually inspect it for any rough patches or inconsistencies. If you find any, it might be best to cut that section off or use a new spool.
- Ensure smooth wire payout: Make sure the wire spool is mounted correctly and spins freely. Check that the wire is coming off the spool in a straight line towards the welder’s feed mechanism.
Issue 4: Wire Burning Back to the Contact Tip (Arcing at the Tip)
This is when the wire feeds out and immediately melts onto the contact tip inside the MIG gun. It can cause a short circuit, poor welds, and damage to the tip and nozzle. It’s a clear sign your wire feed speed isn’t matching your voltage.
Causes:
- Wire feed speed is too slow: The wire is feeding out too slowly for the set voltage.
- Voltage is too high: The voltage is too high for the current wire feed speed.
- Incorrect contact tip size: The tip opening is too large for the wire, or vice-versa.
Fixes:
- Increase wire feed speed: This is the most common fix. Try increasing the wire speed gradually until the arc is stable and the wire melts properly at the weld puddle, not at the tip.
- Decrease voltage: If you can’t get a good arc by adjusting the wire speed, try lowering the voltage. Many welders have separate controls for voltage and wire speed, so you need to find the right combination.
- Check contact tip: Make sure you are using the correct size contact tip for your wire diameter. Also, clean any spatter off the tip or replace it if it’s damaged.
Issue 5: Wire Not Feeding Smoothly Through the Gun Cable
Even if the drive rollers are working, the wire might not be moving freely through the MIG gun cable. This is often related to the liner within the cable.
Causes:
- Damaged or kinked MIG gun liner: The liner is a flexible tube inside the gun cable. If it’s damaged, the wire will catch on it.
- Dirt or debris in the liner: Over time, metal dust and grime can build up inside the liner.
- Sharp bends in the gun cable: Trying to feed wire through too many tight bends.
Fixes:
- Inspect the gun cable: Lay the cable out straight and look for any obvious kinks or damage.
- Clean the liner: Disconnect the MIG gun from the welder. You can try blowing compressed air through the liner from the gun end towards the welder. Sometimes a special liner cleaning kit can be used.
- Replace the liner: If cleaning doesn’t work or the liner is visibly damaged, it’s time to replace it. This is a common maintenance task.
Choosing the Right Drive Roller and Liner
Drive Rollers Explained
Drive rollers have grooves that grip the welding wire. They come in different sizes to match different wire diameters (like 0.023″-0.024″, 0.030″, 0.035″, 0.045″). They also come in different groove types: V-groove for solid wire and U-groove for flux-cored wire.
Using the wrong roller is a big reason for feed issues. Always check the wire spool for its diameter and type, then select the matching drive roller. Most welders come with a couple of common sizes, but you might need to buy extras for different wire types or sizes.
Liners: The Wire’s Highway
The liner is a flexible tube that runs from the back of your MIG gun all the way to the contact tip. It guides the wire smoothly. If the liner is kinked, worn out, or clogged with debris, the wire will struggle to pass through.
This is one of the most frequent causes of wire feed problems.
When you notice consistent feeding issues, the liner is a top suspect. Replacing it is usually straightforward and makes a big difference. Keep a spare liner on hand, as they are a consumable part that wears out over time.
Adjusting Wire Feed Speed and Voltage
Finding the Sweet Spot
Setting the right wire feed speed and voltage is crucial. It’s not just about picking a number; it’s about finding a combination that works for your specific metal thickness, wire type, and welding position.
Many welders have charts that suggest starting settings for different materials. These charts are a great place to begin. You’ll often find a table that shows recommended wire feed speed and voltage for various steel thicknesses.
The Relationship Between Wire Speed and Voltage
Wire feed speed and voltage are directly linked. Think of it like this:
- Higher wire speed usually requires higher voltage to match the amount of wire melting into the puddle.
- Lower wire speed usually requires lower voltage.
If you increase your wire feed speed without increasing voltage, the wire will stick out too far and melt at the tip (burning back). If you decrease wire speed without lowering voltage, you won’t get enough heat, and the wire might not melt properly into the base metal.
Testing Your Settings
The best way to learn is by practicing. Take a piece of scrap metal the same thickness as what you plan to weld. Start with the recommended settings from your welder’s chart or manual.
Weld a short bead. Observe the arc and the resulting weld:
- Too fast wire speed / too high voltage: The weld might be too wide, have excessive spatter, and the arc might sound crackly or uneven.
- Too slow wire speed / too low voltage: The weld might be too narrow, look like a bead sitting on top of the metal (not penetrating), and sound weak.
- Just right: A smooth, consistent arc sound, minimal spatter, good penetration, and a neat, even weld bead.
Make small adjustments to either wire speed or voltage, and weld another short bead. Continue this process until you achieve a good result. This hands-on testing is invaluable for developing your welding skills.
Maintaining Your MIG Welder for Smooth Feeding
Regular Cleaning and Inspection
Keeping your MIG welder clean and in good shape prevents many feeding problems. After each welding session, take a few minutes to clean your equipment.
- Clean the contact tip: Remove spatter with a tip cleaner or wire brush.
- Clean the nozzle: Use a chipping hammer to knock off spatter from the outside.
- Wipe down the gun cable: Keep the exterior clean.
- Check the drive rollers: Brush off any metal dust or debris.
When to Replace Parts
Some parts wear out over time and need replacement. These are often referred to as “consumables.”
- Contact Tips: These wear out and widen. Replace them when they start to affect your weld quality or arc.
- Nozzles: Can get clogged with spatter or damaged. Clean them regularly and replace if needed.
- Drive Rollers: Will eventually wear down. Replace when they no longer grip the wire well.
- MIG Gun Liners: These are essential for smooth feeding and will wear out or get damaged. Replace them as needed.
Regular maintenance means fewer headaches and better welds. It’s far better to spend a little time maintaining your welder than dealing with frustrating wire feed issues mid-weld.
Frequently Asked Questions
Question: Why is my MIG wire feeding inconsistently?
Answer: Inconsistent wire feeding can be caused by a kinked wire spool, a damaged or dirty MIG gun liner, worn drive rollers, or too much tension on the drive roller arm. Inspect these parts first.
Question: What does it mean when the wire nests?
Answer: Wire nesting, or “bird nesting,” happens when the wire bunches up and tangles around the drive roller. This usually means the wire is getting caught somewhere before or as it enters the drive rollers, often due to a kinked wire or a restriction in the gun liner.
Question: My wire keeps burning back to the tip. What’s wrong?
Answer: Wire burning back to the contact tip usually means your wire feed speed is too slow for the voltage you are using. Try increasing the wire feed speed or decreasing the voltage until the arc is stable and the wire melts into the weld puddle.
Question: How do I know if I have the right size drive roller?
Answer: Drive rollers have grooves designed for specific wire diameters. Check the wire spool for its diameter (e.g., 0.030″ or 0.035″). The groove on your drive roller should match this size.
Also, ensure you’re using the correct type of groove: V-groove for solid wire and U-groove for flux-cored wire.
Question: Can dirt affect my wire feed speed?
Answer: Yes, dirt and debris can build up inside the MIG gun liner and on the drive rollers. This increases friction, making it harder for the wire to feed, and can lead to slipping or inconsistent feeding. Regular cleaning is important.
Final Thoughts
Tackling a MIG Welder Wire Feed Speed Issue? Fix is part of learning to weld. You’ve learned about common problems like wire nesting and slipping rollers.
You know how to check your drive rollers, liners, and tension. Remember to match your drive roller to your wire type and size. Keep your gun liner clean and straight for a smooth wire path.
Always test your settings on scrap metal to find that perfect balance between wire speed and voltage. With a little practice and these tips, you’ll be feeding wire smoothly in no time.


