Many folks starting out with MIG welding run into a problem called burnback. It happens when the wire melts too far back and fuses to the contact tip inside the welding gun. This can make your welds messy and your equipment wear out faster.
Figuring out MIG Welder Burnback Issues? Quick Fix Guide can feel tricky at first, but it’s usually simple to fix. This guide will show you exactly what to do, step by step.
Get ready to learn how to stop burnback for good and make better welds.
Key Takeaways
- You will learn what burnback is in MIG welding.
- You will discover the common reasons why burnback happens.
- You will get simple steps to fix current burnback problems.
- You will find out how to prevent burnback from happening again.
- You will know how to adjust your welder settings for better results.
- You will feel more confident MIG welding after reading this.
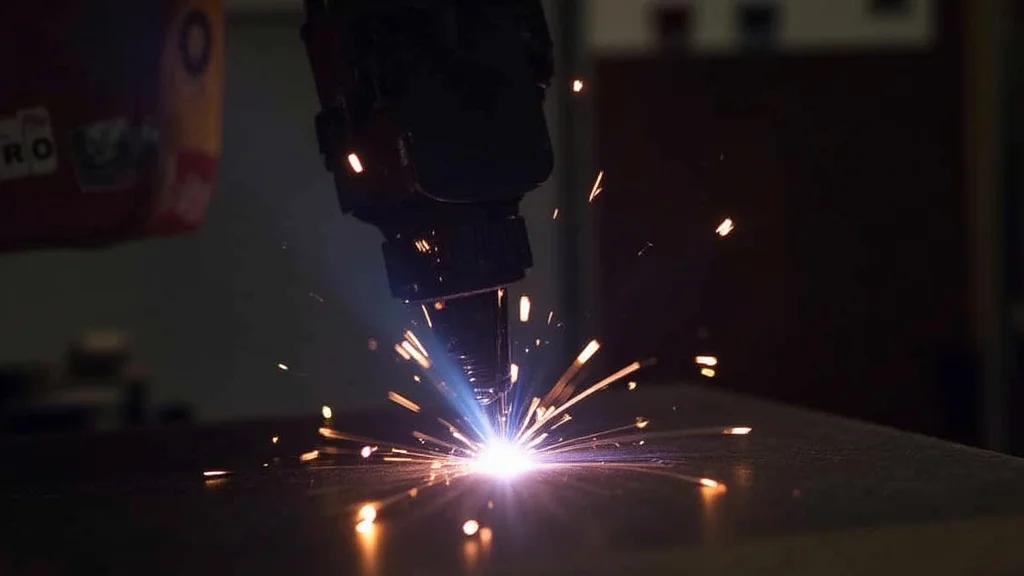
What is MIG Welder Burnback?
Burnback is when the welding wire melts too far back and sticks to the metal contact tip inside your MIG gun. This happens when the heat from the arc is too much or the wire feed speed is too slow. It’s a common issue that can be frustrating for new welders.
You might see it as a ball of metal stuck to the tip, or the wire might not feed properly.
When burnback occurs, it can cause several problems. Your welds might look bad, with lots of spatter or uneven beads. It can also damage your contact tip, making it wear out quicker.
This means you’ll have to replace it more often, costing you money. Worst of all, it can stop you from welding altogether until you fix it.
Why Does Burnback Happen?
Several things can cause burnback. Knowing these reasons helps you prevent it in the first place. It’s usually a mix of settings and how you’re using the welder.
Let’s break down the main culprits.
1. Wire Feed Speed (WFS) Too Low
The wire feed speed is how fast the welding wire comes out of the gun. If this speed is too slow for the voltage you’re using, the wire won’t be consumed fast enough. The arc then melts the wire back into the contact tip.
Think of it like this: if you’re eating with a fork and the food is coming too slowly, you might end up with a blob of food on your fork. Similarly, if the wire is fed too slowly, the electric arc melts it faster than it can be fed out, causing it to stick to the tip.
2. Voltage Too High
Voltage controls the arc length and how hot the weld is. If your voltage is set too high, the arc becomes very hot and energetic. This intense heat can melt the wire too far back, even with the correct wire feed speed.
A high voltage setting creates a more “spattery” and forceful arc. This extra power melts the wire quickly. If the wire feed can’t keep up with this rapid melting, burnback is almost guaranteed.
3. Welder is Too Hot Overall
Sometimes, it’s not just one setting. The combination of voltage and wire feed speed might be too high for the thickness of the metal you’re welding. This leads to too much overall heat being generated at the tip.
If you’re trying to weld thin metal with settings meant for thick metal, you’ll quickly overheat the wire and the tip. This is a common mistake for beginners who might be guessing at settings.
4. Dirty or Damaged Contact Tip
The contact tip is a small copper piece that the welding wire passes through. It also carries the electrical current to the wire. If this tip is dirty with weld spatter or has a worn-out opening, it can cause problems.
A dirty tip can restrict the wire’s smooth passage. It can also affect the electrical connection, leading to an unstable arc and potential burnback. A tip with a widened or damaged opening won’t guide the wire correctly, contributing to the issue.
5. Wire Drive Roll Issues
The drive rolls in your welder’s wire feeder grip the welding wire and push it through the liner and out the gun. If these rolls are too loose, worn, or dirty, they can slip. This means the wire isn’t being fed at the speed you set.
When the drive rolls don’t grip the wire properly, the wire feed speed effectively becomes lower than what your welder display shows. This reduced feed causes the wire to melt back to the tip.
6. Liner Problems
The liner is a flexible tube inside the welding gun that guides the wire from the feeder to the contact tip. If the liner is kinked, too long, or damaged, it creates friction. This friction makes it harder for the wire to be pushed through.
Increased friction means the wire feeder motor has to work harder. If the friction is high enough, the wire might not be able to move forward at the set speed, leading to burnback.
7. Welding Gun Angle and Distance
The angle at which you hold your welding gun and the distance between the contact tip and the workpiece can also play a role. Holding the gun at a sharp angle or being too close can affect the arc and wire melting.
If you pull the gun at a very sharp angle, it can disturb the gas shield and affect how the wire melts. Being too close to the metal can cause heat to build up prematurely, leading to burnback.
How to Fix MIG Welder Burnback (Quick Fix Guide)
When burnback happens, don’t panic! Here’s how to fix it quickly so you can get back to welding.
Step 1: Stop Welding and Release the Trigger
The moment you notice burnback, release the trigger on your welding gun. This stops the welding current and wire feed. Don’t keep trying to weld through it.
Step 2: Inspect the Contact Tip
Carefully look at the tip of your welding gun. You’ll likely see the welding wire melted to the end of it, forming a ball or plug. This is the burnback.
Step 3: Remove the Burned Wire
You need to get that melted wire off the contact tip. There are a few ways to do this:
- Use Pliers: Gently grip the burned wire with a pair of pliers and pull it straight off. Be careful not to damage the tip.
- Tap it Out: Sometimes, a light tap on the side of the tip with the handle of your pliers or a small hammer can dislodge the molten metal.
- Use a Wire Brush: A stiff wire brush can help clean any remaining residue from the tip.
Step 4: Clear the Wire Path
Once the tip is clean, you need to make sure the wire can feed smoothly. Pull the trigger briefly (without welding) to feed a little wire out. This should push any remaining internal debris out and give you a fresh, clean tip to work with.
Feed out about half an inch to an inch of clean wire. You want a nice, straight tip with no melted metal sticking to it.
Step 5: Re-evaluate Your Settings
Now that you’ve fixed the immediate problem, it’s time to adjust your welder. This is the most important part of preventing burnback from happening again.
- Increase Wire Feed Speed: This is often the easiest fix. Try increasing the WFS by a small amount. Listen to the sound of the arc; it should be a steady sizzle or buzz.
- Decrease Voltage: If increasing WFS doesn’t help, or if your arc sounds too “lazy” or “hot,” try lowering the voltage a little. You want a smooth, consistent arc.
- Find the Right Balance: The goal is to find the sweet spot where the voltage and WFS work together. For most common welding jobs, there’s a chart in your welder’s manual or on the machine itself that suggests starting settings.
Remember, thicker metal needs more heat (higher voltage and WFS), while thinner metal needs less. If you’re welding thin material, your settings are probably too high.
Step 6: Check Your Equipment
If adjusting settings doesn’t solve the problem, it’s time to look at your equipment.
- Clean the Contact Tip: Regularly clean your contact tip with a wire brush or tip cleaner. Replace it if it’s worn out or damaged. A new tip is inexpensive.
- Check Drive Rolls: Ensure the drive rolls are clean and properly seated on the wire. Make sure they are tight enough to grip the wire but not so tight they crush it.
- Inspect the Liner: Look for any kinks or damage in your welding gun liner. If you suspect a problem, it might be time to replace it.
- Check the Gas Flow: Make sure your shielding gas is turned on and flowing at the correct rate.
Preventing MIG Welder Burnback
The best way to deal with burnback is to stop it before it starts. By following these tips, you can significantly reduce how often you encounter this issue.
1. Set Your Welder Correctly
Always start with the recommended settings for your metal thickness. Consult your welder’s manual or online charts. These are a great starting point.
Don’t just guess. Using the right voltage and wire feed speed is the single biggest factor in preventing burnback. Aim for a smooth, consistent arc sound.
2. Feed a Little Wire
Before you start welding, pull the trigger for a second to feed out about a quarter inch of wire past the tip. This ensures the wire is extending properly and ready for a clean arc start.
3. Maintain a Consistent Stick-Out
The “stick-out” is the length of welding wire that extends beyond the contact tip. For most MIG welding, aim for about a quarter inch (6mm) to half an inch (12mm) stick-out. This distance is crucial for proper wire melting and arc control.
A longer stick-out can cause the wire to melt back too far. A shorter stick-out can lead to the wire dragging on the metal. Find that sweet spot and try to keep it consistent.
4. Keep Your Contact Tip Clean
Make cleaning your contact tip a habit. After each welding session, or even during long sessions, clean off any spatter. This prevents buildup that can cause burnback and ensures good electrical contact.
5. Regularly Check Your Drive Rolls and Liner
Periodically inspect your drive rolls for wear and clean them. Also, ensure the liner is not kinked. A smooth wire path is essential for consistent wire feeding.
6. Be Mindful of Gun Angle and Distance
Hold your gun at a comfortable angle, usually a slight push or pull angle depending on the weld. Keep the tip at a consistent distance from the workpiece. This consistency helps maintain a stable arc and heat input.
7. Practice, Practice, Practice
The more you weld, the better you’ll get at recognizing the signs of burnback and knowing how to adjust. Develop a feel for the sound of a good MIG arc and the feel of the wire feeding.
Troubleshooting Common Scenarios
Let’s look at some specific situations and how to fix them.
Scenario 1: Burnback occurs immediately after starting a weld.
This usually means your settings are way off, or your contact tip is bad. The most likely causes are:
- Voltage is too high.
- Wire feed speed is too low.
- Contact tip is dirty or damaged.
Fix: Stop, clean the tip, feed wire. Then, try reducing voltage slightly or increasing WFS. If that doesn’t work, try a new contact tip.
Scenario 2: Burnback happens only after welding for a while.
This can happen if the gun or components are heating up, or if wire tension is not quite right.
- Wire drive rolls might be slipping slightly under heat.
- The liner might be starting to cause drag.
- Your stick-out might be creeping too long.
Fix: Check wire tension on the drive rolls. Ensure the liner is clear. Make sure you’re maintaining a consistent stick-out.
Let the equipment cool down if it’s overheating.
Scenario 3: Burnback happens only on thin metal.
Thin metal requires less heat. Your settings are likely too high for the material.
- Voltage is definitely too high.
- Wire feed speed is also too high for that voltage on thin material.
Fix: Significantly reduce both voltage and WFS. You want a fine, crisp arc.
Frequently Asked Questions
Question: How do I know if my contact tip needs replacing?
Answer: If you see the opening is widened, misshapen, or if cleaning it doesn’t help, it’s time for a new tip. They are inexpensive and make a big difference.
Question: Can I weld with a burned-back wire stuck to the tip?
Answer: No, you should not. Welding with a burned-back tip will result in poor weld quality, lots of spatter, and can damage your equipment further.
Question: What is a good starting point for voltage and wire feed speed?
Answer: Always refer to your welder’s manual or the chart on the machine. For example, welding 1/8 inch mild steel might start around 17-19 volts and a WFS of 200-250 inches per minute.
Question: Does the type of wire affect burnback?
Answer: Yes, different wires have different melting characteristics. Solid wire can be more prone to burnback than some flux-cored wires if settings aren’t correct. Always use the recommended settings for your specific wire.
Question: How often should I clean my contact tip?
Answer: It’s a good habit to clean it before every welding session and after every few minutes of continuous welding, especially if you notice increased spatter.
Final Thoughts
Fixing MIG welder burnback is mostly about getting your settings right and keeping your equipment in good shape. You learned what burnback is and why it happens. We showed you quick steps to fix it when it occurs.
Most importantly, you discovered how to prevent it by adjusting your wire feed speed and voltage, maintaining the right stick-out, and keeping your contact tip clean. Don’t worry if you see it again; just use these tips to get back to making great welds.


