Seeing your MIG welder’s arc flicker can be confusing and frustrating, especially when you’re just starting out. It’s like the machine is having a bad day, and you’re not sure why. Many beginners run into this issue, making troubleshooting feel tough.
But don’t worry! This guide is here to help. We’ll walk through simple, step-by-step solutions to fix that sputtering arc.
Get ready to make your welds smooth and steady again, and let’s discover what fixes that jumpy arc.
Key Takeaways
- Learn what causes a MIG welder’s arc to flicker.
- Discover how to check and adjust your wire speed for a stable arc.
- Understand the role of voltage in arc stability and how to set it correctly.
- Identify how shielding gas issues can lead to arc flicker and how to fix them.
- Explore how contact tip condition affects arc quality and what to do about it.
- Gain practical tips for cleaning and maintaining your MIG gun for a consistent arc.
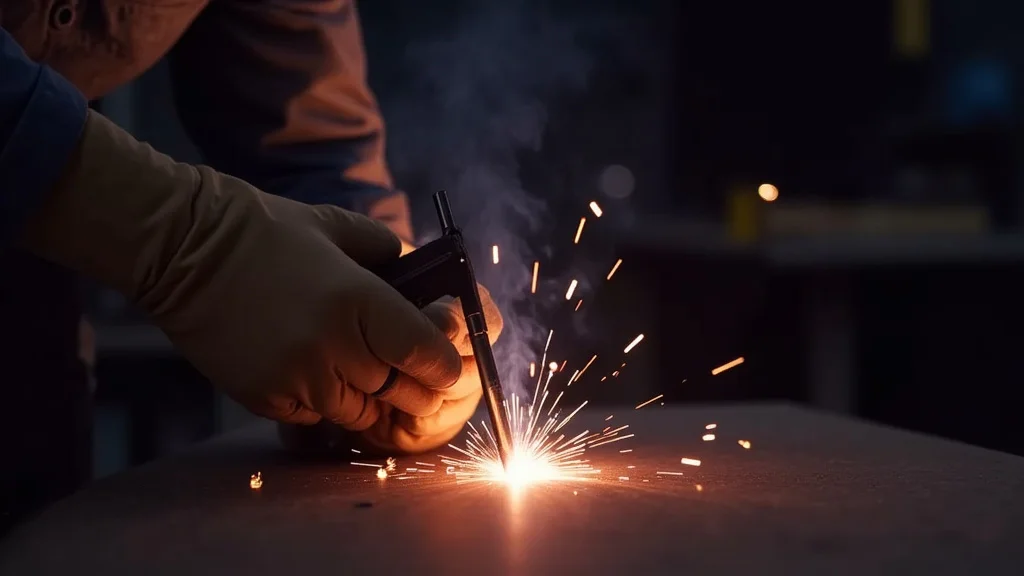
Why Does My MIG Welder’s Arc Flicker?
A steady, consistent arc is the goal for any MIG welder. When that arc starts to sputter and flicker, it’s a clear sign something isn’t quite right. This flickering arc is a common hurdle for beginners because it can stem from several different places.
It’s not just one thing; it’s usually a combination of small issues that add up. This makes it tricky to pinpoint the exact cause at first glance. But by understanding the common culprits, you can fix it quickly.
Understanding the Basics of a Stable MIG Arc
A MIG (Metal Inert Gas) welder works by feeding a wire electrode through a gun. This wire melts as it passes through an electric arc. The arc is the hot, bright spark that melts the metal.
A stable arc means the electricity flows smoothly between the wire and the workpiece. This smooth flow creates a consistent pool of molten metal, leading to strong, clean welds. When the arc flickers, the heat and melting process become uneven.
This can result in weak welds with lots of spatter.
Common Causes of MIG Welder Arc Flickering
There are several reasons why your MIG welder’s arc might be acting up. Most of them are easy to fix once you know what to look for.
1. Incorrect Wire Speed
Wire speed is super important. It controls how much wire is fed into the weld. If the wire speed is too low, you don’t have enough filler metal.
If it’s too high, you’re pushing too much wire into the arc. Both can cause the arc to sputter and flicker. Imagine trying to feed string through a machine; if you push too fast or too slow, it gets tangled.
Welding wire is similar. You need just the right amount feeding at the right time.
Too Low Wire Speed
When the wire speed is too low, the arc might become long and unstable. It can look like the wire is struggling to reach the base metal consistently. You’ll often see a lot of spatter and a weak, patchy weld.
The heat input isn’t enough to create a smooth melt.
Too High Wire Speed
If the wire speed is too high, the wire can hit the workpiece too hard. This causes it to “stub” or push against the metal. The arc will then become erratic and jumpy.
You might hear a crackling sound, and the weld bead will be uneven and likely have poor penetration.
2. Incorrect Voltage Settings
Voltage controls the arc length. It’s like the power that keeps the arc jumping across the gap. If the voltage is set too low, the arc will be short and might sputter or “whistle.” If it’s too high, the arc will be long and stringy, leading to excessive spatter and a weak weld.
Finding the sweet spot for voltage is key to a stable arc.
Low Voltage
A low voltage setting results in a short arc. This can cause the wire to dip too close to the molten pool, leading to a sputtering, inconsistent arc. The weld bead might look “cold” or “ropey,” and you won’t get good fusion.
High Voltage
When the voltage is too high, the arc becomes very wide and long. This causes a lot of spatter to fly out. The weld bead can be wide but shallow, meaning it’s not getting deep into the base metal for a strong bond.
The arc itself looks unstable and “washy.”
3. Shielding Gas Issues
MIG welding uses a shielding gas to protect the molten weld pool from the air. The air contains oxygen and nitrogen, which can ruin your weld. If the gas flow isn’t right, the arc can flicker.
This is because the protection is inconsistent.
Insufficient Gas Flow
If there isn’t enough gas flowing, the atmosphere can get to the molten metal. This causes porosity (small holes) in the weld and makes the arc unstable. You might see the arc sputtering and the weld looking dirty.
Excessive Gas Flow
Believe it or not, too much gas can also be a problem. It can create turbulence around the arc. This turbulence can blow the shielding gas away from the weld puddle.
When the gas is blown away, the molten metal is exposed to the air, causing the arc to flicker and the weld to become contaminated.
Leaky Gas Connections
Make sure all your gas connections are tight. A leak anywhere from the cylinder to the gun can mean you’re not getting enough gas. This is a silent killer of good welds and will definitely cause arc flickering.
4. Poor Ground Connection
A good electrical connection is vital for any welding. The ground clamp connects the welder to the workpiece, completing the electrical circuit. If this connection is loose, dirty, or not making good contact, the electricity can’t flow smoothly.
This causes the arc to be unstable and flicker.
Dirty Metal Surface
The ground clamp needs to be attached to clean metal. Rust, paint, grease, or dirt on the workpiece will prevent a good connection. Always clean the spot where you attach the ground clamp.
Loose Clamp
Make sure the ground clamp is securely fastened to the workpiece. A clamp that’s just loosely attached won’t provide a solid connection. Wiggle it a bit to ensure it’s making good contact.
Damaged Cable
Check the ground cable for any cuts or damage. A damaged cable can lead to poor electrical flow.
5. Contact Tip Problems
The contact tip is the part of the gun that the welding wire passes through. It also carries the electrical current to the wire. If the contact tip is worn out or dirty, it can cause all sorts of welding problems, including arc flicker.
Worn Tip
Over time, the inside of the contact tip can widen and get rough. This causes the wire to feed inconsistently and the arc to be erratic. It’s like trying to shoot a ball through a worn-out pipe; it doesn’t go straight.
Dirty Tip
Spatter can build up inside or on the outside of the contact tip. This buildup can block the proper flow of the wire and affect the electrical contact. A dirty tip is a major cause of sputtering and inconsistent arcs.
Incorrect Tip Size
Using the wrong size contact tip for your welding wire will cause feeding issues and arc instability. Always match the tip size to your wire diameter.
6. Dirty or Damaged Wire Feeder Rollers
The wire feeder rollers grip the welding wire and push it through the liner to the gun. If these rollers are dirty, worn, or have the wrong “V” groove for your wire size, they can slip. This leads to inconsistent wire feeding and a flickering arc.
Dirty Rollers
Grease, dirt, or metal shavings can build up on the rollers. This makes them slip on the wire instead of gripping it firmly. Clean the rollers regularly with a wire brush.
Worn Rollers
The grooves in the rollers can wear down over time. This reduces their ability to grip the wire. Check the rollers for signs of wear and replace them if necessary.
Incorrect Roller Type
Make sure you are using the correct type of drive roller for your wire size and type. Some rollers are designed for steel, others for aluminum, and they have different groove sizes and shapes.
7. Issues with the Wire Feeder Liner
The liner is a flexible tube inside the MIG gun that the wire travels through. If this liner is kinked, dirty, or damaged, it can create too much friction. This makes it harder for the wire to feed smoothly, leading to inconsistent wire speed and arc flicker.
Kinks in the Liner
A kinked liner acts like a speed bump for the wire. The wire can get stuck or feed unevenly. Always keep the gun cable straight when welding and avoid sharp bends.
Dirty or Damaged Liner
Dirt, rust, or metal shavings can build up inside the liner. This increases friction. If the liner is damaged, it can snag the wire.
8. Incorrect Wire Type or Diameter
Using the wrong type of welding wire, or a wire with the wrong diameter for your setup, will cause feeding problems and arc instability. For example, trying to run solid steel wire through a setup meant for flux-cored wire, or using 0.035-inch wire in a 0.023-inch setup, will cause issues.
9. Environmental Factors
Sometimes, the environment you’re welding in can affect your arc. Drafts, for instance, can blow away your shielding gas. This exposes the molten puddle to the air, causing the arc to flicker and the weld to be contaminated.
Wind and Drafts
Always try to weld in a well-ventilated but draft-free area. If you’re welding outdoors, consider using a windbreak.
10. Machine Issues (Less Common for Beginners)
While less common for beginners, sometimes the welder itself can have internal issues. This could be a problem with the drive motor, the circuitry, or the power supply. If you’ve checked everything else and the arc still flickers, it might be time to have the machine serviced.
Step-by-Step Solutions for MIG Welder Arc Flickering
Now that you know what can cause the problem, let’s walk through how to fix it. Follow these steps systematically.
Step 1: Check Your Power Source and Ground
This is the easiest thing to check and often the cause.
- Ensure the welder is plugged in correctly and receiving stable power.
- Inspect your ground clamp. Make sure it’s attached to clean, bare metal on your workpiece or welding table. Wipe away any rust, paint, or dirt.
- Check the clamp itself. Is it tight? Is the cable connected securely to the clamp?
Step 2: Verify Wire Feeder Settings
This is crucial for a smooth arc.
- Consult your welder’s manual for recommended settings based on the material thickness and wire type you are using.
- Start with a recommended setting for wire speed and voltage for your specific material and thickness.
- Adjust wire speed incrementally. If the arc is sputtering or the wire is pushing too hard, slow down the wire speed. If the arc is long and stringy, and you’re not getting good melt, increase the wire speed slightly. Listen to the sound of the arc – it should sound like a consistent sizzle, not a crackle or pop.
Step 3: Set the Correct Voltage
Voltage and wire speed work together.
- Adjust voltage based on wire speed. As a general rule, when you increase wire speed, you often need to increase voltage slightly to match. When you decrease wire speed, you might need to decrease voltage.
- Aim for a smooth arc. You want the arc to be quiet and steady. Too low voltage sounds “fizzy,” too high sounds “hissy” or like a blowtorch.
- Observe the weld puddle. The puddle should be fluid but controllable, with minimal spatter.
Step 4: Examine Your Shielding Gas System
Gas is your weld’s invisible shield.
- Check the gas cylinder valve. Ensure it’s fully open.
- Use a flowmeter regulator. Set the gas flow to the recommended rate, usually around 15-25 cubic feet per hour (CFH), depending on your material and environment. A common mistake is to rely on the pressure gauge alone; you need a flowmeter.
- Perform a “leak test.” With the gas cylinder valve open and the welder off, close the valve on the regulator. If the needle on the flowmeter drops, you have a leak somewhere between the regulator and the torch.
- Check the gas hose and connections. Make sure they are secure and not damaged.
- Eliminate drafts. If you are welding outdoors or in a breezy area, try to shield the weld area from wind.
Step 5: Inspect and Clean the Contact Tip and Gun
This small part makes a big difference.
- Turn off the welder.
- Remove the nozzle from the MIG gun.
- Check the contact tip. Is it worn out (the hole is larger than it should be)? Is it covered in spatter?
- Clean or
- Inspect the nozzle for spatter buildup. Clean it out.
- Ensure the tip is screwed in tightly.
Step 6: Check Wire Feeder Rollers and Liner
Smooth wire feeding is essential.
- Turn off the welder.
- Open the wire feeder compartment.
- Inspect the drive rollers. Are they clean? Are they the correct size and type for your wire?
- Clean the rollers with a wire brush.
- Check the wire spool. Is the wire feeding off it smoothly? Is the spool seated correctly?
- Pull the welding wire out of the gun. Check for any kinks or damage in the wire.
- Inspect the gun liner. Try to feed wire through it without the gun connected to the welder to feel for resistance. If you suspect a problem, the liner may need to be replaced.
Step 7: Use the Right Wire
Make sure you’re using the correct wire for your job.
- Verify wire diameter. Ensure the wire diameter matches the setting on your wire feeder drive rolls and the size of your contact tip.
- Check wire type. Are you using the correct type of wire for the metal you’re welding (e.g., mild steel wire for mild steel, stainless steel wire for stainless steel)?
Troubleshooting Table
Here’s a quick reference to help you diagnose common issues.
| Symptom | Possible Cause | Solution |
|---|---|---|
| Flickering, unstable arc; lots of spatter | Wire speed too high | Decrease wire speed |
| Flickering, unstable arc; wire pushing | Wire speed too high | Decrease wire speed |
| Long, stringy arc; poor penetration | Voltage too high | Decrease voltage |
| Short, sputtering arc; “whistling” sound | Voltage too low | Increase voltage |
| Arc sputters; weak weld | Insufficient shielding gas | Increase gas flow, check for leaks |
| Arc sputters; contaminated weld | Excessive shielding gas or drafts | Decrease gas flow, use windbreak |
| Erratic arc; inconsistent feeding | Dirty or worn contact tip | Clean or replace contact tip |
| Arc flickers; wire jams | Kinked or dirty gun liner | Straighten or replace liner |
| Arc flickers; poor weld quality | Poor ground connection | Clean and secure ground clamp |
Frequently Asked Questions
Question: What is the most common reason for MIG arc flickering?
Answer: The most common reasons beginners experience arc flickering are incorrect wire speed and voltage settings that are not matched. Dirty contact tips and poor ground connections are also very frequent causes.
Question: How do I know if my wire speed is too high or too low?
Answer: If your wire speed is too high, the wire might push against the metal, causing the arc to jump. If it’s too low, the arc can become long and unstable, and you won’t get good melting.
Question: What should I do if I see a lot of spatter when welding?
Answer: Excessive spatter usually means your voltage is too high, or your shielding gas flow is incorrect (too much or too little). Also, check if your contact tip is dirty or worn.
Question: Can a dirty welding gun cause the arc to flicker?
Answer: Yes, a dirty welding gun, especially a dirty contact tip or a clogged liner, can prevent smooth wire feeding and cause the arc to become unstable and flicker.
Question: Is it okay to use a smaller diameter wire than my gun is set up for?
Answer: No, it’s best to match your wire diameter to the drive rollers and contact tip. Using a different size can cause feeding problems, leading to an inconsistent arc and poor weld quality.
Final Thoughts
Learning to fix a MIG welder arc flickering problem is a key skill. By systematically checking your wire speed, voltage, gas, ground, and gun consumables, you can solve most issues. A steady arc means stronger welds and less cleanup.
Keep your equipment clean and your settings correct. Practice makes perfect, and soon you’ll be welding with confidence and a smooth, consistent arc.
Leave a Reply