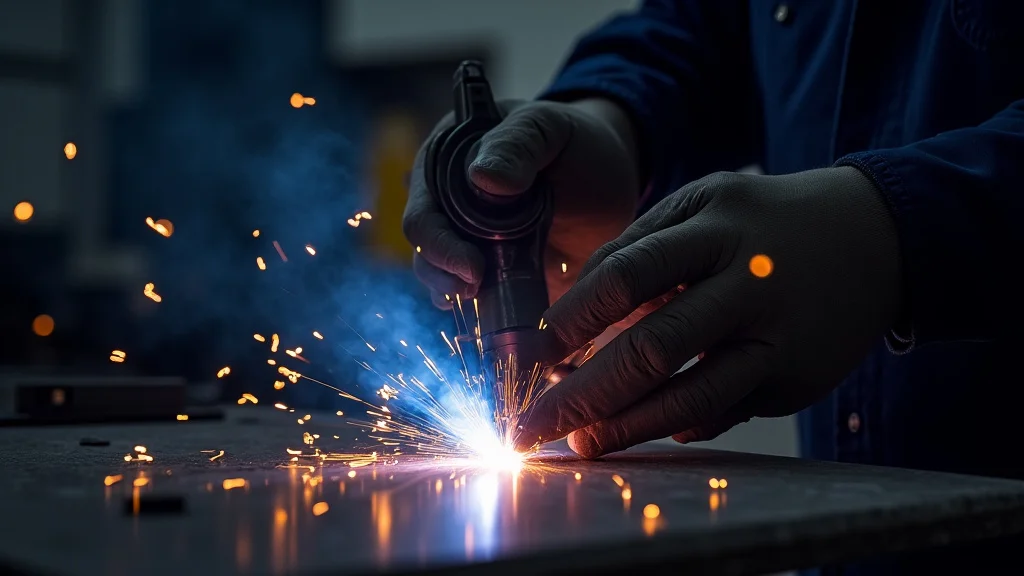
Sometimes your MIG welder doesn’t make a strong, steady arc. It might sputter or seem weak. This is a common problem, especially when you’re just starting out.
Figuring out How Do You Fix Weak Arc in MIG Welding Machines? doesn’t have to be tricky. We’ll walk you through it step-by-step. First, let’s look at what causes this issue and then we’ll show you how to get a solid, reliable arc.
Key Takeaways
- A weak arc in MIG welding often points to issues with wire feed speed, voltage, or contact tips.
- Checking and cleaning your MIG gun’s contact tip is a vital first step to fixing a weak arc.
- Correctly setting your voltage and wire speed is essential for a strong, stable welding arc.
- Contaminated or wrong-type welding wire can greatly affect arc quality.
- Proper grounding and electrical connections are fundamental for a good MIG arc.
- Troubleshooting a weak arc involves a systematic check of several key machine and consumable components.
Understanding the MIG Welding Arc
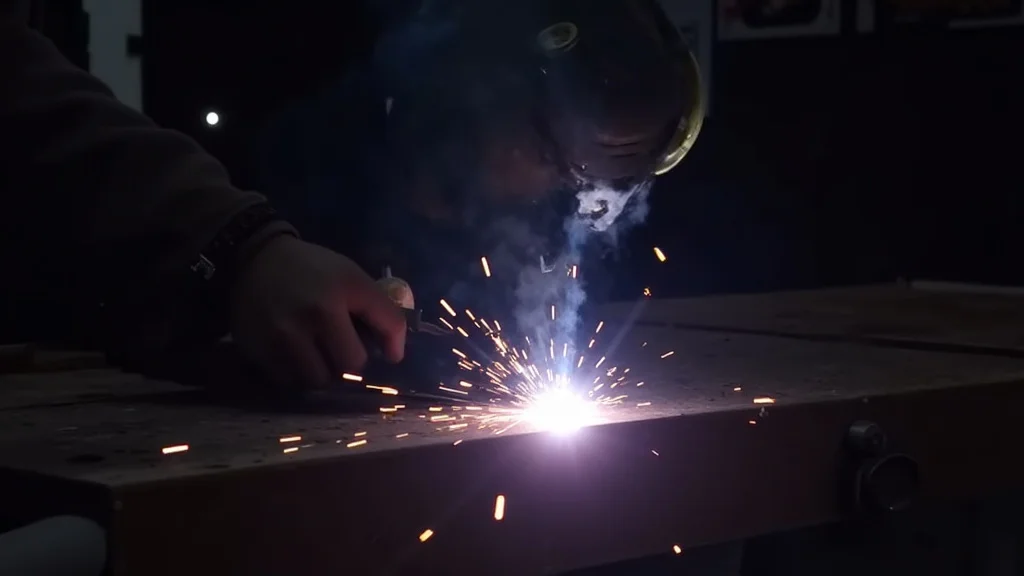
The arc in MIG welding is the heart of the process. It’s what melts the metal and joins your pieces together. Think of it like a controlled lightning bolt between your welding wire and the metal you’re working on.
A good arc is steady, smooth, and consistent. It sounds like a gentle sizzle or bacon frying. When the arc is weak, it’s unstable.
It might pop, sputter, or not even melt the metal properly. This makes welding difficult and the final weld won’t be strong.
What a Weak Arc Looks Like
A weak arc can show up in a few ways. You might see the welding wire glowing too brightly before it even touches the metal. The sound of the weld might be erratic, not that nice, steady sizzle.
Instead, it could sound more like a harsh crackling or popping. The weld puddle itself might be small and hesitant. You might also notice the weld metal not penetrating the base metal as it should.
Sometimes, the wire might even stick to the contact tip or the work piece.
Common Causes of a Weak Arc
Several things can lead to a weak arc. It’s usually not just one big problem, but a combination of smaller ones. We’ll explore the most frequent culprits.
By understanding these, you’ll be much closer to fixing your MIG welder.
1. Wire Feed Issues
The wire feeder’s job is to push the welding wire smoothly and at the right speed into the weld. If this isn’t working right, your arc will suffer. If the wire is feeding too slowly, the arc might be too long and unstable.
If it’s feeding too fast, it can cause the arc to be too short and spattery.
Spool Problems
Check the wire spool itself. Is it wound loosely? Is the wire snagged on the spool?
Sometimes the wire can get tangled, creating resistance. This makes the feeder motor struggle. Make sure the spool is mounted correctly and the wire is unwinding freely.
Drive Rollers
The drive rollers grip the wire and push it through the liner. If they are worn, dirty, or the wrong size for your wire, they won’t grip well. This means the wire won’t be pushed consistently.
Clean the rollers regularly. Make sure they are set to the correct tension. You want them tight enough to grip, but not so tight they flatten the wire.
Drive Roll Tension
The tension on the drive rollers is key. Too loose, and the wire slips. Too tight, and it can deform the wire or even damage the drive motor.
You should be able to hear the motor struggling a little if the tension is too high. Adjust it until the wire feeds smoothly without slipping.
Wire Liner
The wire liner is a flexible tube inside the welding gun cable. It guides the wire from the feeder to the contact tip. If this liner is kinked, damaged, or clogged with debris, it creates friction.
This friction makes it hard for the wire to feed. Sometimes, metal shavings or dirt can build up inside. You might need to replace the liner if it’s old or damaged.
2. Contact Tip Problems
The contact tip is where the welding current actually transfers to the wire. It’s a small, crucial part. If it’s not in good shape, your arc will be weak and unstable.
Worn or Dirty Tip
Over time, the hole in the contact tip can enlarge and become misshapen from the heat and arc. Dirt, spatter, and metal dust can also build up inside the tip. This restricts the wire flow and affects the electrical contact.
A dirty or worn tip is one of the most common reasons for a weak arc.
Incorrect Size Tip
Using a contact tip that is not the correct size for your welding wire is a problem. The wire needs to fit snugly inside the tip. If the tip is too large, the wire can wobble, causing a poor electrical connection.
If it’s too small, the wire might not fit through at all or will be constricted.
Tip Not Tightened
The contact tip needs to be screwed in tightly. If it’s loose, the electrical connection will be poor. This leads to arcing between the tip and the tip holder, causing heat buildup and a weak, unstable arc.
Always make sure the tip is snug.
3. Voltage and Amperage Settings
Voltage and amperage (controlled by wire feed speed) are the two main controls for your MIG welder. Setting them correctly is vital for a good arc. Incorrect settings can easily lead to a weak or problematic arc.
Voltage Too High or Too Low
If the voltage is too high, the arc will be too long and spattery. It can also cause the weld puddle to be too fluid, making it hard to control. If the voltage is too low, the arc will be short and may not provide enough heat.
This can result in a weak weld with poor penetration. You’ll often see a “bird’s nest” of wire if voltage is too low and wire speed is too high.
Wire Speed (Amperage) Too High or Too Low
Wire feed speed directly controls the amperage. Too low a wire speed (low amperage) means the arc won’t have enough power. It will be weak and might not melt the metal properly.
Too high a wire speed (high amperage) can cause excessive spatter and a very short, “buggy whip” arc. The wire might also burn back to the contact tip.
4. Gas Issues
For most MIG welding (GMAW), you need a shielding gas. This gas protects the molten weld puddle from the air. Air contains oxygen and nitrogen, which can cause defects in the weld.
If your shielding gas isn’t flowing correctly, your arc will be affected.
Gas Flow Rate
The gas flow rate needs to be set correctly. Too little gas, and the arc won’t be protected. You’ll see porosity (tiny holes) in your weld.
Too much gas can cause turbulence. This can actually draw air into the weld puddle, also causing defects. A good starting point for many applications is around 20-25 cubic feet per hour (CFH).
Gas Leaks
Leaks in the gas system are a common problem. Check your gas cylinder connections, regulator, hose, and the connection at the welding gun. Even a small leak can mean your weld isn’t properly shielded.
You might hear a hissing sound if there’s a leak.
Wrong Type of Gas
Different metals require different shielding gases. For steel, a common mix is 75% Argon and 25% CO2. For aluminum, you often need pure Argon or a mix with Helium.
Using the wrong gas can lead to poor arc quality and weld defects.
5. Electrical Connections and Grounding
A good electrical connection is essential for any welding process. Poor connections create resistance, which can lead to voltage drops and a weak arc.
Work Clamp Connection
The work clamp (ground clamp) connects your welding machine to the piece you’re welding. Make sure this clamp is attached to clean, bare metal. Rust, paint, or dirt on the workpiece or the clamp will create a poor connection.
This can cause the arc to be unstable and weak. Ensure the clamp is tight and making good contact.
Welding Cable Issues
Check the welding cables for any damage, such as cuts, abrasions, or burnt spots. A damaged cable can have increased resistance. Also, ensure the connections at the welding machine and the work clamp are secure.
A loose connection here will also cause problems.
6. Contaminated or Damaged Wire
The welding wire itself is a consumable that can cause issues if it’s not in good condition.
Dirty Wire
If the welding wire is dirty, oily, or rusty, it will transfer those contaminants to the arc. This can cause spatter and an unstable arc. Clean the wire before feeding it into the gun.
You can often use a wire brush or a special wire cleaning pad.
Wrong Wire Type
Using a welding wire that is not designed for your specific application or metal type will result in poor welds and an unstable arc. Always use the correct type and diameter of wire recommended for your project.
Old Wire
Welding wire can degrade over time, especially if exposed to moisture. Old wire can become brittle or develop surface oxidation, both of which can lead to feeding problems and a poor arc. If you have very old spools, it might be worth trying a new one.
Troubleshooting Steps: How Do You Fix Weak Arc in MIG Welding Machines?
When you notice a weak arc, don’t panic. Work through these steps systematically. This will help you pinpoint the problem and get back to welding effectively.
Step 1: Check the Basics
Before you start taking things apart, do a quick visual check.
- Listen to the arc: Does it sound like a steady sizzle or is it popping and sputtering?
- Look at the arc: Is it too long, too short, or erratic?
- Check your settings: Are your voltage and wire speed appropriate for the material thickness and wire size you are using?
Step 2: Inspect the Contact Tip
This is the most common culprit.
- Turn off your welder.
- Unscrew the contact tip from the welding gun.
- Clean the inside and outside of the tip with a wire brush or tip cleaner tool.
- Check the hole size and condition. If it’s enlarged, misshapen, or heavily pitted, replace it.
- Ensure you are using the correct size tip for your wire diameter.
- Screw a clean, correctly sized tip back on tightly.
Step 3: Examine the Wire Feed System
If the tip is clean, move to the wire feeder.
- Check the spool: Is the wire feeding off smoothly without snags?
- Inspect the drive rollers: Are they clean and free of wire shavings? Are they the correct size for your wire? Adjust the tension if needed.
- Check the liner: Try to gently push the wire through the gun by hand (with the welder off and no power connected). Does it move freely? If not, the liner might be kinked or blocked.
Step 4: Verify Shielding Gas
Ensure your gas is flowing properly.
- Check the gas cylinder valve is fully open.
- Look at the flow meter on your regulator. Is the flow rate set appropriately (usually 20-25 CFH for steel)?
- Turn on the gas at the gun (without welding) for a few seconds. Do you hear and feel the gas coming out of the nozzle?
- Check for leaks in the gas hose and connections.
Step 5: Inspect Electrical Connections
A solid electrical path is a must.
- Ensure your work clamp is attached to clean, bare metal on the workpiece.
- Make sure the work clamp is tight and making good contact.
- Check the welding cable and gun cable connections at the machine for tightness and damage.
Step 6: Evaluate the Wire
If nothing else seems wrong, consider the wire.
- Is the wire clean and free of rust or oil? Clean it if necessary.
- Is it the correct type and diameter for your welding application?
- If the spool is very old or has been stored improperly, consider replacing it.
Maintaining Your MIG Welder for a Strong Arc
Preventing problems is always better than fixing them. Regular maintenance will ensure your MIG welder provides a strong, consistent arc for years to come.
Regular Cleaning is Key
Dedicate time to clean your equipment. After each welding session, take a few minutes to:
- Brush off any spatter from the nozzle and contact tip.
- Check for dirt and debris in the drive rollers and around the feed mechanism.
- Wipe down the welding gun cable.
Tip Replacement Schedule
Contact tips are consumables. They wear out. Develop a habit of checking your tips regularly.
Replace them as soon as you notice them looking worn or misshapen. It’s a cheap fix that makes a big difference.
Wire Management
Store your welding wire spools in a dry place. Keep them covered to prevent dust and moisture from getting on the wire. Clean the wire before feeding it into the gun, especially if it’s been sitting for a while.
Check Your Gas System
Periodically inspect your gas cylinder, regulator, and hoses for any signs of damage or leaks. Ensure your regulator is functioning correctly and providing a stable flow rate.
Frequently Asked Questions
Question: Why is my MIG arc sputtering?
Answer: Sputtering is often caused by incorrect voltage or wire feed speed settings. It can also be due to a dirty or worn contact tip, poor gas flow, or contaminated welding wire.
Question: How do I know if my contact tip is bad?
Answer: A bad contact tip will often have an enlarged or misshapen hole. You might also see excessive spatter building up around it, or the arc may appear unstable and weak even with correct settings.
Question: Can too much gas cause a weak arc?
Answer: Yes, excessive gas flow can create turbulence. This turbulence can draw in air, which then interferes with the arc and the weld puddle, leading to an unstable or weak arc and potential weld defects.
Question: My MIG welder is making a grinding noise. What could it be?
Answer: A grinding noise often means the drive rollers are too tight and are deforming the wire, or there is a blockage in the wire liner preventing the wire from feeding smoothly. Check the drive roller tension and inspect the liner.
Question: How often should I clean my MIG gun?
Answer: It’s best to clean your MIG gun, especially the contact tip and nozzle, after every welding session or at least daily if you are welding extensively. Regular cleaning prevents spatter buildup and ensures good electrical contact.
Final Thoughts
Dealing with a weak arc in your MIG welder can be frustrating, but it’s usually a fixable issue. By systematically checking your contact tip, wire feed system, gas supply, and electrical connections, you can identify and resolve the problem. Remember that consistent maintenance, like keeping your contact tips clean and ensuring proper gas flow, is key to maintaining a strong, reliable welding arc.
Don’t let a weak arc slow you down; follow these steps and get back to making great welds.