When you’re just starting out with MIG welding, seeing little holes in your welds can be super frustrating. It’s a common problem, and figuring out What Causes MIG Welding Porosity and How to Fix? can feel tricky at first. But don’t worry!
We’ll break it down simply. We’ll show you easy steps to spot what’s wrong and how to make your welds smooth and strong. Get ready to learn how to get rid of those pesky holes for good.
Key Takeaways
- Porosity happens when gas gets trapped inside your weld metal.
- Dirty metal is a top reason for tiny holes in your welds.
- Wrong gas flow can let air sneak in and cause problems.
- Keeping your welding gun and wire clean makes a big difference.
- Adjusting your welding settings helps create a good, solid weld.
- Using the right wire for the job is important for strong welds.
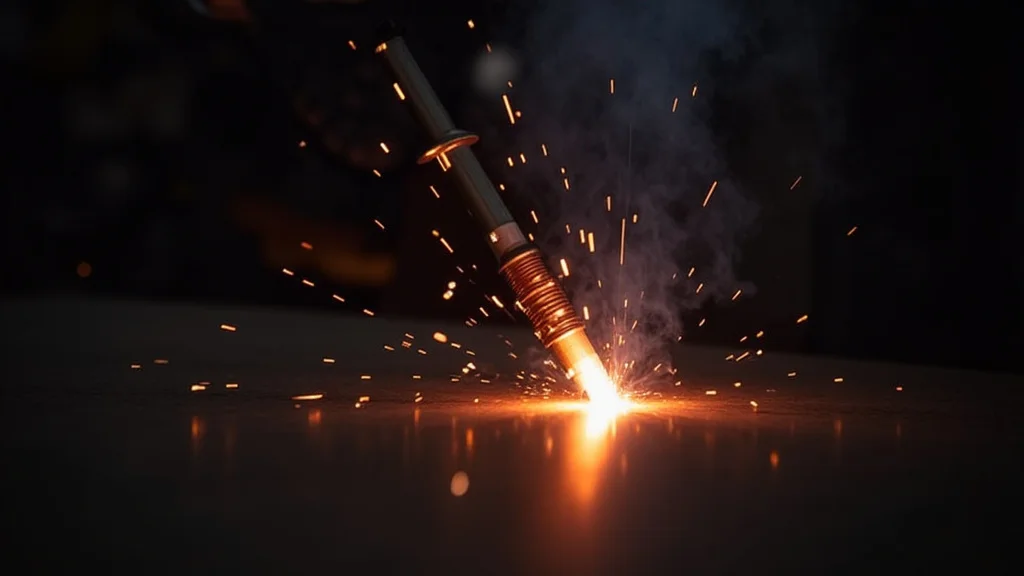
What is MIG Welding Porosity?
Porosity in MIG welding looks like tiny holes or bubbles in your finished weld. These holes are called voids. They happen when gas gets trapped in the molten metal as it cools down.
It’s like baking a cake and having air bubbles that don’t come out – it weakens the cake. In welding, these holes make your weld weaker. This is a big issue because a strong weld is needed for safety and holding things together.
For beginners, seeing porosity can be confusing. You might think you’re doing everything right, but still get these holes. It’s a common hurdle many new welders face.
The good news is, most of the time, porosity is caused by simple things you can easily fix. Once you know what to look for, you can stop it from happening.
Common Causes of MIG Welding Porosity
There are several main reasons why porosity shows up in MIG welds. We’ll go through the most frequent ones so you can spot them and fix them.
1. Contaminated Base Metal
This is a huge cause of porosity. If the metal you are welding on isn’t clean, dirt, oil, grease, rust, or paint can get into the weld pool. When the heat of the arc hits these things, they can release gases.
These gases get trapped in the molten metal, creating those holes.
Think of it this way: if you try to cook food with dirt on it, the dirt will cause problems. It’s the same with welding. The cleaner your base metal, the better your weld will be.
You need a smooth, clean surface for the weld to flow into properly.
2. Dirty or Damaged Welding Wire
Just like the base metal, your welding wire needs to be clean. If the wire is rusty, oily, or has other dirt on it, those contaminants will be carried into the weld pool. The flux coating on some wires can also break down or get damaged, which can lead to porosity.
Wire can get dirty if it sits out in a humid environment or if your hands are oily when you touch it. Damaged wire might have kinks or bends that cause feeding issues, but it can also have its coating damaged.
3. Improper Shielding Gas Flow
MIG welding uses a gas to protect the molten weld pool from the air. The air around us has oxygen and nitrogen. These gases can react with the molten metal and cause defects like porosity.
The shielding gas acts like a shield, pushing the air away.
If the gas flow is too low, the air can sneak in. If the gas flow is too high, it can cause turbulence. This turbulence can actually pull air into the weld pool, causing porosity.
Finding the right gas flow is key. It needs to be enough to shield the weld but not so much that it causes problems.
Factors like drafts or fans near your welding area can also disrupt the shielding gas. This lets the air get to your hot metal.
4. Incorrect Travel Speed and Angle
How fast you move your welding gun and the angle you hold it at matter a lot. If you move too fast, the weld metal might not have enough time to flow and fill in properly, leaving gaps. If you move too slow, you can overheat the metal, which can also cause issues, including drawing in contaminants.
Your travel angle also affects how the shielding gas flows. If your gun is at a bad angle, the gas might not cover the weld pool effectively. You want to push or pull the gun at a consistent angle that allows the gas to do its job.
For most MIG welding, a slight pull (about 10-15 degrees) works well.
5. Incorrect Welding Parameters (Voltage and Amperage)
Voltage and amperage control how much heat goes into your weld. If these are set too high or too low, they can lead to porosity. Too much heat can cause the shielding gas to be blown away too quickly.
Too little heat means the metal might not melt properly, and gases can get trapped.
Each welding wire and base metal combination has a recommended range for voltage and amperage. Sticking to these settings, or fine-tuning them based on what you see, is important for good welds.
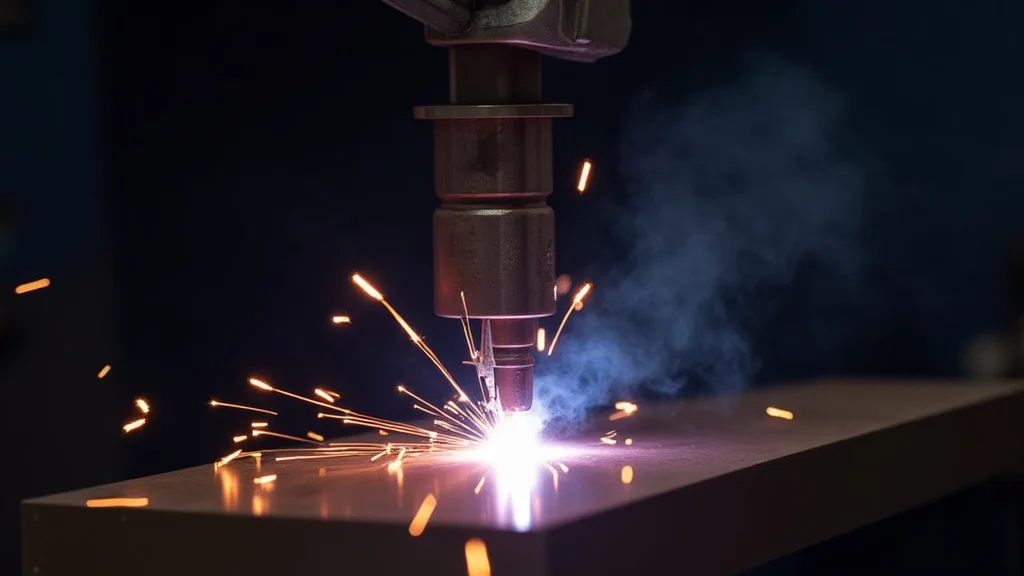
6. Arc Length
The distance between the tip of your welding gun and the base metal is called arc length. If the arc is too long, it can make the weld pool unstable. This instability can pull in air and cause porosity.
A long arc also creates a lot of spatter, which is another sign of problems.
You want a short, consistent arc. This helps keep the shielding gas flowing properly and creates a stable weld pool. It’s often said that the arc length should be about the diameter of the wire you are using.
7. Worn or Damaged Contact Tip
The contact tip is a small part inside your MIG gun that the welding wire passes through. It also carries the electrical current to the wire. If this tip is worn out, dirty, or damaged, it can cause a lot of problems.
A worn tip can cause poor electrical contact, leading to an unstable arc and porosity.
The wire might not feed smoothly, and the arc can become erratic. It’s a cheap part to replace, so if you suspect it’s an issue, swap it out.
8. Wrong Type of Welding Wire
There are many different types of MIG wires, and they are designed for specific metals and welding conditions. Using the wrong type of wire can lead to various weld defects, including porosity. For example, using a solid wire without proper shielding gas will definitely cause porosity.
Solid wires need a shielding gas to prevent porosity. Flux-cored wires have a flux inside that creates its own shielding gas, but they also have specific uses. Always check the recommendations for the wire you are using.
How to Fix MIG Welding Porosity
Now that you know the common causes, let’s look at how to fix them. The solutions are usually straightforward and involve checking and adjusting a few key things.
1. Thoroughly Clean Your Base Metal
Before you start welding, always clean the metal you’re working with. Use a wire brush or grinder to remove any rust, paint, grease, or oil. For really greasy parts, a degreaser can help.
The cleaner the surface, the fewer contaminants will get into your weld.
Make sure to wipe away any dust or debris after cleaning. A clean surface is your first step to a good weld.
2. Keep Your Welding Wire Clean and Well-Maintained
Store your welding wire in a dry place to prevent rust. If you notice rust or dirt on the wire, you can sometimes clean it with a clean cloth or a wire brush designed for welding wire. Check the spool to ensure it’s not damaged and that the wire is feeding smoothly.
If the wire is badly kinked, it might be best to cut that section off and discard it.
3. Adjust Shielding Gas Flow Settings
Check your gas regulator and flowmeter. For most common gases like 75% Argon / 25% CO2, a flow rate of 15-25 cubic feet per hour (CFH) is a good starting point. If you are welding outdoors or in an area with a draft, you may need to increase the flow slightly or use a wind screen to protect the weld.
Listen to the gas flow – it should be a steady stream, not sputtering or roaring. You can also do a quick test: hold your hand near the gun nozzle with the gas on (no arc) and feel for a consistent flow. Ensure there are no leaks in your hose or connections.
4. Maintain Proper Travel Speed and Angle
Practice moving your gun at a steady pace. Start by trying to keep your gun at a consistent distance from the weld puddle. If you notice you’re moving too fast or too slow, adjust your technique.
A good visual cue is to watch the weld puddle and make sure it’s solidifying behind you, but not overheating.
Hold the gun at a slight pull angle (10-15 degrees). This angle helps the shielding gas flow correctly and pushes the weld puddle forward in a controlled way.
5. Set Correct Welding Parameters (Voltage and Amperage)
Refer to the welding machine’s manual or the wire manufacturer’s recommendations for starting settings. These are usually given as a range. Make a test weld on some scrap material.
Look at the weld’s appearance. If it looks rough, has a lot of spatter, or you see porosity, try adjusting your voltage up or down slightly. Small adjustments can make a big difference.
You can also check the penetration of the weld. You want good fusion between the base metal and the weld, but not so much that you burn through.
6. Control Arc Length
Aim for a short, consistent arc. The sound of the arc should be a steady crackle or sizzle, not a loud, aggressive roar or a weak, popping sound. If you see excessive spatter, your arc length might be too long.
Try shortening it by holding the gun closer to the workpiece.
Focus on keeping that distance consistent as you weld. It takes practice, but it’s a vital skill.
7. Inspect and Replace Contact Tips
Regularly check your contact tip for wear or damage. If it looks enlarged, misshapen, or clogged with spatter, it’s time to replace it. A new tip only costs a small amount and can solve many welding problems.
Make sure you use the correct size tip for your welding wire.
Clean the tip with a wire brush or tip cleaner when you get a chance, but replacement is often the best fix for worn tips.
8. Use the Correct Welding Wire
Always confirm you are using the right type of wire for the metal you are welding. If you are welding mild steel, use a mild steel wire. If you are welding stainless steel, use a stainless steel wire.
If you are unsure, check the packaging or consult with your supplier.
Remember that solid wires require a shielding gas, while some flux-cored wires do not. Make sure your setup matches the wire you are using.
Preventative Measures
Beyond fixing issues as they arise, there are proactive steps you can take:
- Pre-weld cleaning: Always clean your metal.
- Wire management: Keep wire spools clean and dry.
- Gun maintenance: Regularly inspect and clean your MIG gun, especially the contact tip and nozzle.
- Environment control: Weld in an area free from drafts if possible.
- Practice: Consistent practice helps develop muscle memory for correct technique.
Frequently Asked Questions
Question: What does porosity look like in a MIG weld?
Answer: Porosity looks like small holes or tiny bubbles within the solidified weld metal. These can be visible on the surface or hidden inside the weld.
Question: Can dirty metal really cause porosity?
Answer: Yes, very often. Dirt, oil, rust, and other contaminants on the metal surface can release gases when heated, which get trapped in the weld.
Question: Is it okay to weld if there’s a slight breeze?
Answer: A slight breeze can disrupt your shielding gas, allowing air to get to the weld. It’s best to weld in a protected area or use a windbreak if possible.
Question: How often should I change my MIG gun’s contact tip?
Answer: You should change your contact tip when it looks worn, enlarged, or clogged with spatter. Regular inspection is key; don’t wait until you have welding problems.
Question: What happens if I use the wrong shielding gas?
Answer: Using the wrong shielding gas can lead to various weld defects, including porosity, poor bead appearance, and reduced strength. Always use the gas recommended for your wire and metal.
Final Thoughts
Dealing with porosity in MIG welding is a common part of learning. You learned that dirty metal, bad gas flow, and incorrect settings are the usual culprits. By keeping your metal clean, checking your gas, and setting your machine right, you can fix most porosity issues.
Always clean your work area and your wire first. Then, make sure your gas is flowing just right. Pay attention to how fast you move and the angle of your gun.
Small tweaks to voltage and wire speed make a big difference. Practice these steps, and you’ll see better, stronger welds.