Getting good welds can be tricky, especially for folks just starting out. One common problem is not getting enough penetration, which means the metal isn’t fused deeply enough. It’s like trying to glue two pieces of wood but only putting a tiny bit of glue on the edges.
This can make your welds weak and unreliable. But don’t worry! Fixing poor penetration in MIG welds is actually quite simple once you know a few key things.
We’ll walk you through it step-by-step so you can get strong, solid welds every time. Get ready to learn what causes this issue and how to easily fix it.
Key Takeaways
- You’ll learn what poor penetration looks like and why it happens.
- We will explain how changing your welding speed affects how deep the weld goes.
- You’ll find out how voltage and amperage play a big role in weld penetration.
- We’ll show you how the type of shielding gas can help or hurt your weld depth.
- You will discover how to choose the right welding wire for better penetration.
- We will guide you on adjusting your torch angle for deeper welds.
Understanding Weld Penetration
What is Weld Penetration?
Weld penetration is how deeply the heat from your welding torch melts and fuses the base metals together. Think of it like digging a trench. A shallow trench isn’t very useful.
A deep trench holds more. In welding, good penetration means the molten metal from your weld goes down into the base material, creating a strong bond.
When you don’t have enough penetration, it’s like only scratching the surface. The weld might look okay on top, but the pieces aren’t really joined well underneath. This is a big deal because it can lead to welds breaking or failing when they are put under stress.
Why is Poor Penetration a Problem?
Poor penetration is a common issue for beginners because it’s not always obvious when it’s happening. The weld bead might look smooth and even, but the real strength is missing. This is dangerous, especially for structural work or anything that needs to be strong and safe.
Imagine building a shelf and not screwing it into the wall deep enough; it won’t hold much weight.
It can also be frustrating because you might follow all the general welding tips, but still end up with weak joints. This is why understanding the specific factors that affect penetration is so important. It’s not about luck; it’s about knowing how to control your welding machine and technique.
Common Causes of Poor Penetration
1. Incorrect Welding Speed
How fast you move your welding torch is very important. If you move too fast, the heat doesn’t have enough time to melt the metal deeply. It’s like trying to melt an ice cube by just blowing on it – it won’t melt very well.
You need to let the heat work.
On the other hand, moving too slowly can cause other problems, like burning through the metal. Finding the right speed is key. For good penetration, you usually want a steady, consistent speed that lets the arc melt into the metal.
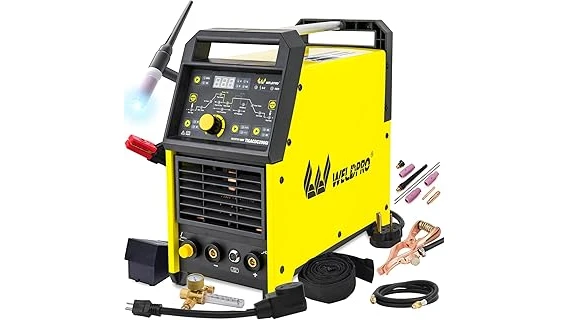
2. Wrong Voltage and Amperage Settings
Voltage and amperage are like the fuel and power for your welding arc. They control how hot your weld gets. If these settings are too low, your arc won’t be hot enough to melt the metal deep down.
Amperage, in particular, is strongly linked to penetration. Higher amperage means more heat and therefore deeper penetration. Voltage affects the arc length and bead width.
Setting these incorrectly is a primary reason for poor penetration.
3. Shielding Gas Issues
Shielding gas protects your molten weld pool from the air. If the gas flow is too low, or if there’s a draft, the air can get in. This can make your weld brittle and reduce how well it melts into the base metal.
It can also lead to other defects.
The type of gas you use also matters. For MIG welding, common gases include pure CO2, argon, and mixtures like 75% argon/25% CO2. Different gases have different heat characteristics and affect penetration differently.
For instance, argon-rich mixes tend to provide a hotter, more penetrating arc compared to pure CO2, especially on thinner materials.
4. Incorrect Wire Stick-Out (CTWD)
CTWD stands for ‘Contact Tip to Work Distance’. This is the length of the welding wire that sticks out from the tip of your MIG gun before it starts to melt. If this distance is too long, the wire can start to melt before it fully enters the weld pool.
This can cool down the arc, reducing penetration.
A shorter stick-out generally leads to a hotter arc and better penetration. However, it’s important not to have it too short, as this can cause the welding nozzle to touch the workpiece or get too close to the arc, leading to contamination and spatter.
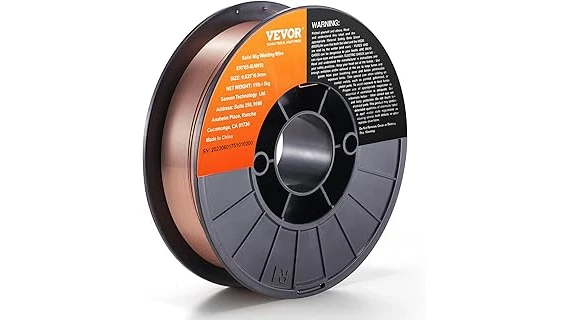
5. Wrong Wire Diameter and Type
The size of your welding wire matters. A smaller diameter wire typically requires less amperage to melt and can be used for thinner materials. A larger diameter wire requires more amperage and can deliver deeper penetration on thicker materials.
The type of wire also plays a role. Solid wires are common for MIG welding. Flux-cored wires, while not strictly MIG, are often used in similar equipment and can provide deeper penetration, especially on dirtier or thicker metals, as the flux adds heat and shielding.
6. Poor Joint Preparation
If the metal you are welding is dirty, rusty, or has paint on it, the weld won’t penetrate well. The contaminants get in the way of the molten metal fusing properly. Clean metal is essential for a strong weld.
This is true for all welding processes, but it’s especially important when you need good penetration.
For thicker materials, sometimes you need to bevel the edges. This creates a V-shape or U-shape groove that allows the welding wire and arc to get deeper into the joint. Without proper beveling, the weld might just sit on the surface.
How to Fix Poor Penetration in MIG Welds
1. Adjust Your Welding Speed
The fix for moving too fast is simple: slow down. Move your torch at a steady, consistent pace. You want the arc to have enough time to melt into the base metal.
Watch the puddle form. If it’s moving away from you too quickly, you’re likely moving too fast.
Experiment with different speeds on scrap pieces of metal. You’re looking for a speed where the molten puddle flows nicely and you can see the arc melting into the joint. A good rule of thumb is to try and keep the puddle size consistent.
2. Increase Voltage and Amperage
To get deeper penetration, you often need more heat. This means increasing your voltage and amperage settings. Most MIG welders have separate controls for these.
Check your machine’s manual or use a welding chart for recommended settings based on the thickness of the metal you’re welding.
Remember, these settings are a starting point. You’ll likely need to fine-tune them. If you increase amperage too much without adjusting other settings, you risk blowing holes through the metal.
Start by increasing them slightly and test on scrap metal.
3. Optimize Shielding Gas Settings
Ensure your shielding gas flow rate is set correctly. For most MIG applications, this is usually between 15-25 cubic feet per hour (CFH). Check your gas cylinder regulator.
Also, make sure there are no drafts or wind that could blow the gas away. Welding indoors or using a windbreak is best.
Consider using a gas mix that promotes deeper penetration. For steel, argon-based mixes (like 75% Argon / 25% CO2) often provide hotter arcs and better penetration than pure CO2, especially on thinner materials. However, pure CO2 can be more economical and offer good penetration on thicker steel.
4. Correct Your Wire Stick-Out (CTWD)
For MIG welding, a common and effective wire stick-out (Contact Tip to Work Distance) is usually between 1/4 inch and 3/8 inch (6-10 mm). Keep this distance consistent throughout your weld. This helps ensure the arc is focused and efficient, leading to better penetration.
If you’re struggling with penetration, try slightly reducing your stick-out. Be careful not to go too short, as this can cause issues with the nozzle. Measure it out on a scrap piece to get it right.
5. Select the Right Welding Wire
Choose a wire diameter that matches the thickness of your material and your machine’s capability. For thinner metals (like 18-gauge to 1/8 inch), a 0.023-inch or 0.030-inch wire is common. For thicker metals (1/4 inch and up), a 0.035-inch or larger wire is usually needed.
If you consistently need deeper welds or are welding on slightly dirtier metal, consider using a flux-cored wire. These wires have a flux coating that provides extra shielding and can produce deeper penetration than solid wires, though they may produce more spatter.
6. Prepare Your Joints Properly
Always clean the metal you are about to weld. Use a wire brush or grinder to remove rust, paint, oil, or any other contaminants. The cleaner the metal, the better the fusion and penetration.
For thicker materials (generally over 1/4 inch), proper joint preparation is crucial. Bevel the edges of the metal to create a groove. This allows the welding arc to reach the root of the joint, ensuring full penetration.
A common bevel is a 30-degree angle, creating a V-groove. Ensure there’s a small root gap (about 1/16 inch) so the weld can fuse the root.
7. Adjust Torch Angle
The angle of your MIG gun can also influence penetration. For most MIG welding, a slight push angle is recommended. This means angling the gun forward slightly in the direction you are welding.
A push angle tends to produce a flatter bead and can help with penetration compared to a drag angle.
Experiment with a slight push angle on scrap metal. You want the arc to be directed into the joint ahead of the molten puddle. This helps the heat melt the base metal effectively before the puddle solidifies.
8. Consider Material Thickness and Type
Different metals and thicknesses require different approaches. Thinner metals are prone to burn-through, so they require lower settings and faster travel speeds. Thicker metals need higher heat input and potentially beveled joints for good penetration.
Always check recommended settings for the specific type and thickness of metal you are welding. Charts and guides are available from welding equipment manufacturers and online resources.
Summary of Fixes
To improve your weld penetration, focus on these key adjustments:
- Travel Speed: Slow down to allow the arc to melt deeper.
- Machine Settings: Increase amperage and voltage.
- Gas Flow: Ensure proper flow rate and consider argon-rich mixes.
- Wire Stick-Out: Keep it consistent and typically between 1/4″ and 3/8″.
- Wire Choice: Use the right diameter and consider flux-cored for tougher jobs.
- Preparation: Clean your metal and bevel thick joints.
- Torch Angle: Try a slight push angle.
Frequently Asked Questions
Question: What does a poorly penetrated MIG weld look like?
Answer: A poorly penetrated weld might look good on the surface, but it won’t have fused deeply into the base metal. The joint will be weak and can easily break apart under stress.
Question: Can I fix poor penetration on a weld I’ve already made?
Answer: It’s difficult to “fix” poor penetration on an existing weld. The best approach is to grind out the bad weld completely and re-weld it properly, ensuring good settings and technique this time.
Question: How do I know if my amperage is too low?
Answer: If your weld beads are very narrow, sitting on top of the metal, and don’t seem to be melting in very deeply, your amperage is likely too low. You might also see a very spiky or rough bead.
Question: Is it possible to have too much penetration?
Answer: Yes, too much penetration can cause burn-through, especially on thinner materials. It can also lead to excessive weld metal buildup or undercut, which weakens the joint.
Question: What is the best shielding gas for deep penetration on steel?
Answer: For steel, argon-rich mixtures like 75% Argon / 25% CO2 or even higher argon percentages tend to provide a hotter arc and deeper penetration than pure CO2. However, pure CO2 can also provide good penetration on thicker materials.
Final Thoughts
Fixing poor penetration in MIG welds comes down to a few key adjustments. You need the right heat, the right speed, and the right preparation. Don’t be afraid to experiment on scrap metal to find what works best for your materials and your machine.
Pay close attention to your settings for amperage and voltage. Make sure your travel speed is consistent and not too fast. Clean your metal thoroughly before welding.
By following these simple steps, you’ll start seeing stronger, deeper welds. You’ve got this!