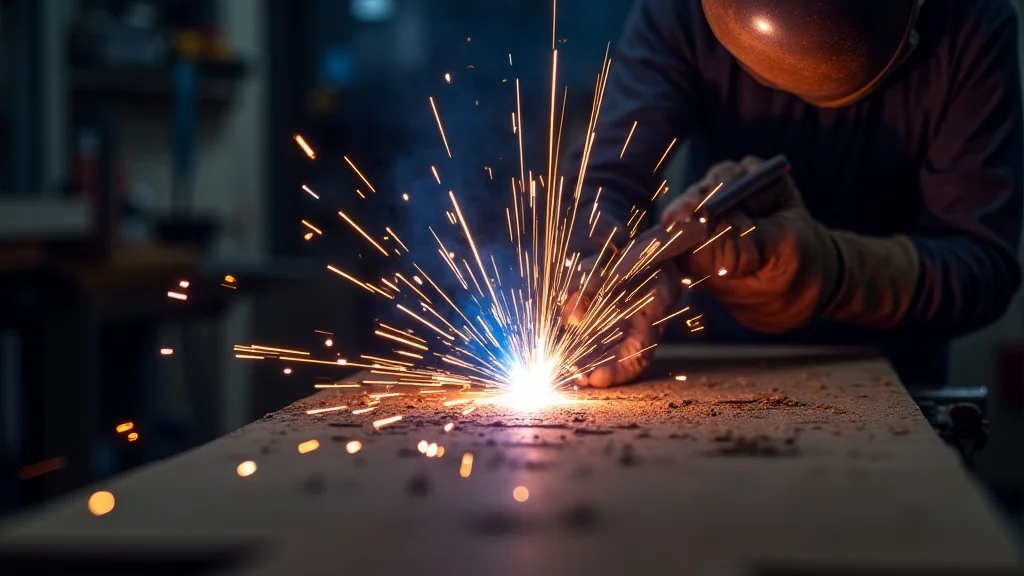
Getting your welding gas regulators set up right can seem a bit tricky when you’re just starting out. It’s super important for good welds, though! Lots of folks wonder if they’re doing it the best way.
Don’t worry, we’ll walk through How to Properly Set Up Welding Gas Regulators in simple steps so you can get to welding with confidence. After this, you’ll know exactly what to do to make sure your gas flows just right for your project.
Key Takeaways
- You will learn the essential parts of a gas regulator.
- We will explain how to connect a regulator to a gas cylinder safely.
- You will discover how to set the correct gas pressure for your welding.
- We will cover how to check for gas leaks.
- You will understand why correct setup improves weld quality and safety.
Understanding Your Welding Gas Regulators
Regulators are key pieces of equipment for any gas welding process, like MIG or TIG. Their main job is to take the high pressure from the gas cylinder and reduce it to a steady, usable pressure for your torch. They also control the flow rate, making sure you get just the right amount of shielding gas.
This gas protects your weld puddle from the air, which can cause problems.
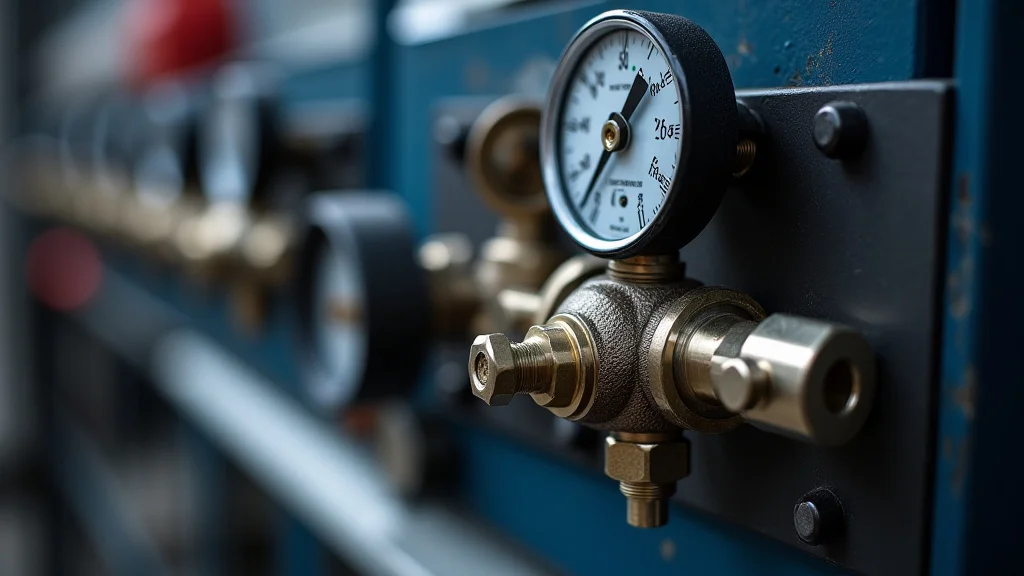
The Different Parts of a Regulator
Most regulators have a few main parts you should know about. They usually have a cylinder connection that screws onto the gas tank valve. There are also pressure gauges.
One gauge shows the pressure left in the tank, and the other shows the working pressure that you’ll be using for welding.
You’ll also find a valve or knob that you use to adjust the output pressure. The hose barb is where you connect your welding hose. Knowing these parts helps you handle the regulator with care and confidence.
Why the Right Pressure Matters
Setting the correct pressure is more than just a technicality; it directly affects your welds. Too little gas and your weld won’t be protected, leading to porosity and weak spots. Too much gas can cause turbulence around the weld puddle.
This turbulence can draw air into the weld. It can also blow away the shielding gas.
The right pressure helps create a stable arc and a clean, strong weld. It also helps you use gas efficiently, saving you money.
Connecting the Regulator to the Gas Cylinder
Safety is the first step when connecting any gas equipment. Make sure you are in a well-ventilated area. Always wear safety glasses.
It’s also a good idea to wear gloves.
Before you connect, check the cylinder valve for any dirt or debris. You can gently “crack” the valve open for a second to blow out any dust. Do this with the regulator completely loose and the valve pointed away from you and others.
Steps for Connecting
First, make sure the regulator’s adjusting screw is all the way out or turned counter-clockwise. This means the output pressure is off. Then, carefully align the regulator’s inlet connection with the cylinder valve.
Screw it on by hand until it’s snug.
Use the correct wrench to tighten the connection. Do not overtighten. Overtightening can damage the valve or the regulator.
Once it’s snug and secure, you’re ready for the next step.
Setting the Correct Gas Pressure
Once the regulator is connected, you can turn on the gas. Slowly open the cylinder valve. You should see the high-pressure gauge start to move.
Check the tank pressure to see how much gas you have left.
Now, turn the adjusting screw on the regulator clockwise. Do this slowly. You will see the low-pressure gauge start to show a reading.
This is your working pressure. You need to set this to the recommended level for your specific welding process and materials.
Finding Recommended Pressures
The ideal pressure depends on several things. These include the type of welding (MIG or TIG), the size of your nozzle, and the type of metal you are welding. Your welding machine’s manual is the best place to find these recommendations.
You can also find charts and guides online or from your welding gas supplier.
For example, steel MIG welding might use 15-25 cubic feet per hour (CFH) of Argon/CO2 mix. TIG welding with pure Argon might use 10-20 CFH.
Adjusting Flow Rate
The regulator sets the pressure. The flow rate tells you how much gas is actually passing through. For MIG welding, you often set the regulator to a specific pressure, and the flow is measured in CFH.
For TIG welding, you might use a flowmeter, which is a type of regulator that directly shows the flow in CFH.
Always start with the recommended flow rate and adjust based on your welding results. You might need to fine-tune it during your weld.
Checking for Leaks
This is a crucial safety step. Even a small leak can waste gas and create a dangerous situation. You can check for leaks using soapy water.
Mix some dish soap with water in a spray bottle.
With the cylinder valve open and the regulator set, spray the soapy water on all the connections. Look for any bubbles forming. If you see bubbles, you have a leak.
What to Do About Leaks
If you find a leak, close the cylinder valve immediately. Then, open the regulator’s adjusting screw to relieve pressure. Check the connections again to make sure everything is tight.
If the leak persists, there might be a damaged part. You may need to replace the fitting, hose, or regulator.
Never try to weld if you suspect a gas leak. Always ensure your equipment is leak-free before you start.
Why Proper Setup Boosts Your Welds
Setting up your regulators correctly means you’re giving your weld the best chance to succeed. A consistent flow of shielding gas protects the molten metal from the air. This prevents contamination and leads to stronger, cleaner welds with fewer defects like porosity or inclusions.
It also makes your welding experience smoother. You won’t have to stop and adjust things as often. This means you can focus on making good passes.
Efficiency and Cost Savings
When your gas flow is set correctly, you aren’t wasting gas. This means your gas cylinders will last longer. This can save you a good amount of money over time, especially if you weld often.
Proper setup ensures you get the most out of your welding supplies.
Frequently Asked Questions
Question: What is the main purpose of a welding gas regulator?
Answer: A welding gas regulator reduces the high pressure from a gas cylinder to a safe, usable working pressure for your welding torch and controls the gas flow rate.
Question: How do I know what pressure to set my regulator to?
Answer: Check your welding machine’s manual or consult welding charts for the recommended pressure and flow rate based on your welding process, materials, and nozzle size.
Question: Can I use the same regulator for different gases like Argon and CO2?
Answer: While some regulators can be used with different gases, it’s best to use regulators specifically designed for the gas you are using. Some gases require specific regulator materials or pressure ranges. Always check the regulator’s specifications.
Question: What should I do if the high-pressure gauge on my regulator is stuck at zero?
Answer: If the high-pressure gauge reads zero, it likely means the cylinder valve is not open or the regulator is not properly connected to the cylinder. Ensure the cylinder valve is fully open and the regulator is securely attached.
Question: How often should I check my regulators for leaks?
Answer: It’s a good practice to check for leaks every time you set up your welding equipment or before each welding session, especially after changing a gas cylinder or if you suspect a problem.
Final Thoughts
Setting up your welding gas regulators properly is a fundamental skill for great welds. By connecting the regulator correctly and setting the right pressure and flow, you ensure your weld puddle gets the shielding it needs. This prevents flaws and makes your welds strong.
Always check for leaks to keep yourself and your work safe. With these steps, you’ll be well on your way to welding with confidence and achieving professional results every time.