
If you’re new to MIG welding, you might be wondering about What Causes Low Weld Penetration in MIG Welding?. It’s a common puzzle for beginners. You might see your welds looking weak or not biting deep enough into the metal.
Don’t worry, it’s a fixable issue. We’ll break down why this happens and show you simple steps to get stronger welds. Let’s look at what can go wrong and how to make it right.
Key Takeaways
- You’ll learn the main reasons why MIG welds don’t go deep enough.
- Discover how voltage and wire speed work together for good penetration.
- Understand the importance of shielding gas and its impact on weld quality.
- Find out how to choose the right welding technique for better results.
- Learn about common mistakes that lead to shallow welds and how to avoid them.
- Get practical tips to improve your weld penetration and build stronger joints.
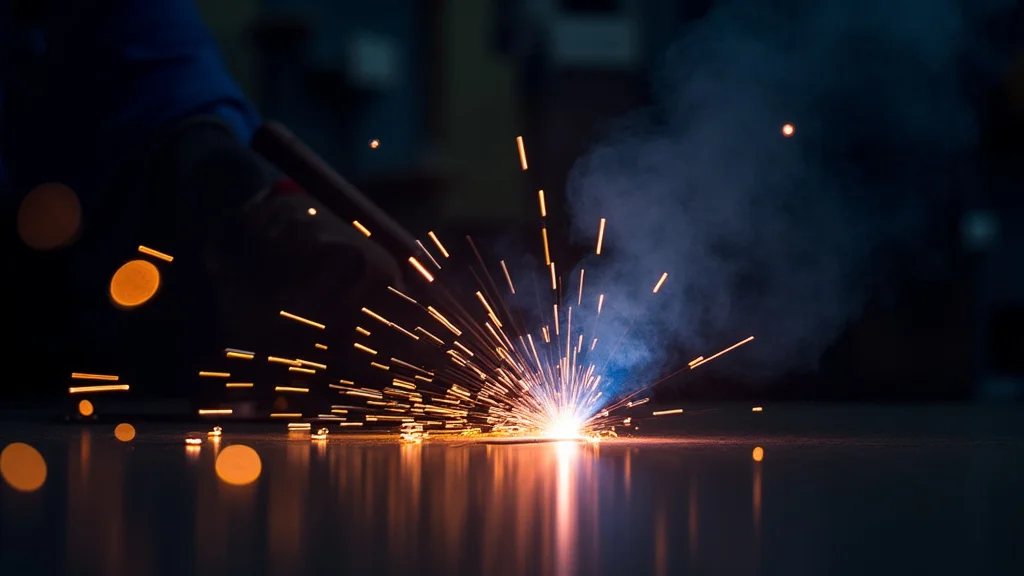
Understanding Weld Penetration
Weld penetration is how deep the melted metal from your weld goes into the base materials you’re joining. When you’re MIG welding, you want this depth to be just right. Too shallow, and your joint won’t be strong.
Too deep, and you might burn through the metal. For most projects, a good, consistent penetration is what you’re aiming for. This depth makes sure your weld can hold weight and stress.
Low weld penetration means the melted metal from your welding wire doesn’t fuse deeply with the pieces of metal you’re joining. This can lead to a weld that looks okay on the surface but is actually weak. It’s like gluing two pieces of wood together with just a tiny bit of glue on the edges; it might stick, but it won’t hold if you pull on it.
Many beginners run into this problem. It’s easy to get the settings slightly off, or to use the wrong technique. The good news is that once you know what to look for, it’s quite simple to fix.
We’ll go through the most common reasons and what you can do about them.
What Causes Low Weld Penetration in MIG Welding?
Several factors can cause low weld penetration. They often work together, so it’s important to look at them as a system. We’ll break down each one so you can identify what might be happening with your welds.
Incorrect Voltage Settings
Voltage is a big player in how hot your arc is. In MIG welding, voltage controls the arc length and the “shape” of your weld puddle. If your voltage is too low, the arc won’t be hot enough to melt the base metal deeply.
This results in a narrow, tall bead that sits on top of the metal rather than sinking in.
Think of it like trying to melt ice with a low-heat lamp. It might soften the surface a little, but it won’t truly melt deep into the ice. Similarly, a low voltage creates a weak arc that doesn’t have the power to create deep fusion.
When the voltage is too high, the arc becomes very wide and splattery, and the weld metal can be pushed away, also leading to poor penetration. However, low voltage is a more common culprit for low penetration. You need that sweet spot where the arc is hot and stable enough to melt into the base metal.
Improper Wire Speed
The wire speed on your MIG welder controls how much welding wire is fed into the arc. This wire is your filler material, and it also helps form the arc. If the wire speed is set too low for the given voltage, you won’t have enough molten metal being added to the joint, and the arc might not be as energetic.
This can lead to a shallow weld.
Conversely, if the wire speed is too high for the voltage, you’ll get a lot of wire feeding into the puddle. The arc struggles to melt all that wire and also melt into the base metal. This can also result in a weaker, less penetrating weld, often characterized by a wide, flat bead.
The key here is the relationship between voltage and wire speed. They need to be balanced. Manufacturers often provide charts or suggested settings for different metal thicknesses.
These charts are a great starting point to find the right balance for your machine and material.
Wrong Gas Flow Rate
Shielding gas is vital in MIG welding. Its job is to protect the molten weld pool from the air, which contains oxygen and nitrogen. If these elements get into the weld, they can cause porosity (small holes) and other defects that weaken the joint.
They can also affect the arc’s stability.
If your gas flow rate is too low, the shielding gas won’t effectively protect the weld puddle. This can lead to a weaker arc and less efficient heat transfer into the base metal, thus reducing penetration. You might see a “lazy” arc or a weld that looks oxidized.
If the gas flow rate is too high, it can create turbulence in the weld puddle. This turbulence can actually blow the shielding gas away, leading to the same problem of contamination and poor fusion. It can also cause a “whistling” sound from the torch.
Different shielding gases also affect penetration. For example, a 100% CO2 gas typically produces a deeper penetration than an Argon-rich mix like 75% Argon / 25% CO2, though it creates a less stable arc and more spatter. The type of gas matters for the weld characteristics.
Incorrect Torch Angle and Travel Speed
How you hold your torch and how fast you move it are just as important as the machine settings. If you hold the torch at an extreme angle or move too quickly, you won’t give the heat enough time to properly melt into the base metal.
Torch Angle
For MIG welding, you generally want to keep your torch at a slight push angle, usually around 10-15 degrees. This means you’re pushing the torch forward in the direction of travel. A push angle helps the shielding gas flow correctly and gives you better visibility of the weld puddle.
If you’re dragging the torch (pulling it), it can sometimes reduce penetration and create a different bead profile.
An angle that’s too steep, either pushing or dragging, can disrupt the arc and the shielding gas. This leads to inconsistent heat input and shallow welds. A straight-up and down angle (90 degrees) is usually not ideal for MIG.
Travel Speed
Travel speed refers to how fast you move the welding torch along the joint. If you move too fast, the arc and molten metal don’t have enough time to melt the base material deeply. The weld bead will be narrow and sit on the surface.
If you move too slowly, you risk overheating the base metal. This can lead to excessive melting, burn-through, or a wide, flat bead that might not have good structural integrity, even if it looks like it has depth. Finding that middle ground is key for consistent penetration.
Wrong Wire Type or Diameter
The welding wire you use needs to be appropriate for the type and thickness of the metal you’re welding. Different wires have different melting points and electrical properties, which affect how they perform in the arc.
Using a wire that’s too thick for the metal you’re welding can make it harder for the arc to penetrate deeply. The arc might struggle to melt the larger wire and also melt into the base metal effectively. A common example is trying to use a .045-inch wire on very thin sheet metal where a .030-inch wire would be more suitable.
Similarly, using the wrong wire formulation can impact penetration. For instance, some wires are designed for specific alloys or for better aesthetics, which might come at the cost of maximum penetration.
Metal Thickness and Preparation
The thickness of the metal you’re welding is a primary factor in how much penetration you’ll achieve. You can’t get deep penetration on very thin metal without burning through. Likewise, if you’re trying to join two thick pieces of metal and your settings are too low, you won’t get sufficient fusion.
Beveled joints are often used when welding thicker materials. Beveling means grinding away an angle on the edges of the metal before welding. This creates a V-groove that allows the welding torch to get closer to the base of the joint, enabling deeper penetration and a stronger weld.
If you’re welding thick material without beveling, you’re unlikely to achieve full penetration in the first pass.
Cleanliness of the metal is also crucial. Rust, paint, oil, or dirt on the surface can interfere with the arc and prevent proper fusion. This contamination can act as an insulator, reducing heat transfer and thus penetration.
Always ensure your welding surfaces are clean and free of debris.
Using the Wrong Welding Machine or Settings for the Job
Not all MIG welders are created equal. Some are designed for light-duty home use, while others are heavy-duty machines for industrial applications. A welder that doesn’t have enough power (amperage) for the job will struggle to provide adequate heat for deep penetration, especially on thicker metals.
Furthermore, if your machine has advanced settings like inductance control, using it incorrectly can affect penetration. Inductance controls how quickly the wire melts and can influence the arc characteristics. While a topic for more advanced users, improper inductance can indirectly lead to penetration issues.
Duty Cycle Limitations
This is less about penetration itself and more about being able to achieve it consistently. Most smaller MIG welders have a duty cycle. This means they can only weld for a certain percentage of time within a 10-minute period before they need to cool down.
If you’re trying to weld a long seam or multiple passes on thick material, and your welder overheats, its output can drop. This reduced output can lead to lower heat input and consequently, less penetration on subsequent welds.
Troubleshooting Low Weld Penetration: A Step-by-Step Approach
When you notice your MIG welds aren’t penetrating well, it’s time to troubleshoot. Here’s a practical way to figure out what’s wrong and fix it.
Step 1: Check Your Machine Settings
This is the most common place to find the problem. Start with the basics.
- Increase Voltage Slightly: If your weld bead is narrow and tall, try increasing the voltage by about 1 volt. Observe the arc; it should become smoother and the puddle wider.
- Adjust Wire Speed: If increasing voltage doesn’t help enough, or if you have too much spatter, try adjusting the wire speed. Often, you want a slightly higher wire speed to match the increased voltage. Aim for a smooth, consistent arc sound.
- Test on Scrap Metal: Always test your settings on a piece of scrap metal that’s the same thickness as your project. Make a few practice beads.
Step 2: Evaluate Your Gas and Torch Technique
Machine settings are only part of the story. How you use the torch matters a lot.
- Check Gas Flow: Make sure your shielding gas is flowing. A simple flow meter on your regulator is essential. A good starting point is often 20-25 cubic feet per hour (CFH). Listen for a consistent hissing sound.
- Correct Torch Angle: Aim for a slight push angle (10-15 degrees) in the direction of your weld. Keep the torch steady.
- Maintain Consistent Travel Speed: Move the torch at a steady pace. If the weld bead is too narrow, you’re moving too fast. If it’s too wide and flat, you might be moving too slow.
Step 3: Inspect Your Materials and Wire
Don’t overlook the consumables and the material itself.
- Clean the Metal: Thoroughly clean the metal surface where you’re welding. Remove rust, paint, oil, and any other contaminants. A wire brush or grinder works well.
- Verify Wire Compatibility: Ensure you’re using the correct diameter and type of welding wire for your metal thickness and material.
- Check Wire Feed Path: Make sure the wire is feeding smoothly through the liner and the drive rolls. Any kinks or obstructions can cause inconsistent wire feed, affecting the arc and penetration.
Step 4: Consider Material Thickness and Preparation
Sometimes, the issue isn’t with your technique but with the material itself.
- Match Settings to Thickness: Ensure your settings are appropriate for the thickness of the metal. Thicker metal requires more heat.
- Bevel Thick Material: If you’re welding material that’s 1/4 inch thick or more, consider beveling the edges to allow for deeper weld penetration.
Frequently Asked Questions
Question: What is the most common mistake beginners make that causes low weld penetration?
Answer: The most common mistake is having the voltage set too low for the wire speed. This creates a weak arc that doesn’t melt deep enough into the base metal.
Question: Can traveling too fast with the MIG gun cause shallow welds?
Answer: Yes, traveling too fast means the arc and molten metal don’t have enough time to melt into the base material, resulting in a shallow weld bead.
Question: How does shielding gas affect weld penetration?
Answer: Proper shielding gas protects the weld pool from contamination, allowing for a more stable and hotter arc, which leads to deeper penetration. Too little or too much gas can disrupt this.
Question: Should I always use the same settings for all metal thicknesses?
Answer: No, you must adjust your settings (voltage and wire speed) based on the thickness of the metal you are welding. Thicker metal requires more heat.
Question: Is it possible to get too much penetration with MIG welding?
Answer: Yes, it is possible to get too much penetration, often called burn-through, especially on thin metals or if the voltage and wire speed are too high for the material thickness.
Final Thoughts
When you’re trying to achieve good weld penetration in MIG welding, remember that it’s a balance. It’s not just one thing, but how voltage, wire speed, gas, and your technique all work together. By checking your settings and making small adjustments, you can get those strong, deep welds.
Keep practicing and observing your welds. You’ll soon get a feel for what a good, penetrating weld looks and sounds like, building confidence with every joint.