It’s a common question for anyone starting out with a MIG welder: “Why Is My MIG Weld Not Penetrating Properly?” You might be seeing welds that sit on top of the metal instead of biting in nicely. This can be frustrating, but it’s a solvable problem! This guide will walk you through the simple fixes.
We’ll look at the most likely reasons and how to fix them so you can get strong, reliable welds every time.
Key Takeaways
- You’ll learn the main reasons why MIG welds don’t penetrate enough.
- We’ll explain how voltage and wire speed work together.
- You will discover the importance of cleaning your metal before welding.
- We’ll cover how gun angle affects your weld penetration.
- You’ll find out why travel speed matters for good welds.
- Learn how to check and fix your MIG gun setup.
Understanding MIG Weld Penetration
What is Weld Penetration?
Weld penetration is how deep the molten metal from your weld goes into the base metal. When you’re MIG welding, you want the weld to fuse the two pieces of metal together fully. A good weld penetrates deep enough to create a strong bond.
If your weld is only sitting on the surface, it’s like gluing two pieces of paper together instead of welding them. This weak bond can easily break apart.
Why is Good Penetration Important?
Good penetration is key to strong welds. For structural projects, weak welds can fail and cause accidents. Even for simple repairs, you want the fix to last.
When you achieve proper penetration, you know the metals are truly joined. It’s the sign of a good, solid weld that can handle stress and time.
Common Reasons for Poor MIG Weld Penetration
1. Incorrect Voltage and Wire Speed Settings
This is probably the most frequent issue for beginners. MIG welding uses voltage and wire speed together to create the right heat and metal transfer. Think of voltage as controlling the arc’s length and heat.
A lower voltage makes a shorter, hotter arc. Wire speed controls how much filler metal you feed into the weld. You need the right balance.
If your wire speed is too high for the voltage, you’re feeding too much metal too fast. This can cool the weld puddle down and prevent it from sinking in. If the voltage is too high for the wire speed, the arc can be too wide and lazy, not focusing enough heat to penetrate.
The Voltage/Wire Speed Relationship
Most MIG welders have charts or guidelines that suggest starting points for different metal thicknesses. These charts are your friends! They give you a good range to start from.
- Too low voltage and wire speed: Weak penetration, often looks like bird droppings on the surface.
- Too high wire speed for voltage: Spattery arc, poor fusion, weld sits on top.
- Too high voltage for wire speed: Arc too wide, not focused, may not melt metal deeply enough.
You need to find the “sweet spot” where the arc is stable, the weld puddle flows smoothly, and the metal melts together well. Small adjustments can make a big difference.
2. Dirty or Contaminated Metal
Metal that isn’t clean will prevent good fusion. Rust, paint, oil, grease, and even dirt can get in the way. When you try to weld over these contaminants, they burn up.
This burning creates gases that get trapped in the weld. It also stops the molten metal from properly bonding with the base metal.
Imagine trying to glue two pieces of paper that are covered in grease. The glue won’t stick well. Welding is similar.
The heat from the arc needs a clean surface to work on. Contaminants can create porosity (holes) in your weld, which also weakens it and hinders penetration.
Cleaning is Crucial
Always clean the metal you are about to weld. Use a wire brush to remove rust and heavy debris. For oil and grease, use a degreaser or acetone.
A clean metal surface allows the weld to melt and flow into the base metal without anything getting in the way.
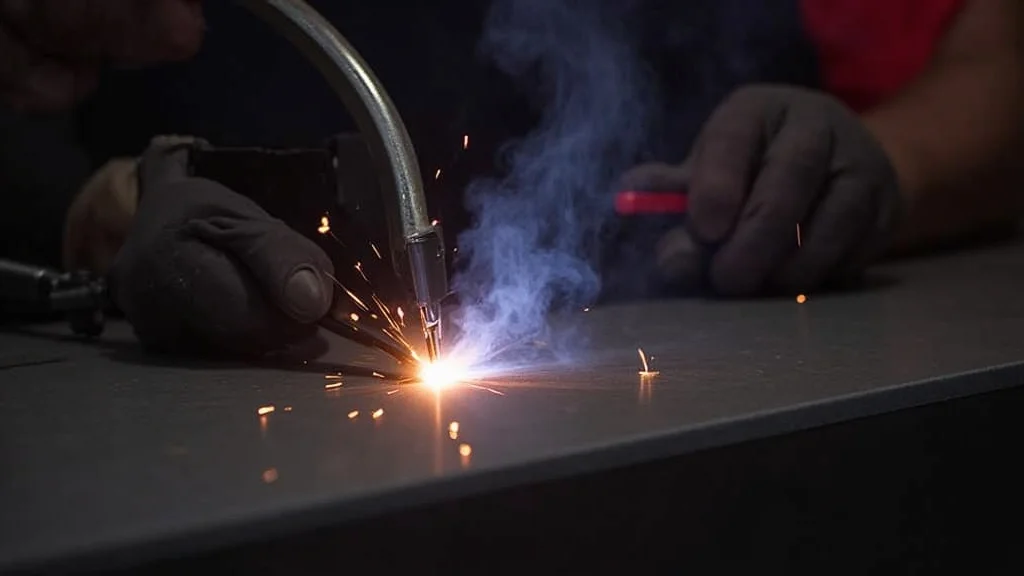
3. Incorrect Gun Angle
The angle of your MIG gun plays a big role in how the weld metal is laid down. If you push or pull the gun at the wrong angle, you can affect heat buildup and how the molten metal flows.
For most MIG welding, you want to use a slight drag angle. This means pulling the gun rather than pushing it. A slight drag angle (around 5-15 degrees) helps to direct the heat and molten metal into the joint.
It allows the leading edge of the weld puddle to melt the base metal before the filler wire is deposited.
Push vs. Drag
Pushing the gun: This can lead to a wider, flatter bead with less penetration. It tends to produce more spatter and can leave the weld sitting on the surface.
Dragging the gun: This angle directs the heat more effectively into the base metal, resulting in deeper penetration and a more convex bead. It also creates less spatter.
Experiment with a slight drag angle to see how it improves your penetration.
4. Travel Speed
How fast or slow you move the MIG gun is called travel speed. Moving too fast means the arc doesn’t have enough time to melt the base metal properly, leading to shallow welds. Moving too slowly can overheat the metal, causing the weld to become too wide and flat, and sometimes you can even burn through.
Finding the right travel speed is about keeping a consistent pace. You want to see the weld puddle flowing smoothly. The puddle should be about the same width as the wire you’re feeding.
If the puddle is very narrow and seems to be just sitting there, you’re likely moving too fast. If the puddle is huge and spreading out everywhere, you might be moving too slowly or have your settings too high.
Consistency is Key
Try to maintain a steady speed. Keep your eye on the weld puddle. It should look like a small, molten pool that you are guiding.
A consistent travel speed ensures consistent heat input and thus, consistent penetration.
5. Incorrect Wire Stick-Out
The amount of wire that sticks out of the MIG gun nozzle is called wire stick-out. This distance affects the heat of the wire as it enters the weld puddle. A longer stick-out means the wire has to travel further through the arc, heating up more.
This can lead to a wider arc and less focused heat, reducing penetration.
For most MIG welding applications, a stick-out of around 1/4 inch to 1/2 inch (about 6-13 mm) is ideal. This provides enough wire for good filler metal deposit while keeping the arc focused on the base metal for good penetration.
Checking Your Stick-Out
Before you start welding, check how much wire is showing. Make sure it’s consistent. If you’re using a new tip, it might stick out a bit more.
If the tip is worn, it might be shorter. Maintaining a consistent stick-out is part of good welding habits.
6. Using the Wrong Type of Wire
There are different types of MIG wire, and they are designed for specific uses and shielding gases. Using the wrong wire can lead to all sorts of problems, including poor penetration.
For example, solid wire needs a shielding gas to protect the arc. If you try to use solid wire without gas (often called “flux-cored” operation without the flux-core), you’ll get a weak, spattery weld with very poor penetration. If you are using flux-cored wire, it often doesn’t require external shielding gas, but using it with gas can also cause issues.
Matching Wire to Gas
Always check the manufacturer’s recommendations for your wire. Solid steel wire typically uses a mix of Argon and CO2 (like 75% Argon / 25% CO2). Flux-cored wire may run on pure CO2 or specific gas mixes, or sometimes no gas at all.
7. Issues with the MIG Gun and Liner
Sometimes, the problem isn’t with your settings or technique, but with your equipment. A worn MIG gun liner or a dirty contact tip can cause issues that affect wire feeding and arc stability.
A kinked or worn liner inside the MIG gun can cause the wire to snag or feed unevenly. This leads to an unstable arc, inconsistent heat, and poor penetration. A dirty or worn contact tip can restrict wire flow or cause the arc to wander, preventing proper fusion.
Maintenance Matters
Regularly check your MIG gun. Clean or replace the contact tip if it looks worn or blocked. Ensure the liner is not kinked and is the correct size for your wire.
A smooth, consistent wire feed is vital for good MIG welding.
8. Metal Thickness and Welder Capability
Your MIG welder has a limit to how much power it can produce. If you’re trying to weld very thick metal with a small, entry-level MIG welder, it might not have enough power to achieve deep penetration. Similarly, trying to weld very thin metal with settings meant for thick material can cause burn-through, but the root cause of lack of penetration is more about insufficient heat input for the material’s mass.
Always consider the thickness of the metal you are welding. The welder’s manual often provides guidance on the recommended metal thickness for its various settings. If you’re consistently struggling with penetration on thicker materials, you might need a more powerful machine.
9. Incorrect Shielding Gas Flow Rate
Shielding gas is essential for most MIG welding processes. It protects the molten weld puddle from the air. If the gas flow rate is too low, the gas shield will be weak, and contaminants from the air (like oxygen and nitrogen) will get into the weld.
This can lead to porosity and poor fusion, hindering penetration.
If the gas flow rate is too high, it can cause turbulence. This turbulence can actually suck air into the weld puddle, also leading to contamination and poor quality welds. You need just enough gas to create a stable shield.
Finding the Right Flow
A good starting point for gas flow is usually around 15-25 cubic feet per hour (CFH) for common Argon/CO2 mixes, but this can vary. Listen to the gas flow when you pull the trigger. It should sound like a gentle hiss, not a strong gust of wind.
Putting it All Together: Step-by-Step Fixes
Let’s break down how to fix common penetration problems.
Step 1: Check Your Settings
Start with the manufacturer’s recommended settings for the metal thickness you are welding. If you don’t have a chart, look online for welding parameters based on your welder model and wire type.
- Increase wire speed slightly.
- Adjust voltage up in small increments.
Remember, wire speed and voltage work together. Often, you’ll increase both as metal thickness increases. Make small changes and test on scrap metal.
Step 2: Clean Your Metal
Scrape off any rust, paint, or coatings. Wipe down the area with a degreaser or acetone to remove oil and grease. A clean surface is vital for good fusion.
Step 3: Adjust Your Gun Angle
Try a slight drag angle, about 5-15 degrees. Pull the gun towards you. This usually gives better penetration than pushing.
Step 4: Control Your Travel Speed
Move the gun at a steady pace. Watch the weld puddle. It should be roughly twice as wide as your wire.
Don’t move too fast.
Step 5: Verify Wire Stick-Out
Ensure your wire stick-out is between 1/4 and 1/2 inch. If it’s too long, trim it. If it’s too short, check your contact tip.
Step 6: Confirm Wire and Gas Match
Make sure the wire you are using is designed for the shielding gas you are using. Check the labels on your wire spool and gas cylinder.
Step 7: Inspect Your MIG Gun
Check the contact tip for wear or blockage. Ensure the liner is straight and the correct size for your wire. If you suspect a problem, replace the tip and check the liner.
Step 8: Consider the Metal Thickness
If you’re welding thick material, ensure your welder has enough power. You might need to increase settings significantly or consider a different welding process if your machine can’t handle it.
Step 9: Set Your Gas Flow Correctly
Adjust your gas flow rate to a gentle hiss. Too much or too little gas will hurt your weld quality.
Troubleshooting Table
| Problem | Likely Cause | Solution |
|---|---|---|
| Weld sits on top, no bite | Low voltage/wire speed, dirty metal, too fast travel | Increase settings, clean metal, slow down |
| Spattery arc, poor fusion | Wire speed too high for voltage, wrong gas, dirty metal | Lower wire speed or increase voltage, check gas, clean metal |
| Weak, porous weld | Poor shielding gas coverage, dirty metal | Check gas flow rate, clean metal thoroughly |
| Inconsistent bead | Uneven travel speed, wire feeding issues | Maintain steady speed, check liner and tip |
Frequently Asked Questions
Question: What is the most common mistake beginners make with MIG penetration?
Answer: The most common mistake is having incorrect voltage and wire speed settings. They often don’t know how these two settings work together to create the right amount of heat.
Question: Can I fix poor penetration by just turning up the wire speed?
Answer: Not usually. While wire speed is important, it needs to be balanced with the voltage. Just turning up wire speed without adjusting voltage can make penetration worse and cause spatter.
Question: How much voltage should I use for welding 1/8 inch steel?
Answer: For 1/8 inch (3mm) steel with solid wire and a 75/25 gas mix, you might start around 17-19 volts. Always check your welder’s guide for specific recommendations.
Question: Is it okay to weld over rust or paint if I want deeper penetration?
Answer: No, it’s never okay. Rust, paint, and other contaminants will prevent good fusion and result in weak welds with poor penetration.
Question: My welds look good on the outside, but they break easily. What’s wrong?
Answer: This usually means you have good surface appearance but very poor penetration. The metal isn’t truly fused. Check your settings, metal cleanliness, and gun angle.
Final Thoughts
Getting good penetration with your MIG welder is all about finding the right balance. You need enough heat from your settings, clean metal to work with, and a steady hand. Adjusting your voltage and wire speed, keeping your metal clean, and using the correct gun angle are your most powerful tools.
Don’t be afraid to test on scrap pieces. Small tweaks can make a huge difference. You’ve got this!