Getting your TIG welder set just right can feel tricky at first. Lots of beginners wonder about How to Properly Adjust TIG Welder Amperage because it makes a big difference in your welds. Don’t worry, it’s simpler than it sounds.
We’ll walk through it step by step. Let’s see how to get your settings perfect for great welds.
Key Takeaways
- Amperage controls how hot your weld is.
- Thicker metal needs more amps than thin metal.
- Material type affects the best amperage setting.
- Tungsten size and type influence amperage limits.
- Shielding gas type can subtly affect settings.
- Practice is key to finding the sweet spot.
Understanding TIG Welder Amperage
Amperage is like the heat control for your TIG welder. Think of it as how much electricity is flowing to your tungsten. More amps mean more heat, which melts the metal faster.
Less amps mean less heat, so the metal melts slower.
This heat is what lets you join two pieces of metal together. If you have too much heat, you can burn through your metal, especially if it’s thin. If you don’t have enough heat, your weld won’t penetrate properly, and it won’t be strong.
Finding the right amount is super important for making good welds.
Why Amperage Matters So Much
The reason How to Properly Adjust TIG Welder Amperage is so talked about is that it’s the main factor in getting a strong, clean weld. It’s not just about making a pretty bead; it’s about making sure the metal is melted together properly and securely.
Each welding job is a little different. Different metals, different thicknesses, and even different welding positions can all need slightly different amperage settings. Getting this right means your weld will be reliable and hold up the way you need it to.
Factors That Affect Amperage Settings
Several things play a role when you’re deciding how much amperage to use. Thinking about these will help you pick the right number for your project.
Metal Thickness
This is one of the biggest influences. Thicker metal needs more heat to melt and create a good bond. Thin metal, on the other hand, can melt through very easily if you use too much amperage.
A good rule of thumb is to increase your amperage as the metal gets thicker. For very thin sheet metal, you might be at the lower end of your welder’s range. For thick steel plate, you’ll be using much higher amperage.
Type of Metal
Different metals conduct heat differently and have different melting points. This means they’ll react to amperage in unique ways.
- Steel: Steel is pretty forgiving and a common metal to start with.
- Stainless Steel: This metal doesn’t conduct heat as well as regular steel. It can build up heat quickly and warp or burn. You might need slightly lower amperage or adjust your travel speed.
- Aluminum: Aluminum conducts heat very well and also oxidizes quickly. You’ll typically need higher amperage for aluminum compared to steel of the same thickness. AC (alternating current) is also usually required for aluminum TIG welding.
- Other Metals: Metals like titanium or exotic alloys have their own specific needs. It’s always best to check recommended settings for less common materials.
Tungsten Electrode Size and Type
The tungsten electrode is what carries the electricity from your torch to the metal. Its size and type have a direct impact on how much amperage your TIG torch can handle effectively.
Tungsten Size:
- Smaller diameter tungstens (e.g., 0.040 inches or 1.0 mm) are good for lower amperage applications, typically under 75 amps.
- Medium tungstens (e.g., 1/16 inches or 1.6 mm) are versatile and work well for a wide range of amperages.
- Larger diameter tungstens (e.g., 3/32 inches or 2.4 mm) can handle higher amperages, often over 150 amps.
Using a tungsten that’s too small for the amperage you need can cause it to overheat, break, or contaminate your weld. Conversely, a tungsten that’s too large for low amperage might make it harder to get a focused arc.
Tungsten Type:
Different electrode types are designed for different welding processes and currents. The most common are:
| Tungsten Type | Color Code | Best For |
|---|---|---|
| Pure (Zirconiated) | Green | AC welding (aluminum, magnesium) |
| 2% Ceriated | Orange | DC welding (steel, stainless steel, copper) |
| 2% Lanthanated | Blue | AC and DC welding, good all-around performer |
| 2% Thoriated | Red | DC welding, durable, but thorium is radioactive |
Choosing the right tungsten type and size ensures a stable arc and prevents contamination.
Shielding Gas
The shielding gas you use protects the molten weld pool from the air. While it doesn’t directly set the amperage, it can influence how the arc behaves and how heat transfers. For TIG welding, argon is the most common gas for steel and stainless steel.
For aluminum, a mix of argon and helium or pure helium might be used to increase heat input.
Joint Design and Fit-Up
How you prepare your joint matters. If two pieces of metal are butted up closely with no gap, you might need less amperage than if there’s a slight gap that needs filling.
A tight fit-up requires less filler metal and less molten puddle to manage. A larger gap will require more filler and a hotter, wider puddle, which generally means more amperage.
General Amperage Guidelines
While there’s no single “magic number” for every situation, some general guidelines can help you get started. These are starting points, and you’ll always need to fine-tune based on your specific setup and experience.
Steel Amperage Chart (Starting Points)
This is a rough guide for mild steel. Remember, other factors like joint type and welding position can alter these numbers. Always do a test weld on scrap pieces first.
| Metal Thickness (Gauge / mm) | Approximate Amperage (DCEN – Direct Current Electrode Negative) |
|---|---|
| 26 gauge (0.4 mm) | 20-40 Amps |
| 22 gauge (0.75 mm) | 40-60 Amps |
| 18 gauge (1.2 mm) | 55-80 Amps |
| 14 gauge (1.6 mm) | 70-100 Amps |
| 1/8 inch (3.2 mm) | 90-130 Amps |
| 1/4 inch (6.4 mm) | 130-180 Amps |
Note: DCEN is the standard for steel.
Aluminum Amperage Chart (Starting Points)
Aluminum typically requires higher amperage than steel for the same thickness due to its excellent heat conductivity. AC (Alternating Current) is generally used for aluminum.
| Metal Thickness (Gauge / mm) | Approximate Amperage (AC – Alternating Current) |
|---|---|
| 24 gauge (0.6 mm) | 40-70 Amps |
| 20 gauge (0.9 mm) | 60-90 Amps |
| 16 gauge (1.5 mm) | 80-120 Amps |
| 1/8 inch (3.2 mm) | 100-140 Amps |
| 1/4 inch (6.4 mm) | 150-200 Amps |
Note: The balance control on AC welders can also affect cleaning action and penetration.
How to Find the Right Amperage: A Step-by-Step Approach
Figuring out the correct amperage isn’t a guessing game. It’s a process of observation and adjustment. Follow these steps to get it right.
1. Consult Your Welder’s Manual
Your TIG welder’s manual is a great place to start. Many manuals have charts or recommendations for different materials and thicknesses. These are usually good starting points.
2. Consider Your Material and Thickness
Before you even turn on your welder, think about what you’re welding. What metal is it? How thick is it?
This will give you a general idea of where to begin on the amperage dial.
3. Choose the Right Tungsten and Gas
Make sure you have the correct tungsten size and type for the amperage you anticipate using. Ensure your shielding gas is flowing correctly.
4. Set a Starting Amperage
Based on your material, thickness, and any charts you’ve consulted, set your amperage dial to a starting point. If you’re unsure, start a little lower than you think you might need.
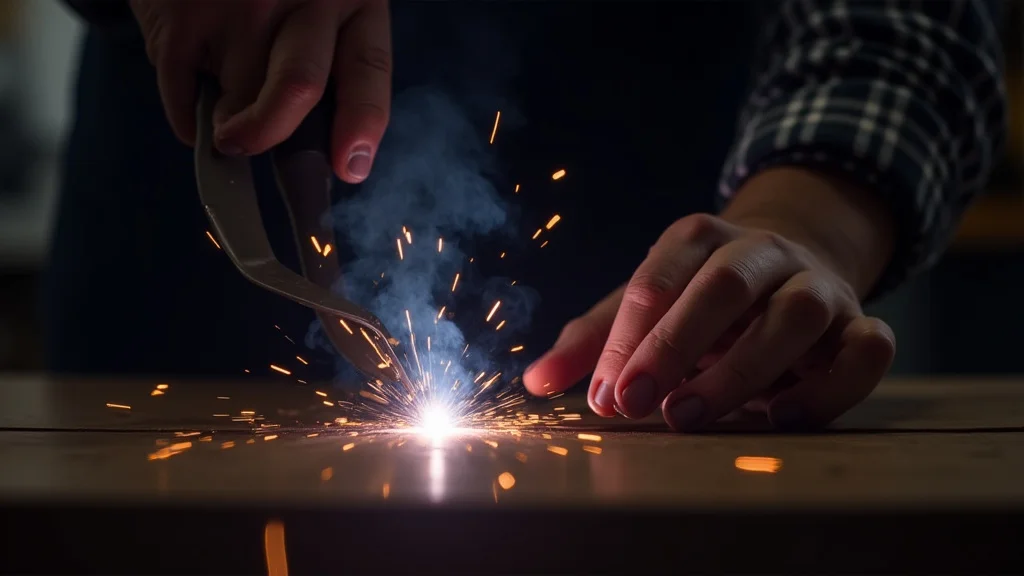
5. Make a Test Weld
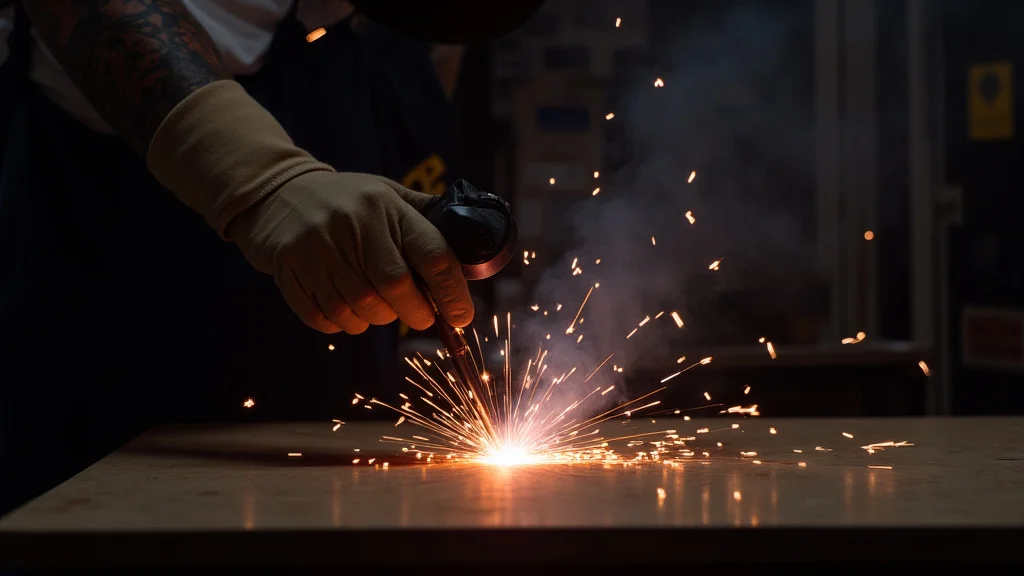
This is the most important step. Always, always, always practice on scrap pieces of the same material and thickness as your project. Never make your first weld on your actual workpiece.
6. Evaluate Your Test Weld
Look closely at your test weld. What does it tell you?
- Too much heat (burn-through, undercut): If you see holes, the metal melting away too fast, or a thin spot around the weld, your amperage is too high. Turn it down.
- Not enough heat (poor penetration, weak bond, wide beads): If the metal isn’t melting well, the weld looks like it’s sitting on top of the metal, or the bead is very wide and shallow, your amperage is too low. Turn it up.
- Just right (good fusion, smooth bead, even penetration): You’ll see a nice, consistent bead that’s fused well with the base metal. The heat seems controlled, and you can move at a steady pace.
7. Adjust and Repeat
Based on your evaluation, make small adjustments to the amperage. Turn it up or down in small increments (e.g., 5-10 amps) and make another test weld. Repeat this process until you achieve a weld that looks and feels right.
8. Consider Travel Speed and Filler Rod
Remember that amperage isn’t the only variable. Your travel speed (how fast you move the torch) and how much filler rod you add also affect the weld. If your amperage is correct, but you’re still having issues, try adjusting your speed or filler rod application.
Common Amperage Mistakes and How to Avoid Them
Even with the best intentions, beginners can fall into common traps. Being aware of these can save you a lot of frustration.
Using a “One-Size-Fits-All” Setting
The biggest mistake is assuming one amperage setting will work for all your welding needs. As we’ve discussed, metal thickness, type, and even the joint you’re welding all require adjustments.
Solution: Always test and adjust your amperage for each new material or thickness. Don’t be afraid to experiment on scrap metal.
Not Using Enough Heat
This often happens when people are afraid of burning through thin metal. While caution is good, insufficient heat leads to weak, superficial welds that won’t hold. You might see a wide, flat bead that looks like it’s just glued on the surface.
Solution: Focus on achieving proper fusion. Learn to recognize the signs of good penetration. Sometimes, a slightly hotter arc with a faster travel speed is better than a low-heat, slow weld.
Using Too Much Heat
The opposite problem is using too much amperage, especially on thin materials. This leads to burn-through, undercut (a notch at the edge of the weld), and a molten puddle that’s hard to control.
Solution: Always start with a lower amperage setting than you think you need and increase it gradually. Pay attention to the sound of the arc and the appearance of the puddle.
Incorrect Tungsten Size
Using a tungsten electrode that’s too small for the amperage can cause it to overheat and contaminate your weld. If it’s too large, it can make it difficult to achieve a focused arc on thinner materials.
Solution: Refer to tungsten manufacturer recommendations or general welding guides for appropriate tungsten diameters based on amperage ranges. Keep your tungsten properly sharpened to a fine point for DC welding and slightly balled for AC welding.
Frequently Asked Questions
Question: What is the easiest way to remember how to adjust amperage for different metal thicknesses?
Answer: Generally, thicker metal needs more amperage (heat) to melt, and thinner metal needs less amperage to avoid burning through. Think of it like cooking: a thick steak needs more heat than a thin pancake.
Question: Should I use the same amperage for steel and stainless steel?
Answer: No, stainless steel doesn’t conduct heat as well as regular steel. You might need slightly lower amperage or adjust your travel speed when welding stainless steel to prevent it from getting too hot and warping or burning.
Question: What does it mean to “burn through” metal?
Answer: Burning through means you’ve used too much heat (amperage) and melted a hole in your metal. The molten metal has escaped, leaving a gap instead of a weld.
Question: How does the tungsten electrode affect amperage?
Answer: The tungsten electrode carries the electricity. A thicker tungsten can handle more amperage than a thinner one. Using a tungsten that’s too small for your amperage can cause it to break or contaminate your weld.
Question: What is the best amperage for TIG welding aluminum?
Answer: Aluminum generally requires higher amperage than steel for the same thickness because it conducts heat so well. You also typically need to use AC (alternating current) for aluminum TIG welding.
Final Thoughts
Learning How to Properly Adjust TIG Welder Amperage is a skill that comes with practice. You’ve learned that amperage is your main tool for controlling weld heat, and it needs to be matched to your material’s thickness and type. Always start with test welds on scrap metal to fine-tune your settings.
Pay attention to how the metal melts and how the weld puddle behaves. Small adjustments make a big difference. Keep practicing, and you’ll get a feel for the right settings.