Learning How to Adjust TIG Welder Pulse Settings can seem tricky at first. You might wonder what each knob does or how to get that perfect weld bead. It’s like learning a new language for your welder!
But don’t worry, we’ll break it all down. This guide will show you exactly what to do, step by step, so you can start making beautiful welds. We’ll start by looking at the main reasons why pulsing is so helpful and then get into the settings themselves.
Key Takeaways
- You will learn what TIG welder pulse settings do.
- You will discover why using pulse is good for welding.
- You will get simple tips on changing pulse speed and width.
- You will find out how to pick the right pulse for different jobs.
- You will see how pulse helps control heat and metal cleanup.
What is TIG Pulse Welding?
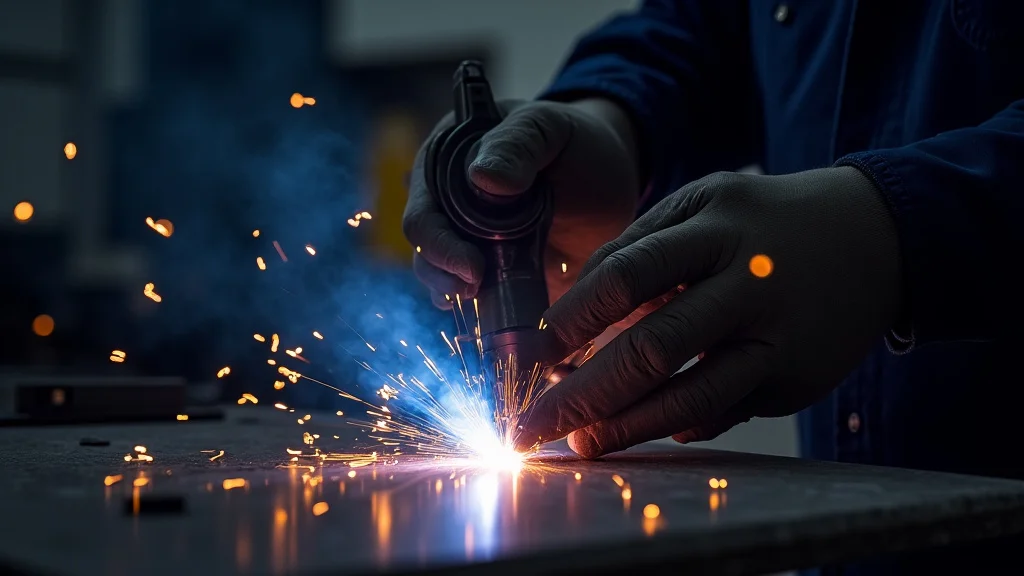
TIG welding, or Gas Tungsten Arc Welding, is known for making clean, strong, and good-looking welds. Sometimes, you want even more control. That’s where pulse welding comes in.
Think of it like a quick on-and-off switch for your welding arc. Instead of a steady stream of heat, the welder rapidly cycles between a high peak amperage and a lower background amperage.
Why Use Pulse? The Big Benefits
Using pulse settings on your TIG welder isn’t just fancy; it’s very helpful, especially when you’re starting out. It gives you a lot more control over the heat going into your metal.
- Better Heat Control: This is a major plus. When the welder pulses, it spends time at a lower amperage. This lower amperage lets the metal cool down a bit between the high-heat bursts. This is super useful for thin metals that can easily burn through. It also helps prevent warping, which is when the metal bends because of too much heat.
- Improved Weld Appearance: Many people like the look of pulsed welds. The repetitive pattern of the arc can create a nice, even ripple effect on the weld bead. This looks professional and shows good control.
- Easier Puddle Control: The pulsing action can make the weld puddle, which is the molten metal, easier to manage. The cooling phase between pulses allows the puddle to solidify slightly. This makes it easier to add filler metal and keep the puddle from running away from you, especially on vertical or overhead welds.
- Cleaner Welds: By controlling the heat better, you can reduce the chances of contamination. This means less oxidation and fewer defects in your weld. It’s like giving the metal a little break to stay clean.
Understanding the Main Pulse Settings
When you look at your TIG welder, you’ll often see a few key settings related to pulsing. Don’t let them scare you! They all work together to give you that control we talked about.
Peak Amperage
This is the high heat setting. It’s when the welder is putting out its full power. This is what melts the metal and creates the weld.
When you’re pulsing, the arc spends a portion of its time at this peak amperage.
Background Amperage (or Minimum Amperage)
This is the low heat setting. It’s a much lower amperage than the peak. The arc is still on, but it’s just enough to keep the puddle from completely solidifying and to maintain the arc.
This is the “cooling” phase of the pulse. The lower this setting, the more cooling you get.
Pulse Width (or Pulse Duty Cycle)
This setting controls how long the welder stays at the peak amperage compared to how long it stays at the background amperage. It’s often shown as a percentage. A higher percentage means it stays at peak amperage for longer.
A lower percentage means it spends more time at the background amperage.
For example, if your pulse width is set to 50%, the welder spends equal amounts of time at peak and background amperage. If it’s set to 70%, it spends more time at peak amperage, giving you more heat input.
Pulse Frequency (or Pulse Speed)
This setting determines how quickly the welder cycles between the peak and background amperage. It’s usually measured in pulses per second (Hz). A high frequency means the arc is pulsing very fast, almost like a steady arc but with less overall heat.
A low frequency means the arc pulses more slowly, giving you a more noticeable on-and-off effect.
Think of it like blinking. A fast pulse is like rapid blinking, while a slow pulse is like slow, deliberate blinking.
How to Adjust TIG Welder Pulse Settings: A Step-by-Step Guide
Now, let’s put it all together. How to Adjust TIG Welder Pulse Settings depends on what you’re welding and what you want to achieve. Here’s a simple way to approach it.
Step 1: Identify Your Material and Thickness
This is the most important first step. What kind of metal are you welding? How thick is it?
- Thin Metals (e.g., aluminum or stainless steel under 1/8 inch): These need less heat. You’ll want a lower background amperage and perhaps a higher pulse width to give the metal time to cool.
- Thicker Metals (e.g., steel over 1/8 inch): These can handle more heat. You might use a higher background amperage and a lower pulse width to keep the heat up.
- Materials that Warp Easily: If you’re working with something like thin aluminum that can easily bend, pulse welding is your best friend.
Step 2: Start with a Low Pulse Frequency
When you’re new to pulsing, start with a slower pulse frequency. Something between 1 Hz and 5 Hz is a good starting point. This makes the pulsing very visible and helps you see and feel how it affects the weld puddle.
You can then increase it if you want a smoother ripple or less visible pulse.
Step 3: Set Your Background Amperage
This is often the trickiest part. A good rule of thumb is to set your background amperage to about 30-50% of your peak amperage. For very thin metals, you might go even lower, maybe 20%.
For thicker metals, you might go a bit higher.
The goal here is to have enough heat to keep the puddle alive and flowing but not so much that it becomes uncontrollable or burns through. You should still be able to see the puddle cool and solidify slightly between pulses.
Step 4: Adjust Your Pulse Width
Pulse width controls how long the arc stays hot (at peak amperage). If you need more heat input for thicker materials or to get better fusion, increase the pulse width (e.g., to 60% or 70%). If you need to limit heat and prevent burn-through on thin materials, decrease the pulse width (e.g., to 40% or 50%).
This setting works with the background amperage to manage the overall heat input.
Step 5: Fine-Tune with Peak Amperage and Travel Speed
Your peak amperage is the main heat source. Ensure it’s high enough to melt the metal and filler rod effectively. Your travel speed – how fast you move the torch – also plays a big role.
If your weld bead is too wide, you might be moving too slowly or have too much heat. If it’s too narrow, you might be moving too fast.
Experimentation is key here. Make a few test welds on scrap pieces of the same material. Watch how the puddle behaves.
Does it look like you have control? Are you getting the penetration you need without burning through?
Pulse Settings for Common Materials
Here are some general starting points. Remember, these are just guidelines. Your actual settings may vary based on your specific machine, technique, and the exact conditions.
| Material | Thickness | Peak Amps (Approx.) | Background Amps (Approx.) | Pulse Width (%) | Pulse Frequency (Hz) |
|---|---|---|---|---|---|
| Thin Steel (18-20 ga) | ~1mm | 70-90 | 30-40 | 50-60 | 1-3 |
| Medium Steel (14-16 ga) | ~1.5-2mm | 90-120 | 40-50 | 50-60 | 1-3 |
| Thin Aluminum (1/16″) | ~1.5mm | 80-100 | 30-40 | 50-60 | 1-3 |
| Medium Aluminum (1/8″) | ~3mm | 120-150 | 50-60 | 50-60 | 1-3 |
| Thin Stainless Steel (20-22 ga) | ~1mm | 60-80 | 20-30 | 40-50 | 2-5 |
Note: These are starting points for amperage. Always adjust based on how the weld puddle behaves.
Common Challenges and How to Solve Them
Even with instructions, you might run into a few snags. That’s normal!
- Burn-through on Thin Metal: If you’re burning holes, you need less heat. Lower your background amperage, decrease your pulse width, or increase your travel speed. You might also need to adjust your peak amperage lower.
- Not Enough Fusion on Thicker Metal: If the weld isn’t penetrating well, you need more heat. Increase your background amperage, increase your pulse width, or slow down your travel speed. You may also need to increase your peak amperage.
- Puddle Too Fluid (Hard to Control): This often means too much heat. Reduce background amperage or pulse width. Make sure your travel speed isn’t too slow.
- Weld Puddle Freezing (Not Melting Enough): This means not enough heat. Increase background amperage or pulse width. Ensure your peak amperage is sufficient. Check your travel speed – if it’s too fast, the heat won’t have time to melt the metal.
The best way to learn is through practice and observation. Watch that puddle! It tells you everything you need to know.
Frequently Asked Questions
Question: What is the main benefit of using pulse settings on a TIG welder?
Answer: The main benefit is much better control over the heat, which helps prevent burn-through on thin metals and reduces warping.
Question: How does pulse frequency affect my weld?
Answer: Pulse frequency, or speed, controls how fast the welder switches between high and low heat. A faster pulse can create a smoother ripple, while a slower pulse gives you more noticeable on-and-off heating.
Question: Should I use a high or low pulse width for thin aluminum?
Answer: For thin aluminum, you generally want to use a lower pulse width (like 40-50%) to limit heat input and prevent it from burning through.
Question: What is background amperage and why is it important?
Answer: Background amperage is the lower heat setting during the pulse cycle. It’s important because it allows the weld puddle to cool slightly between the high-heat pulses, giving you more control.
Question: How can I tell if my pulse settings are correct?
Answer: Watch the weld puddle. If it’s easy to control, you’re getting good fusion without burning through, and the bead looks consistent, your settings are likely correct. Making test welds on scrap material is the best way to check.
Final Thoughts
Learning How to Adjust TIG Welder Pulse Settings is a skill that gets better with practice. You now know that pulse welding gives you control over heat, makes welds look great, and helps manage the molten puddle. Start by understanding your material and thickness.
Then, experiment with background amperage, pulse width, and frequency on scrap pieces. Pay close attention to how the weld puddle behaves. Small adjustments can make a big difference.
Keep practicing, and you’ll soon be creating beautiful, strong TIG welds with confidence.