When you’re working with tools, sometimes things get hot. This can be tricky, especially when you’re just starting out. It’s easy to worry about ruining your project or even hurting yourself.
But don’t fret! We’re going to walk through how to stop your workpiece from getting too hot, step by step. We’ll show you simple ways to keep things cool and safe.
Key Takeaways
- You will learn why preventing overheating is important for good results.
- We will cover different tools and how they can cause heat.
- Simple techniques to keep your material from getting too hot will be explained.
- You will discover ways to monitor heat safely.
- We will explore common problems and how to fix them.
- You’ll get tips for picking the right speed and pressure for different jobs.
Why Workpiece Overheating is a Common Challenge
It’s super common for new crafters and DIYers to face the problem of their workpiece getting too hot. This happens when you use tools like drills, saws, or grinders. The friction from the tool against the material creates heat.
If this heat builds up too much, it can cause all sorts of problems. The material might change color, warp, or even catch fire. This is why learning How Do You Protect Your Workpiece from Overheating? is a big deal for anyone getting started.
Imagine you’re trying to cut a piece of wood. If your saw blade is dull or you push too hard, the wood starts to smoke. That smoke is a sign of too much heat.
It can make the wood brittle, causing it to break unevenly. Or, think about drilling into metal. If you don’t use coolant, the drill bit and the metal can get so hot they become soft.
This makes the hole messy and not the right size.
Even simple tasks can lead to overheating if you’re not careful. For example, sanding a large surface can create a lot of friction. If you sand in one spot for too long without moving, that area will get very warm.
This can ruin the finish of your material, whether it’s wood, plastic, or even soft metals.
The good news is, it’s not as hard as it sounds to keep things under control. With a few smart tricks and some practice, you can easily prevent your projects from getting too hot. We’ll go over these tricks in an easy-to-follow way.
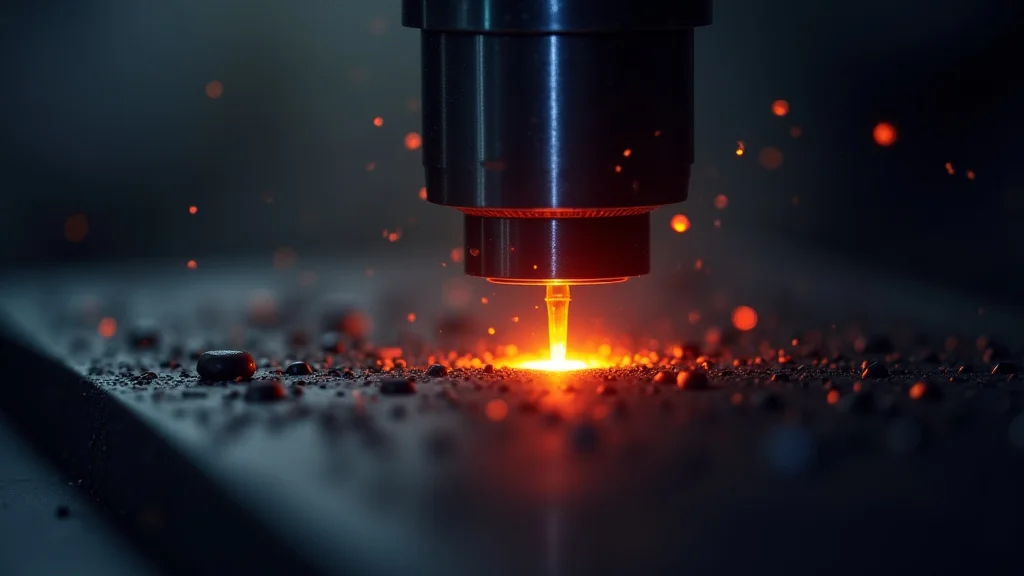
Understanding Heat Generation
Heat is created when two surfaces rub against each other with force. This is called friction. In our DIY projects, this friction usually comes from using tools.
The faster a tool spins or moves, and the harder you press it against your workpiece, the more friction there is. More friction means more heat.
Friction and Material Properties
Different materials handle heat differently. Soft woods might burn easily. Metals can soften and lose their strength.
Plastics can melt or deform. Even glass can crack from sudden temperature changes. Knowing what your material is made of helps you know how much heat it can take.
For example, hardwoods are generally more resistant to heat than softwoods. They can handle a bit more friction before showing signs of damage. Metals like steel can get very hot, but too much heat can change their internal structure, making them weaker or more brittle.
Some plastics will simply melt if they get too warm, ruining the shape.
Tool Speed and Pressure
The speed of your tool and how hard you push it are key factors. A drill spinning very fast on a low setting might not cause much heat. But if you crank up the speed and push hard, heat will build up quickly.
The same applies to saws. A sharp blade moving at the right speed is efficient. A dull blade or too much pressure creates excess heat.
Think about using a sander. If you use a very high grit sandpaper and move it quickly and lightly, you won’t generate much heat. But if you use coarse sandpaper and press down hard, the friction will skyrocket.
Finding the balance between speed and pressure is important for all your tools.
Simple Ways to Keep Your Workpiece Cool
There are many easy ways to stop your workpiece from getting too hot. These methods are simple to use and make a big difference in the quality of your work and your safety.
Coolants and Lubricants
For many tasks, especially with metal, using a coolant is essential. Water, oil, or special cutting fluids help absorb heat. They also help to clear away debris.
This reduces friction and keeps the tool and workpiece cool.
- Water: Good for many metal cutting jobs, especially with softer metals.
- Cutting Oils: Excellent for drilling and tapping metal. They provide lubrication and cooling.
- Soap and Water: A mild solution can be used for some plastics and woods.
When you’re drilling into metal, a little stream of coolant can keep the drill bit sharp and prevent the metal from hardening around the hole. For woodworking, sometimes a light mist of water is enough to keep dust down and reduce heat.
Intermittent Work and Cooling Periods
Don’t force your tool to work non-stop. Take breaks! Work on a section for a short time, then stop and let the material cool down.
This is especially important for tasks that generate a lot of heat, like grinding or prolonged sanding.
You can even use a damp cloth to wipe down the workpiece during these breaks. This quickly draws away built-up heat. It’s a simple but very effective way to manage temperature.
Think of it like giving your project a little “cool-down period.”
Choosing the Right Tools and Settings
Using the right tool for the job is half the battle. A sharp drill bit cuts through material cleanly, creating less heat than a dull one. A saw with sharp teeth will slice through wood smoothly.
Dull tools require more force, leading to more friction and heat.
Also, pay attention to your tool’s settings. Many power tools have adjustable speeds. For most materials, starting with a slower speed is better.
You can gradually increase the speed if needed. For drilling metal, a slower speed is usually recommended. For sanding wood, a medium speed often works best.
Proper Technique and Pressure
How you hold and move your tool matters a lot. Don’t push too hard! Let the tool do the work.
Apply steady, even pressure. For saws, let the blade do the cutting. For drills, let the bit remove the material.
When sanding, move the sander in smooth, even strokes across the surface. Avoid staying in one spot for too long. This distributes the heat evenly and prevents scorching.
Similarly, when cutting, use a consistent feed rate. This means moving the saw through the material at a steady pace.
Monitoring Heat
You can often tell if something is getting too hot by looking and feeling. But there are other ways to check, too.
Visual Cues
The first sign is usually smoke. If you see smoke, stop immediately! Discoloration is another big clue.
Wood might turn brown or black. Metal can turn blue, purple, or even black. These colors show that the material has been heated beyond its ideal state.
Warping is also a sign. If a flat piece of material starts to bend or twist, it’s a clear indicator of overheating. This is common with plastics and thin metals.
Touch Test (With Caution!)
Once you’ve stopped working, you can carefully touch the workpiece. If it feels uncomfortably hot, it’s too hot. You don’t want to burn yourself, so be cautious.
A quick, light touch is usually enough to gauge the temperature.
It’s best to let the material cool down for a minute or two before attempting to touch it. If you’re ever in doubt, err on the side of caution. Letting it cool longer is always better than getting burned.
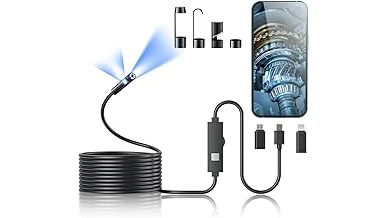
Using Tools to Measure Heat
For more precise work, you can use tools to measure temperature. Infrared thermometers are great because you can measure the surface temperature without touching it. They are quick and safe to use.
Thermocouples are another option, often used with some power tools or in industrial settings. They give a very accurate reading of the temperature. For most hobbyists, though, visual cues and careful touch are usually sufficient.
Common Problems and Solutions
Even with the best intentions, you might run into issues. Here are some common problems and how to solve them.
Problem: Material Discoloration
Solution: This means the material got too hot. Try using a slower speed and lighter pressure. If working with metal, use a coolant.
If it’s wood, take more frequent breaks to let it cool.
Problem: Melting or Warping
Solution: This is a clear sign of excessive heat. You’re likely pushing too hard or using too much speed. Reduce your tool’s speed and the pressure you apply.
For plastics, consider using a lower heat setting if your tool has one, or work in shorter bursts.
Problem: Smoke or Burning Smell
Solution: Stop immediately! This is a critical overheating situation. Let the material cool completely.
Assess your technique: were you going too fast, too hard, or using a dull tool? Sharpen your tools and slow down. Consider using a lubricant or coolant.
Problem: Tool Gets Stuck or Slows Down Excessively
Solution: This can happen when heat makes the material too soft or causes it to expand. Stop, let it cool, and then try again with less pressure. Ensure your tool is sharp and suitable for the material.
Sometimes, a different angle of approach can help.
Problem: Poor Finish Quality (Rough Edges, Uneven Surfaces)
Solution: This is often linked to overheating, which can make materials brittle or gummy. Ensure your tools are sharp and the speed and pressure are appropriate. For cutting, a slower, controlled feed rate helps.
For finishing, proper sanding techniques and grit progression are key.
Choosing the Right Speed and Pressure
Setting the right speed and applying the correct pressure are vital for preventing overheating. It’s not a one-size-fits-all approach.
For Drilling
When drilling, especially in metal or hard plastics, slower is often better. High speeds create a lot of friction. Use enough pressure to make the drill bit cut, but don’t force it.
Let the flutes of the drill bit clear out the material. For wood, you can usually use higher speeds, but always start slow and increase if needed.
| Material | Drill Speed | Pressure |
|---|---|---|
| Soft Wood | Medium to High | Moderate |
| Hard Wood | Medium | Moderate |
| Soft Metal (Aluminum, Brass) | Low to Medium | Light to Moderate |
| Hard Metal (Steel) | Low | Light, with coolant |
| Plastic | Low to Medium | Light, avoid melting |
For Cutting (Saws)
The type of saw matters. For bandsaws and jigsaws, a steady, controlled feed rate is important. For circular saws, let the blade do the work and avoid forcing the saw.
A dull blade will cause more heat and tear the material.
For Sanding
When sanding, the grit of the sandpaper and the speed of the sander are key. Start with a coarser grit for rough work and move to finer grits. Use even, overlapping strokes.
Let the sander move smoothly over the surface. Too much pressure in one spot will cause it to overheat and create unevenness.
For Grinding and Polishing
These tasks generate significant heat. Always use the lowest effective speed. Apply very light pressure.
Take frequent breaks for the material to cool down. For polishing, use specialized compounds and buffing pads designed for the material.
FAQ
Question: How can I tell if my workpiece is getting too hot without touching it?
Answer: Look for signs like smoke, discoloration (brown, blue, black), or if the material starts to warp or bend. These are clear indicators of overheating.
Question: Is it okay to use water to cool down a workpiece?
Answer: Yes, water is a common and effective coolant for many materials, especially metals and some woods. Just be sure it’s appropriate for your material and won’t cause damage.
Question: What should I do if my drill bit gets really hot?
Answer: Stop drilling immediately. Let the drill bit and the workpiece cool down. Use a lubricant or coolant next time.
Ensure your drill bit is sharp and the speed is appropriate for the material.
Question: Can I use the same speed and pressure for all types of wood?
Answer: No, different woods react differently to heat. Hardwoods can handle more friction than softwoods. It’s best to adjust your speed and pressure based on whether you’re working with a hard or soft wood.
Question: What is the best way to prevent plastic from melting when I’m working on it?
Answer: Use a low speed on your tool, apply light pressure, and work in short bursts. Taking breaks for the plastic to cool is very important. Sometimes a light mist of water can help.
Final Thoughts
Protecting your workpiece from overheating is all about being smart and careful. You’ve learned that heat comes from friction, and different materials and tools create it differently. By using coolants, taking breaks, and choosing the right speeds and pressures, you can easily avoid problems.
Always watch for signs of too much heat, like smoke or color changes. If you ever doubt it, let it cool down longer. These simple steps will help you get better results and keep your projects safe.