Many new welders find that getting the wire feed speed just right on their MIG welder can be tricky. It’s a common hurdle when you’re just starting out because too slow and your weld is weak, too fast and it sputters and looks messy. But don’t worry!
Learning How to Adjust MIG Welder Wire Feed Speed is simpler than it seems. We’ll walk you through it step by step so you can get clean, strong welds every time. Let’s get your welder singing the right tune.
Key Takeaways
- You will learn what wire feed speed is and why it matters.
- We will explain the relationship between wire feed speed and voltage.
- You will discover how to fine-tune your settings for different materials.
- Tips for troubleshooting common wire feed speed problems will be shared.
- Simple methods for testing and adjusting your settings will be provided.
Understanding MIG Welder Wire Feed Speed
MIG welding, also known as Gas Metal Arc Welding (GMAW), uses a continuous wire electrode. This wire feeds through a welding gun and melts to create the weld. The speed at which this wire feeds is called the wire feed speed (WFS).
It’s measured in inches per minute (IPM) or meters per minute (MPM).
Getting the WFS right is super important. If the wire feeds too slowly, you won’t have enough filler metal melting into the joint. This can lead to a weak weld that might not hold together well.
Your weld bead will likely be narrow and might not even join the two pieces of metal properly.
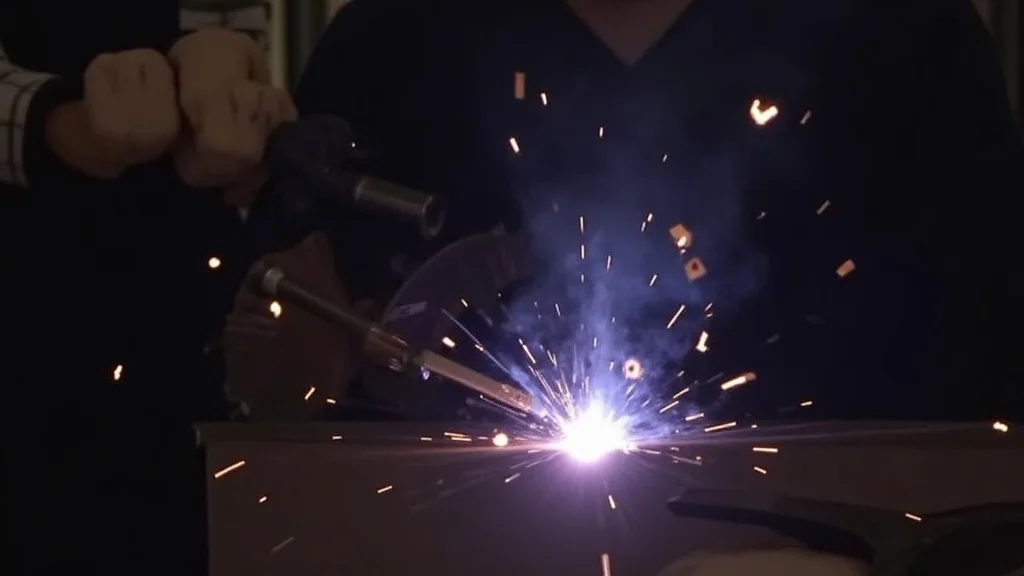
On the flip side, if the wire feeds too fast, you’ll be feeding too much metal into the weld puddle. This can cause the arc to become unstable, leading to spatter (small blobs of molten metal flying everywhere). The weld might look rough, like bacon sputtering in a pan, and it can also lead to other welding defects.
The Crucial Link Between Wire Feed Speed and Voltage
Wire feed speed and voltage are best friends in MIG welding. They work together to give you a good weld. Think of it like this: the wire feed speed controls how much metal you’re putting into the weld, and the voltage controls how much heat you’re using.
You need them to be in balance.
Most MIG welders have two main controls: one for voltage and one for wire feed speed. Often, when you adjust one, the other needs a little tweak too. Many modern welders have a feature called “synergic” or “one-knob” control.
With these machines, you set the wire feed speed, and the welder automatically adjusts the voltage for you to keep things in balance. This makes things a lot easier for beginners.
If your welder doesn’t have synergic control, you’ll need to set them manually. A good starting point is often found in your welder’s manual or on a chart provided by the wire manufacturer. You’ll usually find recommendations based on the type and thickness of metal you’re welding.
Finding Your Starting Point
When you’re first learning How to Adjust MIG Welder Wire Feed Speed, having a good starting point is key. Check your welder’s manual. It will likely have a chart that suggests WFS and voltage settings for different metal thicknesses and types of wire.
If you’re using a specific brand of wire, their website or the spool packaging might have similar charts.
For example, if you’re welding 1/8-inch mild steel with 0.030-inch wire, the chart might suggest a WFS of around 150-200 IPM and a voltage of 17-19 volts. These are just general guidelines, though. Your actual settings will depend on your machine, the exact metal, and even the condition of your welding gun.
Making Small Adjustments
Once you have your starting settings, you’ll likely need to make small adjustments. This is where practice comes in. Make a test weld on a scrap piece of metal that’s the same as what you’ll be welding.
Look at the weld bead.
What to look for:
- Too slow WFS: The arc will sound “poppy” or “bacon-sizzling.” The weld bead will be narrow, and you might see a gap between the weld and the base metal.
- Too fast WFS: The arc will sound like a harsh “hissing” or “snapping.” You’ll get a lot of spatter, and the weld bead might be too wide or appear “wet” and bubbly.
- Just right: The arc will sound smooth and consistent, like a steady “buzzing.” The weld bead will be nicely shaped, with good penetration, and minimal spatter.
If your weld sounds and looks like it’s too slow, increase the wire feed speed a little. If it seems too fast, decrease it. Adjust in small increments.
You might only need to move the dial a tiny bit.
Adjusting for Different Materials
The type of metal you’re welding affects how you should adjust your WFS and voltage. Different metals have different melting points and electrical properties.
Mild Steel
Mild steel is the most common material for beginners. It’s forgiving, and the charts for mild steel are usually readily available. For mild steel, you’ll generally use a straight CO2 or an Argon/CO2 mix shielding gas.
The recommended settings will vary based on the thickness.
Stainless Steel
Stainless steel requires a bit more care. It can discolor (called “heat tint”) if too much heat is applied. You’ll typically use a higher percentage of Argon in your shielding gas for stainless steel, like an Argon/CO2 mix with less CO2 than you’d use for mild steel, or even an Argon/Helium mix for certain applications.
This often means you’ll need slightly different WFS and voltage settings compared to mild steel of the same thickness. You might find that for stainless steel, you’ll run a bit lower on the WFS and voltage to minimize heat input and prevent excessive discoloration.
Aluminum
Welding aluminum presents its own challenges, especially with wire feed speed. Aluminum wire is softer than steel wire, which can lead to feeding problems like “bird-nesting” (where the wire bunches up and jams in the gun liner). For aluminum, it’s highly recommended to use a U-groove drive roller and a Teflon or nylon liner in your welding gun to help the soft wire feed smoothly.
Aluminum also requires a different shielding gas, typically pure Argon. Because aluminum conducts heat very well, you’ll often need higher WFS and voltage settings than you would for steel of the same thickness to achieve good penetration. You might also notice that the arc sounds different when welding aluminum.
The Role of Wire Diameter
The diameter of the welding wire is another key factor in setting your WFS. Common wire diameters for MIG welding are 0.023″, 0.030″, 0.035″, and 0.045″.
Larger diameter wires require higher WFS and voltage settings to melt properly. For example, a 0.035″ wire will need a higher WFS than a 0.023″ wire to achieve a similar weld bead size and penetration. Always ensure your drive rolls and gun nozzle match the diameter of the wire you are using.
Matching Drive Rolls
Your MIG welder has drive rolls that grip and push the wire through the liner. These rolls are grooved to match specific wire diameters. Using the wrong groove size can cause feeding issues.
A V-groove is standard for steel wire, while a U-groove is often used for softer wires like aluminum.
You might also have different types of grooves. For example, a knurled groove is sometimes used for flux-cored wire, which has a rougher outer surface.
Nozzle Size
The nozzle on your welding gun also plays a role. The opening of the nozzle should match the diameter of your wire. If you’re using 0.030″ wire, you need a nozzle with a 0.030″ opening.
A nozzle that’s too small can constrict the wire, while a nozzle that’s too large might not provide proper shielding gas coverage.
Troubleshooting Common Wire Feed Issues
Even when you get the settings dialed in, you might run into common problems with wire feeding. Knowing how to fix them will save you a lot of frustration.
Bird-Nesting
This is when the wire feeds out of the gun, but instead of going through the contact tip, it bunches up and creates a messy tangle, often called a “bird’s nest.” This usually happens when the wire is too soft for the drive rolls, the drive rolls are too tight, or there’s a blockage preventing the wire from feeding smoothly.
- Cause: Wire feeding too fast for the gun liner, or too much tension on the drive rolls.
- Fix: Reduce drive roll tension slightly. Ensure your gun liner is clean and not kinked. If welding aluminum, make sure you’re using the correct U-groove drive rolls and a Teflon liner.
Wire Slipping on Drive Rolls
If the wire isn’t feeding consistently, it might be slipping on the drive rolls. This means the rolls aren’t gripping the wire tightly enough.
- Cause: Drive roll tension is too loose, or the drive rolls are worn or dirty.
- Fix: Increase the tension on the drive rolls slightly. Clean the drive rolls with a wire brush. If they are worn down, replace them.
Wire Not Feeding at All
This is usually a simple mechanical issue. The wire is likely jammed somewhere, or the drive motor isn’t engaging.
- Cause: Kink in the wire spool, jammed liner, or a problem with the drive motor or switch.
- Fix: Check the wire spool to make sure the wire is feeding freely and isn’t kinked. Check the gun liner for blockages or kinks. Ensure the drive motor is receiving power and the switch is working.
Inconsistent Arc
An inconsistent arc can be caused by many things, but a fluctuating wire feed speed is a common culprit.
- Cause: Dirty or worn contact tip, partially blocked gun liner, or an intermittent electrical connection.
- Fix: Clean or replace the contact tip. Ensure the gun liner is clear. Check all electrical connections.
Testing and Fine-Tuning Your Settings
The best way to learn How to Adjust MIG Welder Wire Feed Speed is through practice. Don’t be afraid to experiment on scrap metal.
The “Buzz Test”
This is a quick way to get a feel for your settings. Set your welder to a moderate WFS and voltage. Pull the trigger without touching the metal.
Listen to the arc. It should sound like a steady buzz. If it’s sputtering, it might be too fast or too hot.
If it sounds weak, it might be too slow or too cold.
Making a Test Weld
After the buzz test, make a short bead on your scrap metal. Stop welding and examine the bead.
- Bead too flat and wide: Likely too much voltage or too fast WFS.
- Bead too tall and narrow: Likely too little voltage or too slow WFS.
- Sputtering and spatter: Often too much voltage or too fast WFS.
- Weak penetration, looks like it’s just sitting on top: Too little voltage or too slow WFS.
Adjust one setting at a time and make another test weld. Keep notes on what works best for different materials and thicknesses. This will build your experience and help you get it right faster over time.
Frequently Asked Questions
Question: What is the main difference between wire feed speed and voltage?
Answer: Wire feed speed controls the amount of filler metal you’re adding to the weld, while voltage controls the arc length and heat input.
Question: Can I use the same settings for steel and aluminum?
Answer: No, aluminum requires different settings and often different equipment (like U-groove drive rolls) due to its softness and heat conductivity.
Question: Why is my MIG welder spitting a lot of sparks?
Answer: Excessive spatter is often caused by the wire feed speed being too high or the voltage being too high for the material thickness.
Question: What happens if my wire feed speed is too slow?
Answer: If your wire feed speed is too slow, you’ll have insufficient filler metal, resulting in a weak weld with poor penetration and a narrow bead.
Question: How do I fix “bird-nesting” on my MIG welder?
Answer: Bird-nesting usually means the wire is getting jammed. Check your drive roll tension (make it slightly looser), ensure the gun liner is clean and not kinked, and verify you have the correct drive rolls for your wire type.
Final Thoughts
Learning How to Adjust MIG Welder Wire Feed Speed is a key step to better welding. It’s all about finding that sweet spot where the wire feeds smoothly, the arc is stable, and the weld bead is strong and clean. Remember to start with recommended settings, listen to your arc, and look at your test beads.
Small adjustments make a big difference. Don’t get discouraged by a few messy welds; each one is a learning opportunity. With practice, you’ll develop a feel for it, and your welds will look professional.