It’s frustrating when your welding machine suddenly stops working and lights up a safety warning. Many beginners find the “Welding Machine Stuck in Safety Mode? Fix Now” situation confusing and a bit scary.
You just want to get back to your project, right? Don’t worry! This guide will show you simple steps to figure out what’s going on and get your welder running again.
We’ll cover the most common reasons for this problem and easy ways to solve them, so you can finish your work without any more interruptions.
Key Takeaways
- You will learn the most common reasons why a welding machine enters safety mode.
- Simple checks you can perform without special tools will be explained.
- Steps to reset your welding machine will be provided.
- You will discover how to identify and fix common issues like overheating.
- Tips for preventing your welder from entering safety mode in the future are included.
- You’ll feel more confident troubleshooting your welding equipment.
Why Your Welding Machine Might Be in Safety Mode
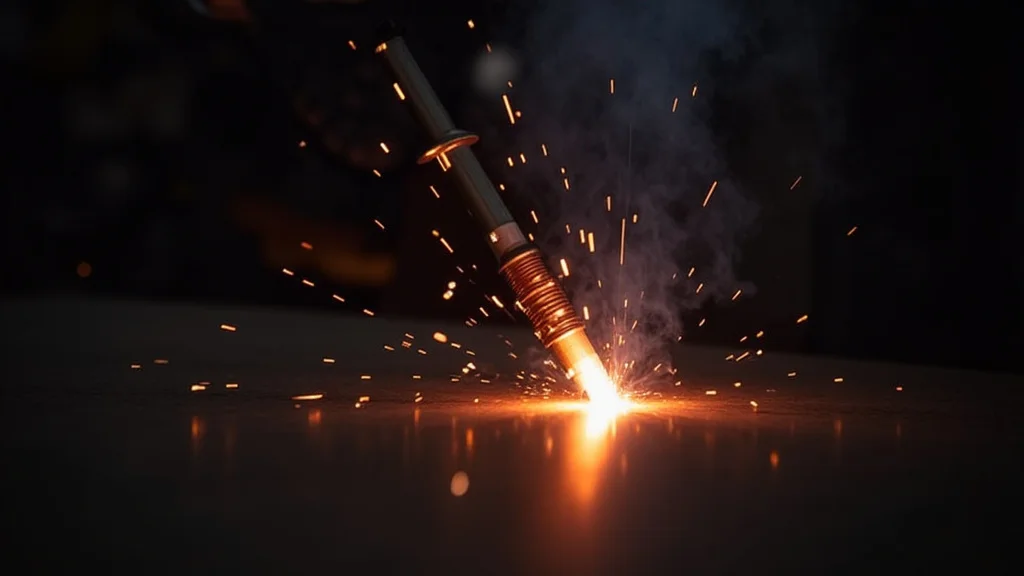
When your welding machine gets stuck in safety mode, it’s usually trying to tell you something important. Think of it like your car’s warning lights. The machine has built-in safety features to protect itself and you from damage or harm. If one of these safety systems is triggered, the machine will shut down or limit its power, displaying a warning light or message. Understanding why this happens is the first step to fixing it.
Overheating is a Common Culprit
One of the most frequent reasons a welding machine enters safety mode is overheating. Welders generate a lot of heat, especially during extended use or when working on thick materials. If the machine’s cooling system isn’t working properly, or if you’re pushing it too hard for too long, the internal temperature can rise beyond safe limits. The machine’s sensors detect this high temperature and activate the safety mode to prevent damage to its sensitive electronic components.
What to do about Overheating
If you suspect overheating, the solution is straightforward: let it cool down. Turn off the welding machine and unplug it from the power source. Give it ample time to rest. In a well-ventilated area, this might take 15-30 minutes. If you are in a very hot environment or using the welder continuously, it might need even longer. Make sure the machine’s vents are not blocked. Dust and debris can build up inside, preventing air from flowing freely and cooling the machine effectively. You might need to clean these vents periodically.
Power Supply Issues
The power source for your welding machine is critical. If the voltage is too low or too high, or if the power supply is unstable, the machine might go into safety mode. This is especially true for sensitive electronic welders. A weak extension cord, a circuit breaker that’s close to its limit, or even issues with your home’s electrical system can cause this.
Checking Your Power Source
First, check if you are using the correct voltage for your welder. Most welders will specify this on a label. Ensure your outlet can provide enough amperage. If you’re using an extension cord, make sure it’s heavy-duty and rated for the amperage your welder requires. Overheating extension cords can cause voltage drops. If you’re on a shared circuit, try plugging the welder into a different outlet that’s on a less-used circuit. Sometimes, simply ensuring a stable and adequate power supply can resolve the issue.
Internal Component Malfunctions
While less common for beginners, internal components can sometimes fail, triggering a safety mode. This could be a faulty sensor, a problem with the control board, or an issue with the welding output circuit. These problems often require more technical expertise to diagnose and fix.
When to Seek Professional Help
If you’ve checked the basics like cooling and power supply, and the machine still insists on staying in safety mode, it might be time to consider a professional. A qualified welding equipment repair technician can test individual components and pinpoint the exact cause of the problem. Don’t try to open up the machine and repair internal circuits yourself unless you have specific training, as this can be dangerous and void your warranty.
Incorrect Settings or Connections
Sometimes, the safety mode is triggered by simple user error. This could involve selecting a welding mode that’s inappropriate for the task, setting the amperage too high for the material thickness, or having loose cables. Welding machines are designed to protect themselves from settings that could cause damage.
Reviewing Your Setup
Double-check all your connections. Make sure the ground clamp is securely attached to your workpiece and that the electrode holder or MIG gun cable is firmly plugged into the welder. Review the welding machine’s manual for recommended settings for the type of metal and thickness you are working with. A quick look at the manual can often clarify settings and prevent accidental overloads.
The Role of Sensors
Welding machines are equipped with various sensors to monitor different parameters like temperature, voltage, and current. If a sensor is dirty, damaged, or not functioning correctly, it might send false readings to the machine’s control board, causing it to enter safety mode.
Cleaning and Inspecting Sensors
Some sensors are accessible for cleaning. Refer to your owner’s manual to see if any sensors are user-serviceable. Often, a gentle dusting or wiping with a clean, dry cloth can help. If a sensor appears physically damaged, it will likely need replacement by a qualified technician.
Troubleshooting Steps for “Welding Machine Stuck in Safety Mode? Fix Now”
When you encounter the “Welding Machine Stuck in Safety Mode? Fix Now” alert, it’s natural to feel a bit stuck yourself. But a systematic approach can help you get back to work quickly. Here’s a step-by-step guide to help you troubleshoot the issue.
Step 1: Power Down and Cool Down
The first and most important step is to remove power and let the machine cool.
1. Turn Off the Welder: Locate the power switch and turn it off.
2. Unplug It: Disconnect the machine from the wall outlet.
3. Wait: Allow at least 20-30 minutes for the machine to cool down completely. Longer if you were welding for an extended period or in a hot environment.
This simple step addresses the most common cause: overheating.
Step 2: Inspect Vents and Airflow
Good airflow is essential for cooling.
1. Locate Vents: Find all the air vents on your welding machine.
2. Check for Obstructions: Ensure nothing is blocking these vents. This includes dust, debris, or even the machine being pushed against a wall.
3. Clean if Necessary: Use a soft brush or compressed air to gently clean out any dust or debris from the vents.
Proper ventilation helps the cooling fan do its job effectively.
Step 3: Verify Power Supply
A stable and adequate power supply is crucial for your welder.
1. Check the Outlet: Make sure the outlet is functioning correctly and is on a suitable circuit.
2. Inspect Extension Cords: If you are using an extension cord, ensure it’s heavy-duty and rated for the amperage your welder needs. Look for any signs of damage or overheating on the cord.
3. Voltage Check (if possible): If you have a multimeter, you can check the voltage at the outlet. Ensure it’s within the acceptable range for your welder.
Using the wrong extension cord is a common mistake that can lead to low voltage and safety cutoffs.
Step 4: Review Cable Connections
Loose or faulty connections can cause problems.
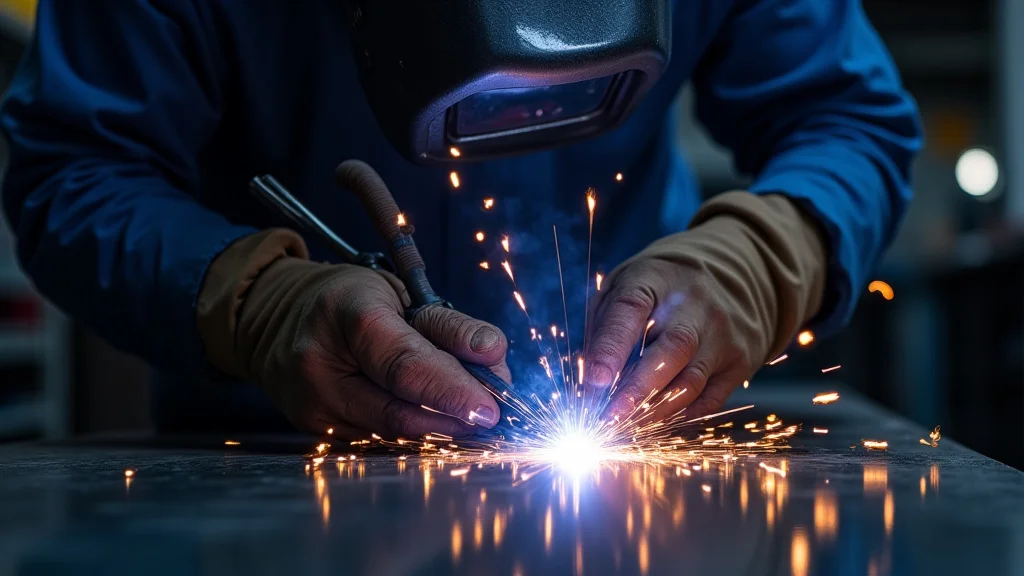
1. Ground Clamp: Ensure the ground clamp is tightly attached to a clean spot on your workpiece. A poor ground connection can lead to erratic welding and trigger safety modes.
2. Electrode Holder/Torch: Check that the cable for your electrode holder (stick welding) or MIG gun (MIG welding) is securely plugged into the welder.
3. Other Cables: Inspect any other cables for damage and ensure they are firmly connected.
Make sure all connections are clean and free of corrosion.
Step 5: Check Machine Settings
Incorrect settings can sometimes trick the safety system.
1. Refer to Manual: Consult your welding machine’s manual for recommended settings for the material and thickness you are working with.
2. Amperage/Voltage: Ensure that the amperage and voltage settings are within the appropriate range. Setting them too high for the task can cause the machine to overheat or overload quickly.
3. Mode Selection: Verify that you have selected the correct welding mode (e.g., DC-, DC+, AC, MIG, TIG, Stick).
Sometimes, a simple reset of settings can clear a temporary glitch.
Step 6: Perform a Reset (If Applicable)
Some welding machines have a specific reset procedure.
1. Consult Manual: Your owner’s manual is the best resource for this. It will tell you if your machine has a reset button or a specific sequence to follow.
2. Try a Full Power Cycle: Even if there isn’t a specific reset button, turning the machine off, unplugging it, and waiting a few minutes before plugging it back in and turning it on can sometimes clear minor electronic faults.
This is like restarting a computer to fix a temporary software issue.
Step 7: Inspect for Physical Damage
Look for any obvious signs of damage.
1. Casing: Check the external casing for cracks or signs of impact.
2. Cables: Inspect all cables for cuts, fraying, or exposed wires. Damaged cables can be dangerous and cause malfunctions.
3. Connectors: Look at the connectors for any bent pins or signs of melting.
Any visible damage should be addressed, potentially by replacing the affected part.
Step 8: Test Again
After performing these checks, it’s time to test.
1. Power On: Turn on the welding machine.
2. Observe Lights: See if the safety light or message is still present.
3. Test Weld: If the safety warning is gone, try a short test weld on a scrap piece of metal. Monitor the machine for any recurring issues.
If the problem persists, it might be time to look for professional assistance.
Common Causes and Solutions in Detail
Let’s break down some of the most frequent culprits behind your welding machine entering safety mode. Knowing these can save you a lot of time and frustration.
Overheating and Cooling Systems
Welding creates heat, and without proper cooling, components can fail.
* The Problem: The internal fan might be too slow, blocked, or broken. Dust buildup inside the machine acts like an insulator, trapping heat. Running the welder at maximum output for extended periods without breaks is a sure way to trigger overheating.
* The Solution:
* Clean Regularly: Make cleaning the vents and internal fans a routine part of your maintenance.
* Breaks are Key: For heavy-duty jobs, give your welder a break every 10-15 minutes. Let it cool down before continuing.
* Environment Matters: Avoid using your welder in extremely hot or enclosed spaces where air circulation is poor.
* Fan Check: Listen to the fan. If you don’t hear it running, or if it sounds weak, it might be failing.
Power Supply Fluctuations
Your welder is sensitive to the electricity it receives.
* The Problem: Using undersized extension cords, faulty wiring in your shop, or a power grid that’s not stable can cause voltage drops. This can make the welder think it’s not getting enough power, triggering a safety shutdown.
* The Solution:
* Use Correct Cords: Always use the gauge (thickness) of extension cord recommended by the welder manufacturer. Thicker cords mean less resistance and less voltage drop.
* Direct Connection: If possible, plug your welder directly into a wall outlet that is on its own circuit, especially for high-amperage machines.
* Avoid Sharing Circuits: Don’t run your welder on the same circuit as other high-draw appliances like air compressors or grinders.
Internal Faults and Sensor Issues
These are a bit trickier.
* The Problem: A sensor might be faulty, sending incorrect data. For example, a temperature sensor might falsely report high heat. Or, a circuit board could have a component failure.
* The Solution:
* Sensor Check: If your manual mentions specific sensors you can access, check them for dirt or damage.
* Professional Diagnosis: For anything beyond a visual inspection, it’s best to have a service technician examine the machine. They have specialized tools to test individual components.
Loose Connections and Grounding Problems
A good connection is vital for proper welding.
* The Problem: A loose ground clamp means the electrical circuit isn’t complete, leading to unstable welding and potential overloads. Dirty or corroded connections add resistance, which can also cause issues.
* The Solution:
* Cleanliness is Crucial: Always scrape your workpiece and the ground clamp contact point to ensure a clean, metal-to-metal connection.
* Tighten Everything: Make sure all your welding cables and connectors are securely fastened. Wiggle them to ensure they are not loose.
Electromagnetic Interference (EMI)
Sometimes, other electrical devices can cause problems.
* The Problem: Strong electromagnetic fields from other machinery nearby can sometimes interfere with the sensitive electronics inside your welder, leading to unexpected behavior, including safety shutdowns.
* The Solution:
* Relocate: Try moving your welding setup to a different area, away from other large electrical equipment.
* Shielding: Ensure your welding cables are not running directly alongside other power cables if possible.
FAQ
Question: My welding machine keeps shutting off after only a few minutes of use. What could be wrong?
Answer: This is a classic sign of overheating. Make sure your machine has enough time to cool down between uses. Also, check that the air vents are clean and not blocked so that air can flow through freely.
Question: The safety light is on, but the machine doesn’t feel hot. What else should I check?
Answer: It could be a problem with the power supply. Ensure you are using the correct voltage and that your extension cord is heavy-duty enough for the amperage your welder needs. A weak or unstable power source can trigger the safety mode.
Question: Can I just ignore the safety mode and keep welding?
Answer: No, you should never ignore the safety mode. It is there to protect the machine from damage and to ensure your safety. Continuing to weld can cause permanent damage to the welder or create a safety hazard.
Question: My welding machine is brand new, and it’s already in safety mode. What now?
Answer: Even new machines can have issues. First, go through the basic troubleshooting steps like checking power and airflow. If the problem persists, contact the manufacturer or the place where you bought it.
It might be a factory defect, and you may be eligible for a replacement or repair under warranty.
Question: Is there a way to reset the safety mode without turning the welder off?
Answer: For most welding machines, the primary way to clear a safety mode is to power cycle the machine (turn it off, unplug it, wait a bit, then plug it back in and turn it on). Some models might have a dedicated reset button, but this is less common. Always refer to your owner’s manual for specific instructions.
Final Thoughts
If your welding machine is stuck in safety mode, remember it’s usually a sign that something needs attention, not that your equipment is ruined. Overheating, power issues, or loose connections are the most likely culprits. By following simple checks like ensuring good airflow, using the right power setup, and keeping connections clean, you can often resolve the issue yourself.
Don’t hesitate to consult your manual or seek professional help if the problem persists. Getting your welder back online means you can finish your projects with confidence and get back to what you love doing.