If you’re new to TIG welding, you might find the TIG Welder Welding Rod Not Feeding? Fix Fast issue a bit tricky. It’s not as simple as with some other welding types.
But don’t worry! We’ll walk through how to fix it easily. Get ready for a simple, step-by-step guide that will have you welding smoothly again in no time.
Key Takeaways
- You will learn common reasons why a TIG welding rod might not feed.
- We will cover simple checks you can do yourself to fix the issue.
- Discover how to ensure your tungsten and filler rod are correctly set up.
- Understand the role of gas flow and its impact on rod feeding.
- Learn how to troubleshoot issues with your TIG torch and equipment.
- You will gain confidence in resolving this common beginner problem quickly.
Why Your TIG Welder Might Not Be Feeding the Rod
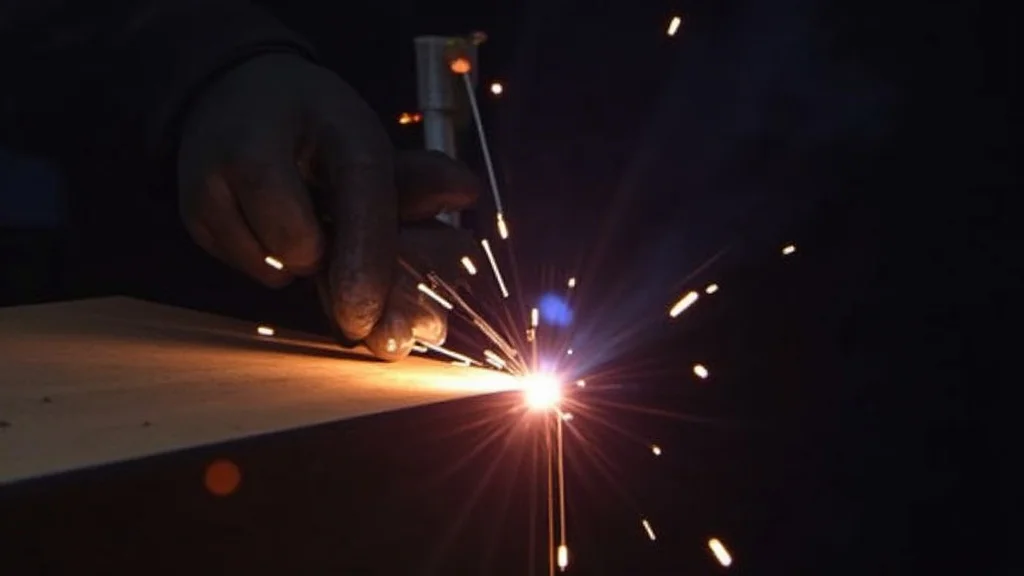
It can be frustrating when you’re trying to weld, and your TIG welding rod just won’t feed properly. This problem is common for beginners because TIG welding is a bit different. Unlike MIG welding where the wire feeds automatically, with TIG, you have to feed the filler rod by hand.
This manual aspect means there are more potential points for things to go wrong. You might be focused on controlling the arc, managing the heat, and looking at your puddle, and then realize the rod isn’t moving where you want it to. It’s easy to feel stuck when this happens, but most of the time, it’s a simple fix.
The core reason behind a TIG welder welding rod not feeding is usually a combination of setup issues, material problems, or sometimes, a small equipment glitch. It’s rarely a sign of a major, expensive problem. Instead, it points to a specific part of your welding process or setup that needs a little attention.
Think of it like learning to ride a bike; at first, you might wobble a lot, but with practice and small adjustments, you get much smoother.
This guide is here to help you understand those common issues and how to fix them quickly. We’ll go through each potential problem step by step, so you can get back to making great welds without any fuss.
Common Causes for a TIG Welder Welding Rod Not Feeding
Incorrect Tungsten Setup
Your tungsten electrode is the heart of your TIG arc. If it’s not prepared correctly, it can cause all sorts of issues, including problems with feeding the filler rod. The tungsten needs to be ground to a sharp, clean point.
A blunt or dirty tungsten can create an unstable arc. This instability can make it harder for you to control the heat and, in turn, harder to feed the filler rod smoothly into the puddle.
When you grind your tungsten, make sure you’re doing it on a dedicated grinder, not one you use for other metals. This keeps your tungsten clean and prevents contamination. The shape of the point also matters.
For most DC TIG welding, a long, tapered point is ideal. For AC welding on aluminum, a slightly rounded tip is often preferred. An improperly shaped tungsten can also cause the arc to wander, making it difficult to focus on feeding the rod.
Check your tungsten regularly. If it looks like it’s balled up, dirty, or has a dull tip, it’s time to regrind it or replace it. A clean, sharp tungsten is fundamental to a stable arc and good control over your filler rod.
Filler Rod Contamination or Damage
The filler rod itself can be the source of the problem. If your filler rod is contaminated, it won’t melt cleanly into the weld puddle. Contaminants like oil, dirt, or even rust on the rod can cause spitting, porosity, and an erratic arc.
This erratic behavior makes it very difficult to feed the rod consistently. You might try to feed it, but it just won’t melt and join the puddle smoothly.
Make sure you’re storing your filler rods properly. Keep them in their original packaging or a clean, dry container. Avoid touching the rod with bare hands, especially the part you’ll be feeding into the weld.
Use clean gloves or pliers to handle them. If you notice any rust, grease, or other grime on a rod, it’s best to discard it or clean it thoroughly. Sometimes, a rod might get bent during storage or transport.
A bent rod is harder to control and feed precisely.
When you’re welding, try to keep the end of the filler rod from dipping into any dirt or debris on your workpiece. A small piece of grit can transfer to the rod and cause issues. If you’re welding steel, ensure the rod is the correct type for the base metal.
Using the wrong filler rod can lead to poor weld quality and feeding problems.
Incorrect Gas Flow
Shielding gas is crucial in TIG welding. It protects the molten weld puddle and the hot tungsten from atmospheric contamination. If your gas flow rate is too low, you won’t get adequate shielding.
This can lead to an unstable arc and issues with filler metal melting. The weld puddle might start to oxidize, making it difficult to push the filler rod into it.
On the other hand, too much gas flow can also cause problems. A very strong gas stream can actually disturb the weld puddle and the arc. This turbulence can make it hard to control the filler rod.
It can also cause the gas to blow away the filler rod itself before it reaches the puddle. You’ll usually see a strong indication of this if the gas is visibly buffeting the rod.
The ideal gas flow rate depends on several factors, including the type of gas you’re using (usually Argon for steel and stainless steel, a mix for aluminum), the size of your nozzle, and ambient conditions. A good starting point for most DC welding is around 10-15 cubic feet per hour (CFH) for steel. Always check your flowmeter or regulator to ensure it’s set correctly.
You can also feel the gas flow gently with your hand to check if it feels too strong or too weak.
Torch Angle and Distance
The angle at which you hold your TIG torch and the distance between the tungsten and the workpiece are vital for a stable arc and good control. If your torch angle is too steep, it can disrupt the gas flow and make it hard to see your puddle. If the tungsten is too far from the metal, the arc can become unstable and spread out, making it difficult to concentrate the heat needed to melt the filler rod.
When feeding filler rod, you generally want to maintain a consistent torch angle, often around 10-15 degrees from the vertical. The distance between the tungsten tip and the workpiece should be just enough to create a steady arc, usually about the diameter of the tungsten itself. As you feed the filler rod, you’ll want to dip the end into the leading edge of the molten puddle.
If your torch angle or distance is off, you’ll struggle to position the rod correctly.
Practice holding your torch steady and maintaining consistent distances. This takes practice, but it’s key to effective filler rod manipulation. Experiment with different angles and distances to see what works best for you and the specific weld you’re making.
Incorrect Amperage Setting
The amperage setting on your TIG welder controls the heat input. If your amperage is too low, you won’t generate enough heat to create a fluid weld puddle. This means the filler rod won’t melt and fuse properly.
It will just sit on the surface or barely melt, leading to a weak, incomplete weld and feeding issues. You might feel like you’re trying to push something into a solid surface.
Conversely, if your amperage is too high, you’ll create a very large, fluid puddle very quickly. This can be hard to control, and you might end up burning through your workpiece. While this might not directly stop the rod from feeding, the instability of a huge puddle can make it very difficult to feed the rod precisely where you want it.
It can also cause the filler rod to melt too quickly and dissipate before it can join the puddle effectively.
Finding the right amperage is crucial. It usually involves consulting welding charts for your specific metal thickness and type, and then making fine adjustments based on your experience. For thinner materials, you’ll need lower amperage, and for thicker materials, you’ll need higher amperage.
A good rule of thumb for mild steel is about 1 amp per thousandth of an inch of thickness.
Issue with the TIG Torch or Consumables
Sometimes, the problem isn’t with your technique but with the equipment itself. The collet holding your tungsten might be loose, preventing a stable connection and arc. The gas nozzle might be cracked or have a buildup of spatter, restricting gas flow.
Even the ceramic cup might be the wrong size for the job, affecting gas coverage.
Check all your torch consumables. Make sure the collet is the correct size for your tungsten and is tightened properly. Inspect the gas lens and nozzle for any damage or blockages.
If you’re using a gas lens, ensure it’s installed correctly. A clogged or damaged nozzle can significantly impact gas flow, leading to poor shielding and arc instability, which directly affects your ability to feed the rod.
Another common issue is a worn-out collet body or gas diffuser. These parts direct the gas flow and can become damaged over time. If you suspect an issue with your torch, it’s often best to disassemble it and clean all the parts.
Replace any worn or damaged consumables. Ensuring your torch is in good working order is a fundamental step in solving feeding problems.
Welding Machine Malfunction (Rare)
While less common, there’s a slim chance that a problem with the welding machine itself could be causing issues. This could manifest as an unstable arc that doesn’t behave as expected, or inconsistent power output. However, before you jump to this conclusion, always exhaust all the simpler, more common troubleshooting steps first.
If you’ve checked your tungsten, filler rod, gas, torch consumables, and technique, and you’re still experiencing problems, you might want to consider if your machine is functioning correctly. Look for any error codes on the display, or listen for unusual noises. If you have access to another TIG welder, try using that with the same materials and consumables to see if the problem persists.
If it doesn’t, then the issue likely lies with your original machine.
Troubleshooting Steps: Fixing the TIG Welder Welding Rod Not Feeding? Fix Fast
Step 1: Inspect Your Tungsten
Start by examining the tip of your tungsten electrode. Is it sharp and clean? If it’s balled up, dull, or has a dark, burnt appearance, it needs to be reground.
Use a dedicated grinder for tungsten and grind it to a long, tapered point for DC welding. Make sure you don’t touch the ground tungsten with your fingers. A clean tungsten electrode is key to a stable arc, which in turn makes feeding the filler rod much easier.
Step 2: Check Your Filler Rod
Look at your filler rod. Is it clean and free from rust, oil, or dirt? If it looks dirty, try cleaning it with a clean cloth and some alcohol.
If it’s significantly corroded or bent, it’s best to use a new rod. Ensure you’re handling the rod with clean gloves or pliers to avoid transferring oils from your skin.
Step 3: Verify Gas Flow
Turn on your shielding gas supply. If you have a flowmeter, check the reading. A typical range for Argon is 10-15 CFH.
If you don’t have a flowmeter, you can feel the gas flow gently from the torch. It should be a steady stream, not too strong that it blows things around, and not too weak to provide adequate coverage. Adjust your regulator or flowmeter as needed.
Step 4: Examine Torch Consumables
Disassemble your TIG torch. Check the collet and collet body to ensure they are the correct size for your tungsten and are not damaged. Inspect the ceramic cup and gas diffuser for any cracks or blockages.
Clean any spatter or debris from these parts. Make sure the cup is seated properly.
Step 5: Review Amperage Setting
Consider the thickness and type of metal you are welding. Is your amperage setting appropriate? For thin steel, you’ll need less amperage; for thicker steel, more.
Consult a welding chart if you’re unsure. A common mistake is having the amperage too low, which prevents a fluid puddle and makes it hard for the rod to melt in.
Step 6: Adjust Torch Angle and Distance
When welding, hold your torch at a slight angle (around 10-15 degrees) from the vertical. Keep the tungsten electrode a short distance from the workpiece, usually about the diameter of the tungsten itself. Focus on creating a consistent arc and a manageable puddle.
As you feed the rod, aim to dip the very end into the leading edge of the molten puddle.
Step 7: Practice Feeding
With everything set correctly, practice feeding the filler rod. Hold the rod at a comfortable angle and try to dip just the tip into the puddle. You don’t need to feed a lot of rod at once.
Small, consistent dips are usually best. Focus on the puddle and the filler rod, coordinating your hand movements. This part takes practice, so don’t get discouraged if it’s not perfect right away.
FAQ
Question: Why is my TIG filler rod not melting into the puddle?
Answer: This usually means your amperage is too low, or your puddle is not hot enough. Ensure your tungsten is clean and the correct amperage is set for your material thickness. Also, make sure you are dipping the rod into the molten puddle, not just near it.
Question: Can a dirty filler rod cause feeding issues?
Answer: Yes, a dirty filler rod can cause contamination and an unstable arc, making it difficult to melt and feed smoothly. Always use clean filler rods and handle them with gloves or pliers.
Question: What should I do if my TIG arc is unstable?
Answer: An unstable arc can be caused by a dirty or improperly ground tungsten, incorrect gas flow, or too high or too low amperage. Inspect your tungsten, check your gas settings, and verify your amperage.
Question: Is it normal for the filler rod to stick to the tungsten?
Answer: No, the filler rod should not stick to the tungsten. This typically happens if the rod is too close to the arc, or if the amperage is too low, causing the rod to cool down and stick. Maintain the correct distance and amperage.
Question: How do I know if I’m using the right type of filler rod?
Answer: You should use a filler rod that is compatible with your base metal. For example, use ER70S-2 or ER70S-6 for mild steel. Consult a welding supply store or chart if you are unsure about the correct filler rod for your specific application.
Final Thoughts
When you encounter a TIG Welder Welding Rod Not Feeding? Fix Fast situation, remember it’s usually a simple fix. You’ve learned to check your tungsten’s preparation, ensure your filler rod is clean, and verify your gas flow.
We’ve also covered inspecting your torch parts and setting the right amperage. Mastering these steps gives you control. You can now tackle this common problem confidently and get back to creating strong, quality welds.