It can be frustrating when your TIG welder won’t strike an arc. You’re ready to start a project, but nothing happens! This problem is quite common, especially for those just getting started with TIG welding.
Don’t worry, though. Most of the time, the issue is simple to fix. We’ll walk you through easy steps to get your welder working again so you can get back to creating.
Let’s explore the common reasons why your TIG welder might not be striking an arc and how to solve them.
Key Takeaways
- You’ll learn the most common reasons a TIG welder fails to strike an arc.
- Discover how to check your power source and connections.
- Understand the importance of your tungsten electrode and gas flow.
- Find out how to troubleshoot faulty shielding gas.
- Learn how to check your TIG torch and consumables.
- We’ll cover simple checks for your TIG welder machine itself.
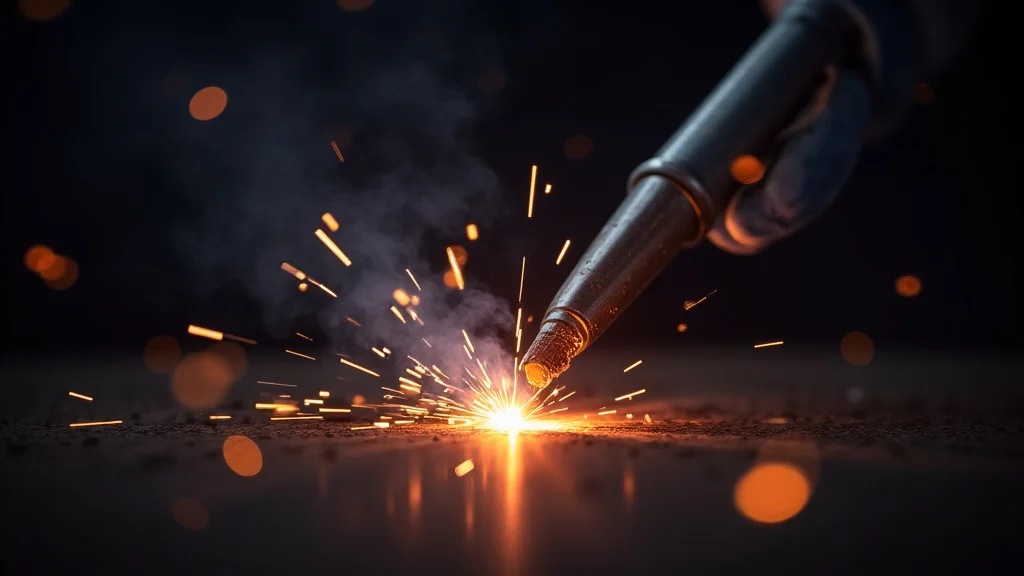
Why Isn’t My TIG Welder Striking an Arc?
It’s a moment that can stop a project cold: you squeeze the trigger on your TIG welder, and. nothing. No flash, no sizzle, just silence.
This “TIG Welder No Arc? Simple Fixes That Work” situation is a common hurdle for beginners and even experienced welders sometimes. But before you panic or call for expensive repairs, know that most no-arc issues have straightforward solutions.
Often, it’s a simple oversight or a component that needs a quick adjustment.
This guide will break down the most likely culprits behind a TIG welder that refuses to spark. We’ll go through them one by one, starting with the most basic checks. By the end, you’ll have a clear path to diagnosing and fixing the problem yourself, getting you back to welding in no time.
Checking Your Power Source and Connections
The first place to look when your TIG welder won’t strike an arc is the power source. It sounds obvious, but sometimes the simplest things are overlooked.
Is it Plugged In?
This might seem silly, but double-check that the welder is firmly plugged into a working outlet. Make sure the plug is all the way in.
Breaker Tripped?
Your welding machine needs a good amount of power. If the circuit breaker for the outlet has tripped, the welder won’t get power. Look for a tripped breaker in your electrical panel and reset it.
Correct Voltage?
Some TIG welders can run on different voltages (like 120V or 240V). Make sure your welder is set to the correct voltage for the outlet you’re using. Check the machine’s label or manual for this setting.
Extension Cords
If you’re using an extension cord, it needs to be heavy-duty. A cord that’s too thin or too long can cause power loss, preventing the arc from starting. Ideally, avoid extension cords if possible, or use one specifically rated for welders.
Loose Connections
Check all the cables connecting to your welder. Ensure the ground clamp, the torch lead, and the power cord are all securely attached. Loose connections can stop the flow of electricity.
The Importance of Your Tungsten Electrode
Your tungsten electrode is key to striking and maintaining an arc. If it’s not in good condition, you’ll have trouble starting. This is a frequent reason for a “TIG Welder No Arc?
Simple Fixes That Work” situation.
Is the Tungsten Grounded Properly?
For DC TIG welding, your tungsten electrode needs to be ground to a sharp point. This concentrated point helps initiate the arc. A dull or rounded tip won’t let the arc jump easily.
For AC TIG welding on aluminum, the tip can be more rounded or ball-shaped, but it still needs to be clean and free of contamination.
Is the Tungsten Clean?
Contamination is a major arc killer. If your tungsten tip has touched the weld puddle, the filler metal, or the base metal, it can become coated. This coating prevents a stable arc.
You’ll need to grind a new, clean tip.
Is the Tungsten the Right Type?
Different types of tungsten electrodes are used for different metals and welding processes. For example, pure tungsten is mostly used for AC welding of aluminum, while thoriated or ceriated tungsten is common for DC welding of steel. Using the wrong type can affect arc starting and stability.
Is the Tungsten Securely Clamped?
Make sure your tungsten electrode is properly inserted and secured in the collet inside your TIG torch. If it’s loose, it can’t transfer electricity effectively.
Troubleshooting Shielding Gas Issues
Shielding gas is vital for TIG welding. It protects the molten weld puddle from the air. If the gas isn’t flowing correctly, it can prevent arc initiation or cause a very unstable arc.
Is the Gas Cylinder Open?
Check the valve on your shielding gas cylinder. Make sure it’s fully open. It’s easy to forget this simple step.
Is the Regulator Set Correctly?
Your gas regulator controls the flow rate. Ensure the regulator is set to the recommended flow rate for your specific application. This is usually listed in your welding machine’s manual or on the gas supplier’s documentation.
A typical flow rate might be around 15-25 cubic feet per hour (CFH).
Is There Gas Left in the Cylinder?
Gas cylinders have a pressure gauge. If the pressure is very low, you might have run out of gas. Even if there’s a little pressure left, it might not be enough to sustain an arc.
Check for Leaks
You can check for gas leaks in your setup. With the cylinder valve open and the regulator set, listen for hissing sounds at the connections. You can also use soapy water on the fittings; bubbles indicate a leak.
Flow Through the Torch
With the gas cylinder open and the regulator set, turn on the gas flow at the torch handle (if your torch has a valve). You should feel or hear gas escaping. If not, there might be a blockage somewhere in the hose or torch assembly.
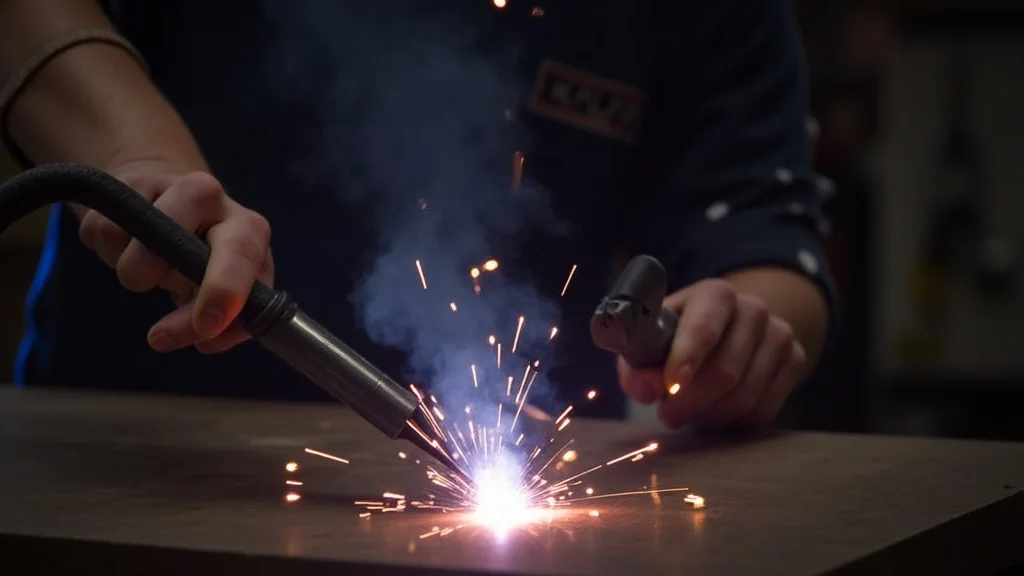
Examining Your TIG Torch and Consumables
Your TIG torch is the tool that delivers the electricity and gas. If any part of it is worn out or damaged, it can prevent you from striking an arc.
Torch Body and Cable
Inspect the torch body and cable for any visible damage, such as cuts, burns, or cracks. Damage to the cable can disrupt the electrical connection.
Gas Nozzle (Cup)
The gas nozzle, or cup, directs the shielding gas. Make sure it’s not cracked or chipped. A damaged cup can lead to poor gas coverage, affecting arc stability.
Collet and Collet Body
These parts hold the tungsten electrode in place. If they are worn or damaged, the tungsten might not be held securely, leading to poor electrical contact. Ensure they are the correct size for your tungsten diameter.
Ceramic or Alumina Nozzle
This is the part the gas flows through before exiting. If it’s cracked or broken, gas flow will be disrupted.
Work Lead Connection
Ensure the work lead from your TIG welder is securely connected to the workpiece. A poor connection here will prevent the circuit from being completed, and you won’t get an arc.
Simple Checks for the TIG Welder Machine Itself
If you’ve checked the power, tungsten, gas, and torch, it’s time to look at the welder unit itself. Sometimes, the issue is internal or related to machine settings.
Power Switch
Confirm the main power switch on the TIG welder is in the ‘ON’ position.
Amperage Setting
While not directly preventing arc start, an extremely low amperage setting might make it harder to initiate a strong arc, especially on thicker materials. Ensure your amperage is set appropriately for the task.
Torch Switch/Trigger
The trigger on your TIG torch is what tells the machine to start the arc (and often, to start the gas flow). Make sure the trigger mechanism is not stuck or damaged. Test the trigger functionality.
High-Frequency (HF) Start
Most TIG welders use high-frequency (HF) to start the arc, especially for non-contact starts.
Check if HF Start is enabled: Some machines have a setting to turn HF start on or off. Make sure it’s set to ‘ON’ if you’re trying to start the arc this way.
HF Intensity: If your machine allows, try adjusting the HF intensity. If it’s too low, it might not be strong enough to jump the gap. If it’s too high, it could be causing other issues, but usually, it helps arc start.
HF Contact Setting: Some welders have a setting for contact start (lift-arc). If you’re trying to use HF and it’s set to contact start, it won’t work. Ensure the setting matches your intended starting method.
Lift-Arc (Contact Start)
If your welder uses lift-arc instead of HF for starting, you need to make contact with the workpiece and then lift the electrode slightly to break the arc. Ensure you are performing this action correctly.
Machine Fault Indicators
Some modern TIG welders have indicator lights or digital displays that show error codes or fault conditions. Consult your machine’s manual to understand any displayed messages.
When to Seek Professional Help
If you’ve gone through all these steps and your TIG welder still won’t strike an arc, it’s possible there’s a more serious internal problem. This could involve the internal circuitry, power supply, or control board of the machine.
In such cases, it’s best to stop troubleshooting yourself. Contact the manufacturer of your TIG welder or a qualified welding equipment repair technician. They have the tools and expertise to diagnose and fix more complex issues safely.
Frequently Asked Questions
Question: Why does my TIG welder sometimes start and sometimes not?
Answer: Intermittent arc starting often points to a loose connection somewhere in the system, a worn tungsten electrode that’s become contaminated, or an issue with the shielding gas flow that’s inconsistent.
Question: Can a bad ground clamp stop my TIG welder from arcing?
Answer: Yes, absolutely. The ground clamp must make a solid, clean connection to the workpiece and the welder’s ground terminal. A poor ground connection breaks the electrical circuit needed to create an arc.
Question: What happens if I use the wrong type of tungsten?
Answer: Using the wrong tungsten can make arc starting difficult, cause the tungsten to melt or contaminate too quickly, and lead to an unstable arc. Always match the tungsten type to your material and welding process.
Question: My TIG torch feels hot quickly, and then the arc won’t start. What’s wrong?
Answer: This could indicate a problem with the torch’s cooling system (if it’s a water-cooled torch) or insufficient shielding gas flow. Overheating can cause components to expand and disrupt electrical or gas pathways, preventing a good arc.
Question: Is it safe to keep trying to strike an arc if it’s not working?
Answer: While generally safe for simple issues, repeatedly trying to strike an arc without success can potentially overheat components in the welder or torch. If you’re not seeing an arc after a few tries, it’s better to stop and check your setup.
Final Thoughts
When your TIG welder acts up and won’t strike an arc, remember that simple fixes are often the solution. Check your power, ensure your tungsten is sharp and clean, and verify your shielding gas is flowing correctly. Inspect your torch and all connections.
Most “TIG Welder No Arc? Simple Fixes That Work” issues stem from these basic checks. Don’t be afraid to go through each step methodically.
You’ll likely find the small problem that’s stopping your arc.