Getting your MIG welder just right can feel a bit tricky when you’re starting out. Lots of folks run into issues with MIG Welder Voltage Problems and Their Solutions because it affects how your weld looks and how strong it is. Don’t worry, though!
We’ll walk through this step by step. We’ll show you how to fix common voltage snags so you can get back to welding with confidence. Let’s look at what’s going wrong and how easy it is to make it right.
Key Takeaways
- You will learn why voltage is so important for MIG welding.
- We will explain the common signs of incorrect MIG welder voltage.
- You will discover simple fixes for voltage issues that create bad welds.
- We will cover how voltage affects bead appearance and penetration.
- You will understand how to fine-tune your voltage for different materials.
Understanding MIG Welder Voltage
Voltage is like the push that makes electricity flow in your MIG welder. It’s super important because it controls how hot your welding arc gets. A hotter arc melts the metal more.
If the voltage is too low, your weld won’t melt enough into the metal. If it’s too high, you can burn through the metal, especially if it’s thin.
Think of it like setting the temperature on a stove. Too low, and you won’t cook your food properly. Too high, and you’ll burn it.
For MIG welding, finding that sweet spot for voltage is key to making a strong, clean weld.
Common MIG Welder Voltage Problems
When voltage is off, your welds won’t look good, and they might not be strong enough. Here are some signs you might be having voltage issues.
Problem 1: The Weld Looks Like a String of Beads (Low Voltage)
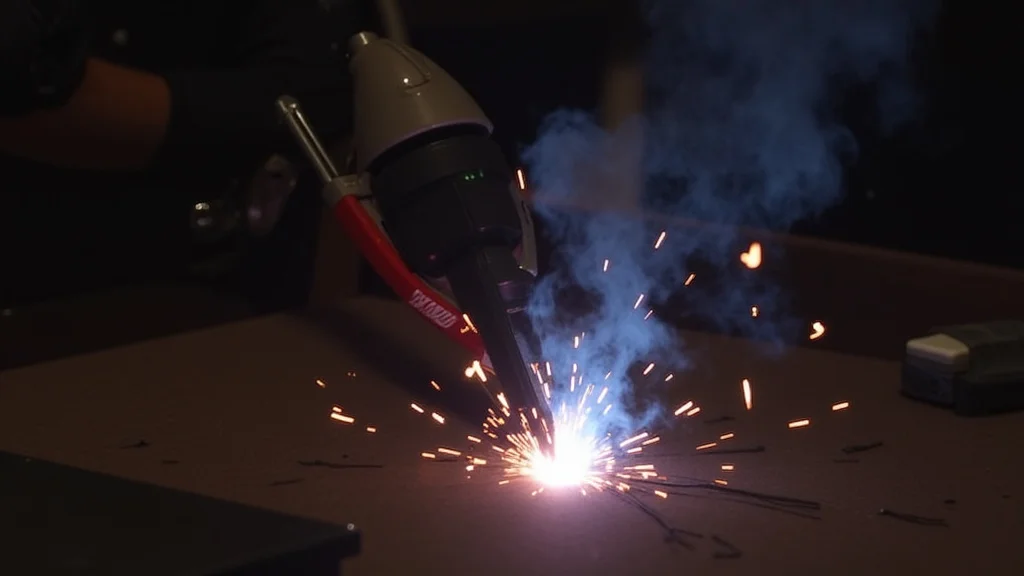
If your MIG weld looks like a bumpy string of disconnected beads, the voltage is likely too low. The arc isn’t hot enough to make the weld puddle flow nicely and fuse together smoothly. It looks lumpy and uneven.
This means the weld won’t be very strong because the metal isn’t melting together properly. It’s like trying to glue things with not enough glue. The pieces might stick a little, but they won’t hold well.
Problem 2: The Weld is Too Wide and Flat (High Voltage)
On the flip side, if your weld is super wide, flat, and looks almost like a splash, your voltage is probably too high. The arc is too hot, making the weld puddle spread out too much. It might not sink deep into the metal, and the edges can look washed out or uneven.
This can lead to a weak weld because it doesn’t penetrate enough. The excess heat can also burn away some of the metal, making it thinner and weaker in that spot.
Problem 3: Too Much Spatter (Often High Voltage or Incorrect Settings)
Little bits of melted metal flying off your weld, called spatter, can be a sign of many things, but often it’s linked to voltage being too high. When the arc is too intense, it can blast molten metal out of the weld puddle.
Too much spatter means you have more cleanup work to do. It can also mean your weld isn’t as smooth or consistent as it should be, affecting its strength.
Problem 4: Arc Instability or Wandering (Voltage Too High or Low)
A stable welding arc is smooth and consistent. If your arc seems jumpy, unstable, or wanders around uncontrollably, voltage is a likely culprit. It can be either too high or too low.
An unstable arc makes it very hard to control the weld puddle. You can’t lay down a nice, even bead, and it’s difficult to get good penetration. This leads to a weak and messy weld.
Problem 5: Burn-Through on Thin Metal (High Voltage)
If you’re welding thin metal and suddenly you see a hole appear, or the metal gets very thin and you’re about to burn through, your voltage is almost certainly too high. The intense arc melts through the thin material much too easily.
This is a common and frustrating problem when working with sheet metal. Getting the voltage right is critical to avoid damaging your workpiece.
Solutions for MIG Welder Voltage Problems
The good news is that fixing voltage issues is usually straightforward. It often involves making small adjustments to your welder’s settings.
Solution 1: Adjusting Voltage for the Right Bead Appearance
To fix the “string of beads” look (low voltage), you need to increase the voltage. Make small jumps in voltage setting. Watch how the weld puddle flows.
You want it to spread out a bit, not just sit there like a blob.
For welds that are too wide and flat (high voltage), you need to decrease the voltage. Again, make small changes. You’re looking for a good, even bead that melts into the base metal nicely without spreading too thin.
Solution 2: Matching Voltage to Wire Speed
Voltage and wire speed work together. Wire speed controls how much welding wire is fed into the weld. Generally, as you increase wire speed, you also need to increase voltage to match the faster wire feed.
If your wire speed is set too high for the current voltage, you might get a weak, spattery weld. If it’s too low, you might get a weak weld that’s too tall and thin. Most MIG welders have a recommended chart for voltage and wire speed based on the type and thickness of metal you’re welding.
Solution 3: Using a Voltage Chart or Calculator
Many MIG welders come with a chart inside the machine’s cover or in the manual. This chart gives you a good starting point for voltage and wire speed based on the metal thickness and wire diameter. Always check this chart first.
There are also online MIG welding calculators that can help you find good starting settings. These tools are very helpful for beginners and experienced welders alike.
Solution 4: Testing on Scrap Metal
The best way to dial in your voltage is to practice on scrap pieces of the same metal you’ll be welding. Make a test weld, look at the results, and then make small adjustments to the voltage. Keep a log of your settings so you can remember what worked.
For example, if you’re welding 1/8 inch steel, try the recommended settings from your chart. If the bead is too tight, increase voltage slightly. If it’s too wide, decrease it slightly.
Do this until you get a smooth, consistent bead with good penetration.
Solution 5: Understanding Material Thickness
Voltage needs change with the thickness of the metal. Thicker metals need higher voltage to get enough heat for good penetration. Thinner metals require lower voltage to avoid burning through.
For very thin metals (like 20-gauge steel), you’ll need very low voltage and wire speed. For thicker metals (like 1/4 inch steel), you’ll need higher voltage and wire speed. Always refer to your welder’s chart or a reliable guide for specific thickness recommendations.
Solution 6: Checking Your Equipment
Sometimes, voltage problems aren’t just about settings. Make sure your MIG gun liner is clean and not kinked. A dirty or damaged liner can cause inconsistent wire feeding, which affects the arc.
Also, check your welding ground clamp. A poor ground connection can cause all sorts of welding issues, including arc instability. Ensure the clamp is making good, clean contact with the metal.
Troubleshooting Table
Here’s a quick guide to common voltage issues and their fixes:
| Problem | Likely Cause | Solution |
|---|---|---|
| Weld looks like unconnected beads (lumpy) | Voltage too low | Increase voltage slightly. |
| Weld is too wide and flat | Voltage too high | Decrease voltage slightly. |
| Excessive spatter | Voltage too high or wire speed incorrect | Lower voltage or adjust wire speed; check for correct pairing. |
| Arc is unstable/wanders | Voltage too high or too low, or poor ground | Adjust voltage, check ground connection. |
| Burn-through on thin metal | Voltage too high | Significantly decrease voltage. |
Frequently Asked Questions
Question: What is the ideal voltage for MIG welding?
Answer: There’s no single ideal voltage for all MIG welding. It depends on the type of metal, its thickness, the wire you’re using, and the welding position. You need to adjust it to get the right weld bead appearance and penetration for your specific job.
Question: How do I know if my voltage is too low?
Answer: If your weld looks like a series of small, unconnected beads, or if it doesn’t seem to be melting into the base metal properly, your voltage is likely too low. The arc will also seem weak and might not sound right.
Question: How do I know if my voltage is too high?
Answer: If your weld puddle spreads out too much, looks very flat, or if you’re burning through thin metal easily, your voltage is too high. You might also see a lot of spatter.
Question: Does wire speed affect voltage?
Answer: Yes, voltage and wire speed are closely related. As you increase wire speed, you generally need to increase voltage to maintain a stable arc and proper weld puddle. They should be balanced.
Question: Can I use the same voltage for steel and aluminum?
Answer: No, steel and aluminum require different voltage settings. Aluminum generally needs a bit more heat, but it’s also softer and easier to burn through, so precise voltage control is very important. Always refer to welding charts for specific material recommendations.
Final Thoughts
Getting your MIG welder’s voltage right makes a huge difference. It helps you make strong, good-looking welds every time. You learned what low voltage does, like making bumpy beads, and what high voltage does, like causing burn-through.
You also found simple ways to fix these problems by adjusting your settings and practicing on scrap metal.
Remember to use your welder’s chart and test your settings. Small changes can make a big impact on your weld quality. Keep practicing, and you’ll get the hang of it quickly.
You’ve got this!