When your stick welder decides not to light up, it can be super frustrating, especially when you’re just starting out. The question, “Stick Welder Won’t Start? Here’s What to Check,” pops up a lot because many things can go wrong, and the solutions aren’t always obvious.
Don’t worry, though! We’ll break it down into easy steps. Let’s find out why your welder is being stubborn and get it running again.
Key Takeaways
- You’ll learn about common power issues that stop a stick welder from working.
- We’ll show you how to check your electrode holder and ground clamp connections.
- You’ll discover how the right welding machine settings make a difference.
- We’ll cover electrode condition and why it matters for starting.
- You will understand how to test your welder’s internal components.
Troubleshooting Your Stick Welder’s Starting Problems
Is It Getting Power? The First Thing to Check
The most basic reason a stick welder won’t start is that it’s not getting electricity. This might sound simple, but it’s often overlooked. Think of it like a lamp that won’t turn on – if it’s not plugged in, it won’t work!
Checking the Power Cord and Outlet
First, make sure the power cord is plugged in all the way. Check for any damage to the cord itself. Look for cuts, fraying, or melted spots.
If the cord looks bad, you can’t use the welder until it’s fixed or replaced. Safety is super important here.
Next, check the wall outlet. Is it working? You can test it with another appliance, like a lamp or a drill.
If the outlet doesn’t have power, the problem is with your house wiring, not the welder. You might need an electrician to fix that.
Understanding Your Welder’s Power Requirements
Stick welders need a good amount of power. Some run on standard household outlets (110/120 volts), while others need a bigger outlet (220/240 volts), like the kind used for dryers or ovens. Make sure your welder is plugged into the correct type of outlet.
If your welder needs 240 volts and you plug it into a 120-volt outlet, it won’t have enough power to start.
Also, check your circuit breaker or fuse box. If a breaker has tripped or a fuse has blown, the welder won’t get power. Reset the breaker or replace the fuse.
If it trips again right away, there might be a bigger electrical problem.
Connections Matter: Electrode Holder and Ground Clamp
Your stick welder needs a complete electrical circuit to work. This circuit is made up of the power source, the electrode, the metal you’re welding, and a way to get the electricity back to the welder. The electrode holder and the ground clamp are key parts of this circuit.
The Electrode Holder
The electrode holder is where you grip the welding rod. Make sure the rod is held firmly in the jaws of the holder. If the rod is loose, the electrical connection won’t be good, and the arc might not start.
Check the cable that runs from the welder to the electrode holder. Is it connected securely to the holder? Is the cable itself damaged?
Look for any breaks or wear and tear. A loose or damaged cable here is a common culprit.
The Ground Clamp
The ground clamp is just as important. It connects the welder to the metal you are welding. This is how the electricity returns to the welder to complete the circuit.
Make sure the ground clamp is attached to a clean piece of metal. Rust, paint, or dirt can prevent a good connection. You might need to scrape the metal a bit to get down to bare steel.
Check the clamp itself. Are the jaws clean and making good contact? Is the cable from the welder to the clamp attached tightly?
A poor ground connection is a very common reason a stick welder won’t start an arc.
Welding Machine Settings: Are They Right?
Your stick welder has settings that control how much electricity it sends out. If these settings are wrong, it can make starting difficult or impossible.
Amperage Control
The amperage setting controls the heat of your weld. For starting an arc, you generally need a certain amount of amperage. If the amperage is set too low, you won’t have enough power to get the arc going.
If it’s too high, it can be hard to control.
Different welding rods require different amperage ranges. Check the packaging of your welding rods or look up charts online to find the recommended amperage for the type and size of rod you are using. Then, adjust your welder’s amperage dial to that range.
For beginners, a slightly higher amperage within the recommended range can sometimes make it easier to strike an arc.
Polarity Settings
Many stick welders have a polarity setting, either DC (Direct Current) or AC (Alternating Current). Some welding rods work best on DC, while others work best on AC. Using the wrong polarity for your rod can make it hard to start and can affect how the weld looks.
Always check the packaging of your welding rods. It will usually tell you the recommended polarity. For example, some common rods like 6013 work well on AC or DC+, while others like 7018 often perform best on DC+.
Make sure your welder is set to the correct polarity for the rod you have loaded.
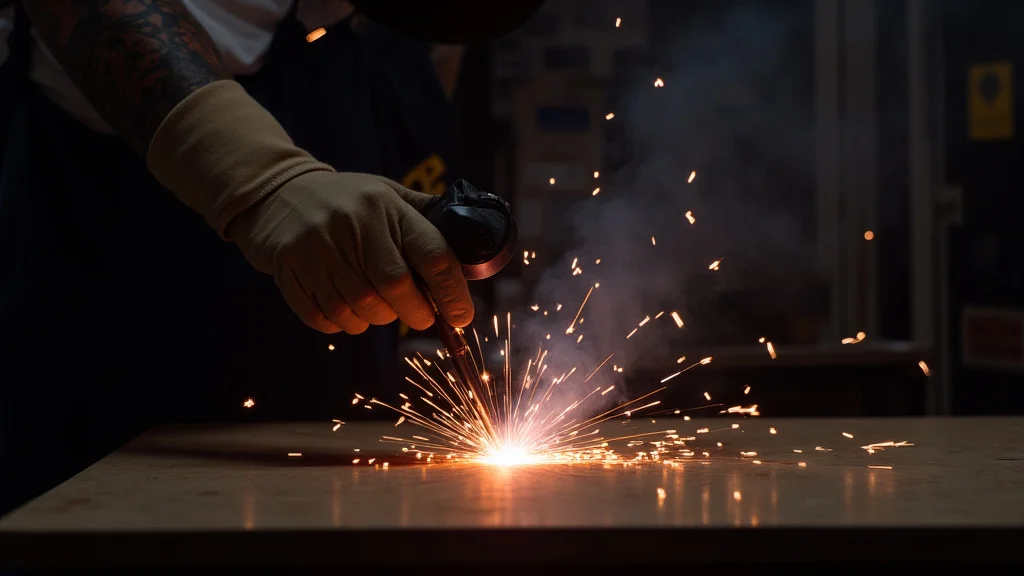
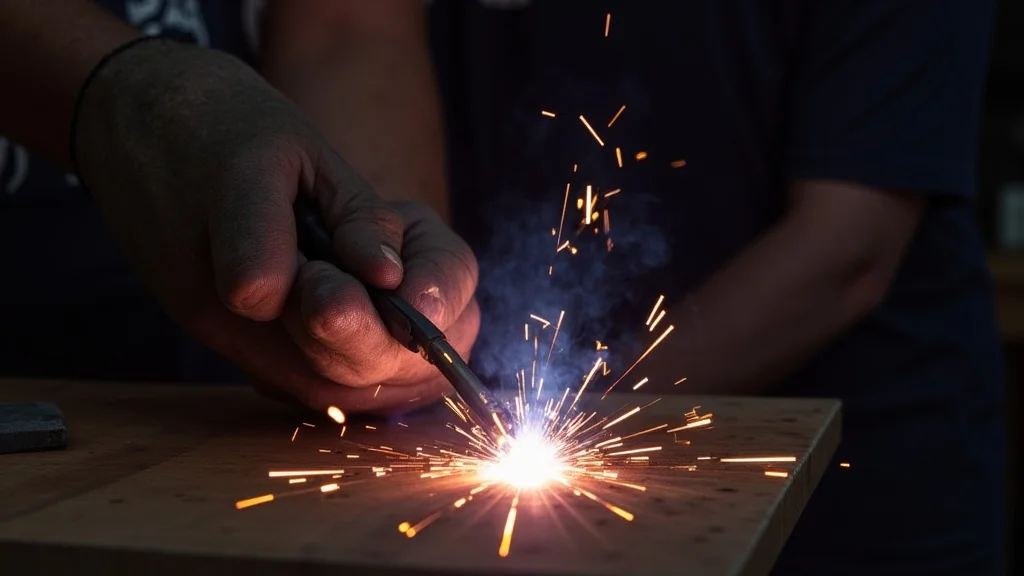
The Electrode: It’s Not Just a Stick
The welding rod, or electrode, is what melts to create the weld. If the electrode itself has issues, it can prevent you from starting an arc.
Electrode Condition
Welding rods can go bad over time. The coating on the rod is important. If the coating is damaged, chipped, or looks like it’s falling off, it can affect the arc.
Old or damaged rods might not strike an arc easily.
Moisture is a big enemy of welding rods. If rods get damp, the coating can absorb water. This makes them harder to start and can cause sputtering and a weak arc.
Many types of welding rods, especially 7018, should be stored in a dry place, often in special ovens to keep them dry. If you suspect your rods are damp, try using a new, fresh pack.
Choosing the Right Electrode
Using the right type and size of electrode for your project and welder is also important. A rod that’s too large for your welder’s capacity might not be able to be run at the correct amperage, making it hard to start. Similarly, using a rod designed for thin metal on thick metal might not be ideal for starting an arc.
For beginners, rods like 6013 are often recommended because they are forgiving and easier to strike an arc with. They work on AC or DC power and are good for general-purpose welding.
Checking Your Welder’s Internal Components (Advanced)
If you’ve checked all the external things and your welder still won’t start, there might be an issue inside the machine. This is usually for more experienced users or when you need professional help.
Internal Fuses or Circuit Breakers
Some welders have internal fuses or circuit breakers that protect the machine’s electronics. If one of these has blown or tripped, it could be stopping the welder from working. Consult your welder’s manual to see if it has these and how to check them.
Wiring and Connections Inside
Inside the welder, there are many wires and connections. Over time, these can loosen or become damaged. If you’re comfortable opening up the machine (after unplugging it!), you can visually inspect the wiring.
Look for anything that looks burnt, loose, or disconnected. However, it’s best to leave internal repairs to a qualified technician if you’re not sure.
Cooling System Issues
Most welders have a fan to keep them cool. If the fan isn’t working, the welder might have an overheat protection that prevents it from starting. Check if the fan is running when you turn the welder on.
If not, this could be the problem.
Frequently Asked Questions
Question: My stick welder is plugged in, but nothing happens when I try to strike an arc. What’s the first thing I should look at?
Answer: The very first thing to check is your power source. Make sure the outlet is working by testing it with another device. Also, check that your circuit breaker or fuse hasn’t tripped.
If those are good, then check the power cord for damage.
Question: I’m using a new pack of welding rods, but I still can’t get an arc. What could be wrong with the rods?
Answer: Even new rods can have issues if they’ve absorbed moisture. Try storing them in a dry place. Also, make sure you are using the correct polarity and amperage for the type of rod.
Some rods are just trickier to start than others.
Question: My ground clamp is attached to the metal, but it still won’t arc. What should I do?
Answer: Ensure the metal where the ground clamp is attached is clean. Rust, paint, or grease can prevent a good electrical connection. You might need to scrape the metal down to bare steel.
Also, check that the cable is securely attached to the clamp.
Question: I adjusted the amperage up, but it’s still hard to start. Could the polarity be the problem?
Answer: Yes, polarity is very important. Check the recommended polarity for the welding rod you are using. Using the wrong polarity can make it very difficult to strike and maintain an arc, regardless of the amperage setting.
Question: Is it safe to open up my stick welder to check for problems inside?
Answer: It’s generally not recommended for beginners to open up their welder. There can be stored electrical charges inside that are dangerous. If you suspect an internal issue, it’s best to consult your welder’s manual or take it to a qualified repair professional.
Final Thoughts
It’s frustrating when your stick welder won’t start, but most issues are simple fixes. You’ve learned to check your power, connections, and settings. Ensure your welding rods are in good shape too.
By following these steps, you can usually find the problem and get back to welding. Keep practicing, and you’ll become a pro at troubleshooting.